Installing a reverse camera in your car is a great way to improve safety and make manoeuvring into tight spots easier. While it's a complicated process, it can be done at home with the right tools and safety precautions. This guide will take you through the steps to successfully install a reverse camera, from choosing the right equipment to testing your new setup.
How to Replace a Car Reverse Camera
| Characteristics | Values |
|---|---|
| Safety Gear | Glasses and Gloves |
| Tools | Philips or Flathead Screwdriver, Drill with assorted bits, Posi-tap or other electrical connectors |
| Disconnect | Ground cable to the battery |
| Mounting | Dashboard, Rearview mirror, License plate bracket, Trunk handle |
| Wiring | Connect to power source, usually the wires powering rear tail lights |
| Camera Monitor | Mounted on windscreen or dash, or integrated with the rear-view mirror |
| Testing | Test camera setup while the car is stationary and parked |
What You'll Learn

Finding the right camera equipment
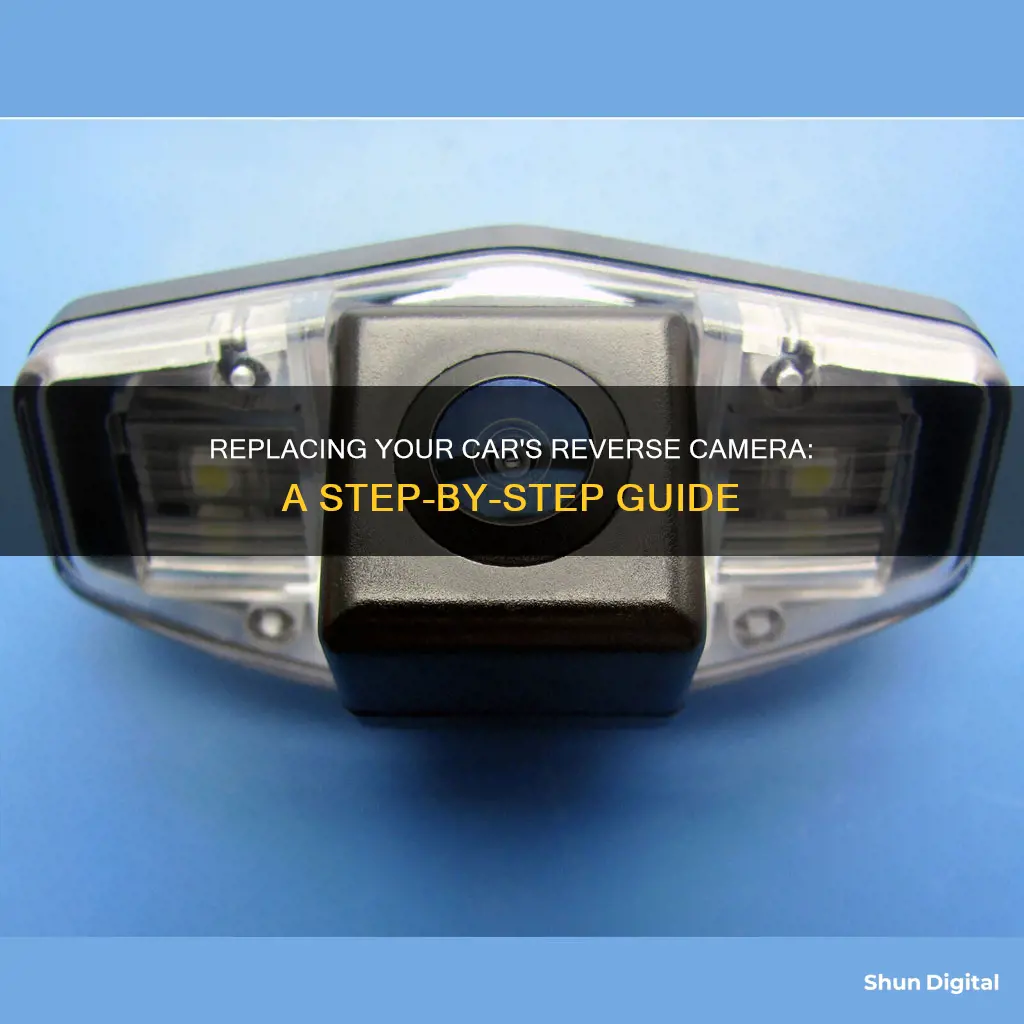
When it comes to choosing the right camera equipment for your car, there are a few key considerations to keep in mind. Firstly, it is important to purchase a device specifically designed as a rear-view or backup camera, as these will have features that enhance safety and assist with manoeuvring. It is also recommended to choose a camera that is made for your specific vehicle model, as this will make installation much easier.
One of the most important features to look for is high resolution, which will ensure a clear and detailed view of the rear area. A wide-angle lens is also beneficial, as it provides better coverage and allows you to see more of your surroundings. Some cameras also offer parking guidelines, which can be especially useful when parallel parking. These guidelines can be static, dynamic, or steering-linked, providing high accuracy during manoeuvres.
When selecting a camera, consider the mounting location. You can choose a discreet camera that fits behind your number plate, or one that replaces your existing boot handle or reversing light. If you prefer a less obtrusive option, a boot handle or number plate camera can be tailored specifically to your vehicle, giving it a factory-fitted look.
In addition to the camera itself, you may need to purchase additional equipment such as power and video cords, as well as a monitor or display screen. If you want to keep your existing rear-view mirror, you can opt for an external monitor that mounts onto your windshield. Alternatively, you can choose an internal monitor that either clips onto your current rear-view mirror or replaces it entirely. Internal monitors often have the added benefit of shutting off and disappearing when not in use, preserving the aesthetics of your car.
When choosing a monitor, consider the screen size and compatibility with your vehicle's infotainment system. The screen should be large enough to see clearly without obstructing your field of view or cluttering your cockpit. If you are integrating the camera with an existing system, ensure that the monitor is compatible.
Lastly, it is important to consider the installation process. Some cameras may require professional installation, especially if you are uncomfortable working with your car's electrical system. You can refer to online resources or seek assistance from a mechanic or specialist to ensure proper installation.
The First Surveillance Camera: A Historical Perspective
You may want to see also

Preparing your vehicle
Before you begin the installation process, there are several important steps to take to prepare your vehicle. Firstly, it is crucial to disconnect the ground cable to the battery to ensure there is no power to the car. This step is essential for safety reasons, as failing to do so could lead to electrical shortages or serious injuries.
Additionally, don safety gear, such as glasses and gloves, to protect yourself during the installation process. Gather all the necessary tools and parts, including a Phillips or flat-head screwdriver, a drill with assorted bits, a Posi-tap or other electrical connectors, and, of course, the rearview camera system.
If your vehicle is a European make, you may need Torx or Hex bits to gain access, as these vehicles often use security bits to prevent outside tampering. It is also important to determine the correct video format for your camera. Most vehicles use the NTSC format, but it is essential to confirm this before proceeding.
Finally, if you plan to use double-sided tape for mounting the camera, ensure that the mating surfaces are clean. Any debris or residue can cause the camera to fall off while driving, so use a rag and isopropyl alcohol to clean the area thoroughly.
Car Cameras: Worth the Cost?
You may want to see also

Mounting the camera
To mount your new rear-view camera, you'll need to find a flat surface at the back of your car, as close to the centre of the vehicle as possible. Clean the area with wax and grease remover or methylated spirits, and then stick the camera in place.
Double-sided tape should be enough to secure the camera, but if you're comfortable drilling into your car, you can use the included screws for added security.
If you want to preserve the OEM look, you can mount the camera by the trunk handle, using either tape or by drilling into the trunk.
If you're using a license plate bracket, simply screw the camera into place.
Now, drill a hole in the trunk to route the camera wire inside. This step will be the same for any type of camera mount if you want to keep a clean look. Ensure there are no wires in the way that could be damaged when drilling. Snake the wire through the hole and any potential trim to gain access to the wire inside the vehicle.
Mastering Adjustment Brush Undo in Camera Raw
You may want to see also

Completing the wiring
To complete the wiring, you will need to locate the fuse panel or a switched power terminal to provide power to the rearview camera. While some vehicles have dedicated posts for this, all cars have fuse boxes. This step is important as incorrect wiring will cause the rearview camera system to continuously drain power from your battery overnight.
Fuses for functions like your wipers or radio only receive power when the key is switched "on", making them ideal sources to piggyback off of. You can test this using a multimeter to check which fuse terminals receive power when the key is switched "on".
After verifying which fuse has switched power, grab a fuse tap and insert it into one of the pins of the terminal. Ensure that the wires are tucked into the necessary trim to maintain a clean look.
For the rearview camera to work, the camera must know when the car is in reverse and needs a video signal. This is done by running the supplied wire from the front to the back of the car.
Next, supply a signal to the rearview camera by tapping into your reverse lights. Disassemble your taillight assembly and locate the wires that run to your reverse light. Get a friend to press the brake pedal, sending power to the brake light and making it easier to identify the wire to tap into.
Using your multimeter, check which wire is being supplied with 12 volts. You will need to add the new signal wire to what is already fitted to the car. The easiest method is to use a Posi-tap or other electrical connector to tap the new wire into the existing one. Alternatively, use a twist connector or strip the wire manually and solder in the new one.
After completing this step, the rearview camera system should be fully operational. Check your work by reconnecting the ground cable to the battery post to give it power, then put your car in reverse and verify that the camera is working. If it is, you're ready to reassemble the car and make it look neat again.
Browning Trail Cameras: Maximizing Battery Life
You may want to see also

Testing the camera
Now that you have installed your reverse camera, it is time to test it. Before turning on your car, make sure that the camera is properly connected to a power source. Check that the red wire is connected to a constant power source and that the black wire is earthed. You can use a test light to probe the wires and identify which ones are receiving power.
Once you have confirmed that the camera is connected to a power source, turn on your ignition but keep the engine off. Your reverse camera should not be displaying anything at this point. Put your car in reverse and wait a moment. The camera should now be on and displaying what is behind your vehicle.
If the camera is not working, double-check that all the wires are connected correctly. Make sure that the power wire is connected to a power source that only receives power when the key is switched on, such as the wiper or radio fuse. You can use a multimeter to check which fuses receive power when the key is turned.
Another thing to check is that the camera is properly earthed. The black wire should be connected to a nearby earthing bolt, preferably made of bare metal.
If you have checked the power and earthing connections and the camera is still not working, you may need to consult a professional or refer to the camera's installation manual for further troubleshooting tips.
Once you have confirmed that the camera is functioning properly, you can reassemble any trim pieces that you removed during the installation process. Make sure that the wires are tucked neatly out of the way and use zip ties to secure them in place if necessary.
The Evolution of Cameras: From First Invention to Now
You may want to see also
Frequently asked questions
Before working on your vehicle, disconnect the ground cable to the battery to ensure there is no power to the car. Also, make sure to wear proper safety gear, including gloves and glasses.
You will need a Phillips or flat-head screwdriver, a drill with assorted bits, a wire stripper and crimping tool, a packet of ring terminals, an electrical test light, and a soldering iron.
Look for a flat surface at the rear of your car, as close to the centre of the vehicle as possible. You can use the supplied screws or double-sided tape to mount the camera.
Locate the fuse panel or a switched power terminal to provide power to the camera. You can also find dedicated posts for this in some vehicles. Connect the power wire to a constant power source, such as the wires powering your rear tail lights, so that the camera activates when you select reverse gear.


