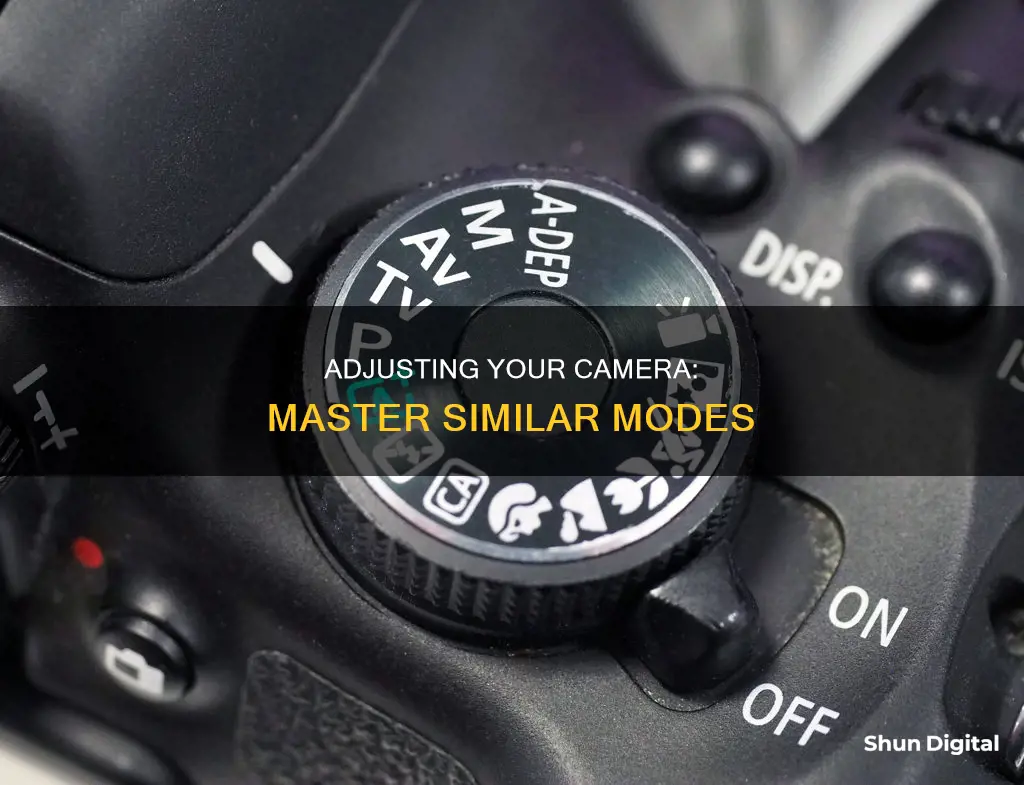
Adjusting your camera to the same mode can be done in a few ways, depending on the type of camera you have. Most modern cameras have an Auto Mode, which is usually indicated by a green box, camera, or text. In this mode, the camera will automatically adjust the settings to suit the scene, including the aperture, shutter speed, and ISO. You can also switch to creative modes, such as sports, landscape, portrait, or low light, depending on what you're photographing. Additionally, you can adjust settings like the photo aspect ratio, video quality, location info, grid lines, and video stabilization. If you want more control over your camera, you can switch to semi-automated modes like Program Mode, Shutter Priority, Aperture Priority, or Manual Mode. These modes give you more flexibility in adjusting settings like aperture, shutter speed, and ISO to achieve the desired effect in your photographs.
What You'll Learn

Adjusting ISO settings for lighting conditions
Low-Light or Indoor Shooting:
When shooting in low-light or indoor conditions, you might consider increasing the ISO to capture more light. However, a higher ISO can introduce "noise," resulting in grainy or pixelated images. To avoid this, use the lowest ISO possible, typically within a range of 100 to 400, that still provides a good exposure. You can also enhance the lighting and stability of your shots by using a tripod, flash, or reflector.
Bright or Outdoor Shooting:
In bright or outdoor lighting conditions, lowering the ISO is recommended to prevent overexposure, which can lead to washed-out images with a loss of detail. Aim for an ISO range of 100 to 200, and if needed, use neutral density filters like ND64 or ND32 in extremely bright conditions. Additionally, consider shooting during golden hour, the first hour after sunrise or the last hour before sunset, for optimal lighting.
Mixed or Artificial Lighting:
When dealing with mixed or artificial lighting, such as fluorescent or LED lights, pay attention to the white balance and tone of your images. Use the appropriate white balance setting on your camera or shoot in RAW format to make adjustments later. For mixed or artificial lighting, an ISO range of 200 to 800 is generally recommended.
Creative or Artistic Effects:
ISO can also be used creatively to achieve specific artistic effects. For instance, a high ISO can create a gritty or vintage look, while a low ISO can result in a smooth or silky appearance. Experiment with different ISO settings, but always consider the trade-offs between image quality and your desired effect. An ISO range of 800 to 3200 is often used for creative purposes.
Understanding the Exposure Triangle:
ISO is one of the three fundamental elements of the exposure triangle, along with aperture and shutter speed. Balancing these three factors is key to achieving perfectly exposed images. Increasing the ISO allows you to unlock" faster shutter speeds and smaller apertures, giving you more flexibility in capturing moving subjects or achieving specific depth-of-field effects. However, remember that higher ISO values can introduce noise, so always aim for the lowest ISO setting that suits your lighting conditions.
Cellular Trail Cameras: How Long Do Batteries Really Last?
You may want to see also

Using shutter speed to capture moving objects
Shutter speed is one of the most important settings in photography. It controls the amount of light that enters your camera and can be used to either freeze motion or create a sense of movement.
How to Use Shutter Speed to Capture Moving Objects
The best shutter speed for capturing moving objects depends on the speed of the object and the effect you want to achieve. Here are some general guidelines:
- Fast-moving objects: For objects like cars, athletes, or birds in flight, use a fast shutter speed to freeze the action and eliminate motion blur. A shutter speed of 1/500th of a second to 1/2000th of a second is typically sufficient.
- Slower-moving objects: For slower-moving objects or to intentionally capture motion blur, use a slower shutter speed. A range of 1/60th of a second to 1/2 a second can add dynamism and context to your photos.
- Low light conditions: In low light, you will need to use a slower shutter speed to allow more light to reach the sensor. However, this can result in motion blur, so consider using a tripod to minimise camera shake.
- Bright light conditions: In bright conditions, a faster shutter speed is necessary to avoid overexposing your photos.
Techniques for Capturing Moving Objects
- Panning: Move your camera along with the moving subject to keep it in focus while blurring the background. This technique takes practice and works best with a shutter speed of 1/30th of a second.
- Burst mode: Take multiple shots in quick succession to increase your chances of getting a clear shot.
- Continuous autofocus: Use the AI Servo or AF-C mode to continuously refocus and track your subject, keeping it sharp even as it moves.
Adjusting Other Settings
Remember that shutter speed is not the only factor affecting your photos. You may also need to adjust the aperture and ISO:
- Aperture: A larger aperture (smaller f-stop number) lets in more light but reduces the depth of field.
- ISO: A higher ISO increases the camera's sensitivity to light but can introduce grain and digital noise.
Charging Your ADT Camera Battery: A Step-by-Step Guide
You may want to see also

Choosing the right aperture for your subject
The aperture setting you choose will depend on the type of shot you want to take and the environment you are shooting in. Aperture is one of the three pillars of photography, the other two being shutter speed and ISO. Aperture is the opening in a lens that lets light pass through to enter the camera. It is like the pupil in your eye, which expands or shrinks to control the size of your pupil.
How Aperture Affects Your Images
Aperture has a significant impact on the brightness and depth of field of your images. A larger aperture (a wider opening) will pass a lot of light, resulting in a brighter photograph. A smaller aperture does the opposite, making the photo darker.
The depth of field is the range of distance that appears in focus in your images. A shallow depth of field means only a small part of the image will be in focus, while a deep depth of field will have sharpness from the foreground to the background. A wider aperture will give you a shallower depth of field, while a smaller aperture will give you a deeper depth of field.
When choosing the right aperture for your subject, consider the amount of light available and the type of shot you want to achieve. Here are some scenarios to help you choose the right aperture:
- Low-light environments: In low-light conditions, it is wise to use a wide aperture (e.g. f/1.4 to f/2.8) to ensure you get a good exposure. This will allow more light to enter the camera, resulting in a brighter image.
- Portraits: For portrait photography, a wide aperture (e.g. f/1.4 to f/2.8) is ideal as it will create a shallow depth of field, blurring the background and bringing attention to the subject.
- Landscapes: For landscape photography, you typically want a deep depth of field to get everything in focus. Therefore, a smaller aperture (e.g. f/8 to f/16) is recommended. This will result in a sharper image from the foreground to the background.
- Sports and wildlife photography: For fast-moving subjects like sports or wildlife, a wider aperture (e.g. f/2.8) is recommended to freeze the motion and get a sharp image.
- Architecture: Similar to landscape photography, architecture photography often benefits from a smaller aperture (e.g. f/8 to f/16) to get a deeper depth of field and capture the details of the building.
- Night photography: For night photography, a wide aperture (e.g. f/1.4 to f/2.8) is ideal for capturing the night sky or cityscapes. It lets in more light and creates a shallow depth of field, allowing you to focus on specific subjects.
Remember, these are just guidelines, and you may need to adjust the aperture depending on the specific conditions and the creative effect you want to achieve. Experiment with different apertures to find the best setting for your particular subject and environment.
The Best Camera Grip Battery Options and Their Lifespans
You may want to see also

Setting up your camera for video conferencing
Lighting:
One of the most critical aspects of setting up your camera for video conferencing is lighting. It is recommended to have a light source behind your camera, shining directly on your face. This simple technique can make a significant difference in how you appear on camera, making you look more present and less like you were caught off guard. Ensure the light is at eye level and avoid backlighting, as it can make you appear dark and unclear. If possible, use two lights with diffusers to eliminate shadows and create a professional look.
Camera Placement:
The height of your camera can impact your appearance on screen. Try to position your camera at eye level or slightly lower. If using a laptop, you can adjust the height by placing it on a stack of books. For external webcams, consider mounting it on top of your monitor or using a tabletop tripod. Additionally, be mindful of the distance between you and the camera. A closer distance can distort your features, particularly your nose, so consider moving back slightly to reduce this effect.
Camera Quality:
The quality of your camera will also impact the overall video conferencing experience. While built-in laptop webcams are adequate, investing in an external webcam can significantly improve video quality. Look for webcams that offer 1080p resolution or even 4K for a truly impressive experience. External cameras often have a wider field of view, which is ideal if multiple people will be joining the meeting from the same setup. They also provide more flexibility in adjusting the camera angle and placement to optimize lighting and framing.
Audio Quality:
In addition to video quality, ensuring clear audio is crucial for effective communication. Consider using an external microphone or a headset with a built-in microphone to enhance audio quality and reduce background noise. If you are in a noisy environment, a headset can help block out unwanted sounds. Additionally, always test your microphone levels and adjust the sensitivity accordingly. Most operating systems allow you to automatically adjust microphone gain, but in some cases, it may be better to leave this off and make manual adjustments.
Background:
When setting up your camera for video conferencing, pay attention to your background. It is recommended to keep it simple and avoid clutter or distractions. A plain background that is not disruptive or noticeable will do just fine. If you want to get creative, you can use a virtual background offered by some video conferencing platforms, but ensure your computer meets the minimum requirements to avoid any lag or blurring.
Software and Internet Connection:
The video conferencing software you choose and your internet connection speed are also essential factors. Opt for software that offers features like real-time call transcriptions, meeting recordings, and screen sharing. Additionally, ensure your internet connection is reliable and provides adequate bandwidth to avoid glitchy calls.
By following these tips and adjusting your setup accordingly, you can greatly improve your video conferencing experience and ensure a smooth and professional online presence.
Understanding P Mode: A Photographer's Creative Companion
You may want to see also

Using manual mode for creative control
Manual mode gives you full creative control over your camera and your photos. It allows you to capture exactly what you want to capture. When you use the Auto setting on your camera, the camera decides what it thinks is important to capture.
The Exposure Triangle
To shoot in manual mode, you need to understand the "exposure triangle". This is made up of your aperture, shutter speed, and ISO. You use these three components to get your light meter to zero.
Aperture
Aperture, or "f-stop", is what allows you to have those blurry backgrounds. The type of lens you use is a big factor in what aperture you can set. A lower f-number will have a wider aperture and only a small part of your photo will be in focus, with the background blurry. A higher f-number will have a narrower aperture and more of your picture will be in focus.
Shutter Speed
Shutter speed is the amount of time that your shutter is open, written as a fraction of a second. A faster shutter speed will generally produce sharper images, while a slower shutter speed will often produce motion blur.
ISO
ISO is the sensitivity of your camera sensor to light. With a higher ISO, the sensitivity to light is increased, so you will have more light in your photograph. However, a higher ISO can also add grain or noise to your image.
Putting it All Together
To shoot in manual mode, you will need to adjust your aperture, shutter speed, and ISO to get a well-exposed image. It may take some time to get used to balancing these three elements, but it will give you full creative control over your images.
Clip Studio's Camera Raw Mode: Pros and Cons
You may want to see also
Frequently asked questions
The best way to adjust your camera settings for the best photos depends on the lighting conditions, the subject of your photo, and your intent for the photo. In low light, set your ISO higher to allow your camera to manage the light better. For a moving subject, use a faster shutter speed to ensure it is sharp. If you want to isolate your subject, use a wider aperture.
The best mode to use with your camera is aperture priority (A, Av) as it gives you control over how much of your photograph is in focus. The camera then chooses the appropriate shutter speed for the scene.
Camera modes are predetermined settings that help you take a photograph. The main ones are Auto Mode, Program Mode, Shutter Priority, Aperture Priority, and Manual Mode. In Auto Mode, the camera chooses the settings. In Program Mode, you can change the aperture and shutter speed, and the camera adjusts the rest. Shutter Priority lets you control the shutter speed while the camera chooses the aperture. Aperture Priority is the reverse of Shutter Priority. In Manual Mode, you control both aperture and shutter speed.
In low light, you will need to increase your camera's ISO setting to allow your camera to manage the light better. A higher ISO will give you more flexibility with the other two settings of the exposure triangle, which are aperture and shutter speed.


