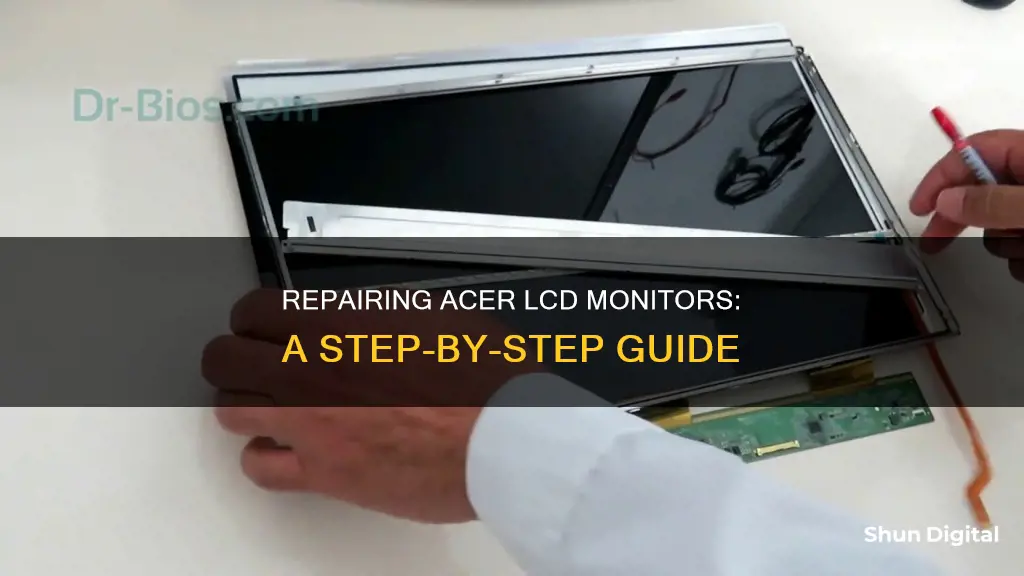
If your Acer LCD monitor is malfunctioning, you may be able to repair it yourself. This could save you money and keep your monitor out of a landfill. Before attempting any repairs, make sure you have the necessary tools and a suitable workspace. You should also be cautious when working with electricity and electronic components.
Some common issues with Acer LCD monitors include a cracked screen, a white filter, an orange shade, and a flickering or black screen. In some cases, you may need to disassemble your monitor to identify the specific model and source replacement parts. It's important to note that opening your monitor may void its warranty, and Acer recommends that only authorised technicians repair their products. However, with the right tools and guidance, it is possible to successfully repair your Acer LCD monitor.
What You'll Learn

Disassembling the monitor
To disassemble an Acer monitor, you will need to place it on a soft, flat surface with enough room to work. Ensure you have all the necessary tools before you begin.
First, remove the screws in the IO panel. There are three Phillips screws in the IO panel, and none behind the product label. Next, remove the stand base. This is fixed with a big flat-head screw. No other screws need to be removed at this stage. Then, remove the stand stem. Remove the metal plate carefully, as the two Phillips screws are fixed to long plastic tubes that may crack if you apply too much force. Behind the metal plate, there are three more Phillips screws.
Now, remove the tilting mechanism. This can be done by gently pushing on the plastic lock clamp between/below the two bolts. Also, remove the two long Phillips screws below the tilting mechanism to loosen the monitor's plastic back. At this point, the back is held in place by over 20 plastic locks. Use a pry tool and a screwdriver to loosen them all, being careful and patient to avoid leaving marks. Start at the bottom, on the side without the monitor's control panel/buttons, and continue carefully around the edge.
Before removing the monitor's plastic side frame, you must disconnect the control panel. It is connected with a single flat ribbon cable that is connected to a clamp connector. Use a screwdriver to push on the clamp to open it and loosen the ribbon cable. Carefully remove the ribbon cable, being careful not to touch the monitor's electronics to prevent any electric discharge.
Now, remove the screws in the plastic frame, being cautious around the cabling. Notice that the screws were screwed in with a specific torque, so try to remember the force you used to unscrew them and reapply it during reassembly.
At this point, you have successfully disassembled your Acer monitor. To reassemble, simply follow these steps in reverse.
The Release of the ASUS VN289QL Monitor: When and What?
You may want to see also

Removing the tilting mechanism
To remove the tilting mechanism of an Acer Thin Bezel Monitor, follow these steps:
Place the monitor on a soft, flat surface, ensuring you have enough room to work. Remove the three Phillips screws from the IO panel. Next, remove the stand base, which is fixed with a big flat-head screw. No other screws need to be removed at this stage.
Now, carefully remove the stand stem. Behind the metal plate, you will find three Phillips screws. It is recommended to use a magnetic Phillips screwdriver with a long, thin neck for this step. Be cautious, as the screws are fixed to long plastic tubes that may crack if too much torque is applied.
At this point, the tilting mechanism will be revealed. To remove it, gently push on the plastic lock clamp situated between/below the two bolts. The tilting mechanism should easily slide out. Additionally, remove the two long Phillips screws located below the tilting mechanism to loosen the monitor's plastic back.
With these steps, you will successfully remove the tilting mechanism of the Acer Thin Bezel Monitor. Remember to keep track of the removed parts and screws to facilitate the reassembly process.
Monitor Lizard Size: Understanding Their Massive Growth
You may want to see also

Disconnecting the control panel
To begin, locate the monitor's control panel, which is typically found on the side or back of the monitor. In some cases, it may be integrated into the front bezel. Once you have located the control panel, identify the ribbon cable that connects it to the rest of the monitor. This cable is usually flat and thin, and it may be secured with a clamp or locking mechanism.
Before disconnecting the ribbon cable, ensure that the monitor is powered off and unplugged from the power source. This step is crucial for your safety and to prevent any damage to the internal components. Use a screwdriver to carefully loosen the clamp or locking mechanism that secures the ribbon cable. Gently pull on the cable to disconnect it from the control panel. Take caution not to touch any other electronic components or circuitry to avoid electric discharge or potential damage.
In some cases, the control panel may have additional connectors or wires attached. Identify and label these connections to ensure proper reassembly. Gently disconnect each wire or cable, taking note of their orientation and placement. It is recommended to take photos or make notes during this process to aid in reassembly.
Once all connections to the control panel have been disconnected, set the control panel aside. It is now safe to proceed with further disassembly or repair work on the monitor. Remember to handle the control panel with care and store it safely if you plan to reuse it during reassembly.
Repairing an Acer LCD monitor can be a delicate process, and it is important to follow the correct procedures to avoid damage. Always refer to a reliable repair guide, such as the one provided, and ensure you have the necessary tools and skills before attempting any repairs.
Best ASUS Monitors for 2K 144Hz Gaming Experience
You may want to see also

Replacing capacitors
Before attempting to replace capacitors, it is important to understand the dangers involved. Capacitors may hold a major charge even after power disconnection, and improper handling can result in a dangerous or lethal electric shock. Therefore, it is recommended to hire a professional if you have never replaced a circuit board or handled electronic equipment before.
If you choose to proceed, ensure that you work in a static-free environment, wear static-free clothing, and avoid working in dry or wet conditions. Ground yourself by touching the metal chassis of the monitor while it is off but plugged into a grounded outlet. Additionally, stand on a low-friction surface and treat the carpet with an anti-static spray if necessary.
Now, let's get into the steps for replacing capacitors:
- Disconnect the power by unplugging the monitor or removing the battery if it is attached to a laptop.
- Remove the case by unscrewing the plastic case at each corner and prying it apart with a thin, flexible tool like a plastic putty knife.
- Locate the power supply board, which is usually near the power socket. You may need to unscrew additional panels to find it.
- Disconnect the power supply board by removing screws and ribbon cables. Always pull the cables directly out of their sockets.
- Lift the board carefully by the edges and locate the cylindrical capacitors on the other side.
- Discharge the largest capacitors using a resistor in the range of 1.8-2.2kΩ and 5-10 watts. Touch the resistor leads to the pins of the capacitor for several seconds.
- Identify broken capacitors by looking for domed or bulging tops, leaking fluid, or crusty buildup. Record the position and markings of each capacitor, especially the negative and positive sides.
- Desolder the broken capacitors using a soldering iron and a desoldering pump.
- Purchase replacement capacitors with the same size, voltage, and capacitance as the old ones.
- Solder the new capacitors onto the circuit board, ensuring that the negative side of each capacitor is connected to the correct pin.
- Reattach all cables, panels, and components. Test the monitor before screwing in the final plastic panel.
Remember to work carefully and follow safety precautions to protect yourself and the monitor's components.
Monitor Size Guide: 40-Inch Displays' Dimensions Explained
You may want to see also

Reassembling the monitor
To reassemble your Acer LCD monitor, carefully follow the steps below:
Firstly, ensure you have all the necessary tools and a soft, flat surface to work on. Place the monitor on the prepared surface and locate the screws in the plastic frame. Be cautious around the cabling when reattaching the frame. Try to match the torque required to screw in the screws with the force you used to unscrew them.
Next, reconnect the control panel. Before you can replace the monitor's plastic side frame, you must reconnect the control panel. It is connected by a single flat ribbon cable. Use a screwdriver to loosen the clamp connector and carefully remove the cable. When reassembling, push the cable into the connector until it is secure, then close the clamp.
Now, replace the monitor's back. Over 20 plastic locks hold the back in place, so use your screwdriver and a pry tool to secure them. Start at the bottom, on the side without the monitor's control panel, and work your way around. Be careful and patient to avoid leaving marks on the monitor.
Then, replace the tilting mechanism. Slide it into place and secure it with two long Phillips screws.
After that, reattach the stand stem. This is fixed with a big flat-head screw. Be careful, as the two Phillips screws are fixed to long plastic tubes that may crack if you apply too much torque.
Finally, reattach the stand base and ensure that your monitor is stable.
It is important to remember to follow the disassembly steps in reverse order and to be cautious when working with electrical components.
Finding the Right Monitor Fit: Size Matters
You may want to see also
Frequently asked questions
Before starting, ensure you have enough room to work and place the monitor on a soft, flat surface. You will need a range of tools, including a magnetic Phillips screwdriver. First, remove the screws from the IO panel and stand base. Next, remove the stand stem by taking out the metal plate and being careful not to apply too much torque to avoid cracking the plastic tubes. Then, remove the tilting mechanism and the monitor's back. Disconnect the control panel and remove the monitor's plastic frame. Finally, separate the LCD and backlight layers.
If your Acer LCD monitor has a cracked screen, you may be able to replace the LCD panel. First, disassemble the monitor to retrieve the damaged LCD panel. Then, identify the correct replacement part by checking the model and part number on the back of the LCD panel. You can search for the replacement part online or contact Acer support for assistance in obtaining the correct part.
There could be various reasons for your Acer LCD monitor not functioning correctly. It is recommended to consult the troubleshooting section of the Acer support page for specific models to diagnose and address these issues.
If your Acer LCD monitor has a damaged display due to accidental impact, such as during gaming, you may need to replace the screen. First, identify the correct replacement part by checking the model and part number. You can try contacting Acer support or look for alternatives on websites like eBay and Amazon for used or generic replacement parts.
Yes, it is important to exercise caution when repairing an Acer LCD monitor, especially when dealing with electricity. Ensure that the monitor is unplugged before beginning any repair work. Additionally, be careful when handling the internal components to avoid causing further damage, such as breaking plastic clips that hold the panels together.


