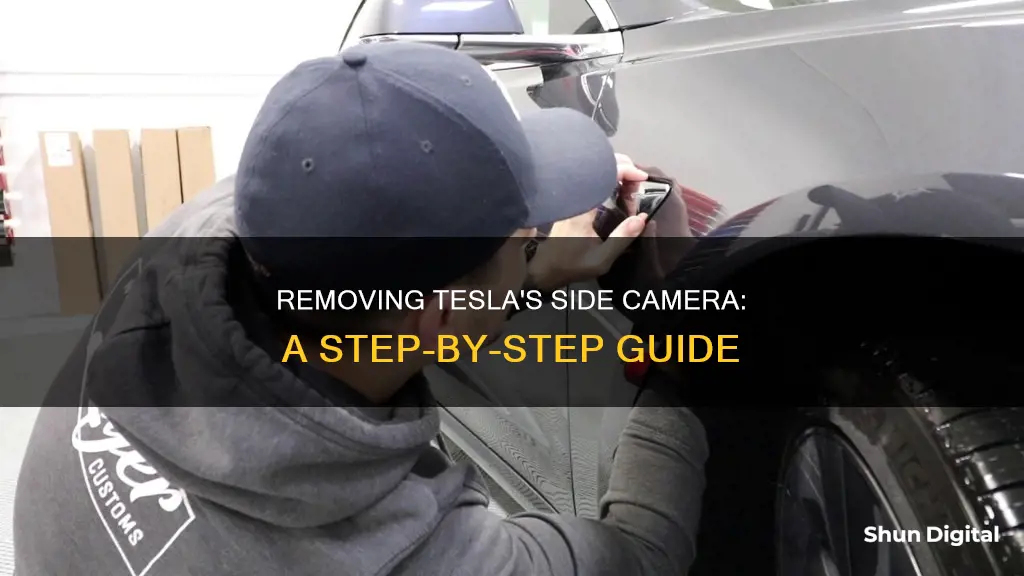
Removing the side camera on a Tesla is a relatively simple process that can be done by following these steps:
Firstly, decide whether you want to wrap your Tesla or remove the camera for another reason. If you are wrapping your Tesla, you may want to remove the side cameras to get a cleaner finish. However, this is not necessary, and some people choose to leave the cameras in place during the wrapping process.
If you do decide to remove the camera, you will need to open the front door and lower the front window on the side of the car where the camera is located. You will then need to disconnect the camera connectors and press down on the lock release to pull the connector away from the camera. Once this is done, you can remove the bolts attaching the camera to the repeater assembly and wiggle the camera to clear the o-ring. Finally, you can lift the camera out and replace it with a new one or leave the space empty, depending on your preference.
It is important to note that removing the camera may affect the functionality of certain features, such as Autopilot, and it is always recommended to consult a professional or refer to the owner's manual before attempting any modifications to your vehicle.
| Characteristics | Values |
|---|---|
| Tools required | Ratchet/torque wrench, plastic trim tool, laptop with Toolbox 3 |
| Preparation | Ensure proper PPE is worn |
| Post-removal | Calibrate camera |
What You'll Learn

Removing the Tesla side camera's bolts
To remove the bolts from your Tesla's side cameras, you will need to follow these steps:
Step 1: Open the left front door and lower the left front window.
Step 2: Press the brake pedal to turn on the drive rails.
Step 3: Using the centre display, set the air suspension ride height to "Very High".
Step 4: Turn the steering wheel fully to the left.
Step 5: Enable service mode.
Step 6: Apply masking tape to the left front fender assembly at the edges of the left front side repeater.
Step 7: Partially remove the rear portion of the left front wheel arch liner. Use a plastic trim tool to release the push clip that attaches the left front side repeater to the fender assembly.
Step 8: Disconnect the connectors (x2) from the left front side repeater.
Step 9: Press down on the lock release and pull the connector away from the side repeater camera. Release the red locking tab and disconnect the side repeater connector.
Step 10: Wrap the terminals of the camera and wiring harness to protect them from moisture and potential damage.
Step 11: Remove the left front side repeater from the vehicle.
Step 12: Now, you can focus on the bolts. Remove the bolts (x2) that attach the left front side repeater camera to the repeater assembly. You may need to wiggle the camera to clear the o-ring from the assembly.
Step 13: With the bolts removed, you can now separate the camera from the repeater assembly.
To reinstall the side camera, simply follow these steps in reverse. Ensure that you reset the Driver Assistance System (DAS) and recalibrate the camera as needed.
Self-Driving Cars: What Do Their Cameras Actually See?
You may want to see also

Disconnecting the camera's wiring harness
Accessing the Camera:
- Open the left front door of your Tesla.
- Lower the left front window to gain better access to the side camera.
- Press the brake pedal to activate the drive rails.
- Using the center display, adjust the air suspension ride height to "Very High."
- Turn the steering wheel fully to the left.
- Enable service mode through the touchscreen menu.
Preparing the Work Area:
- Apply masking tape to the left front fender assembly, covering the edges of the left front side repeater.
- Partially remove the rear portion of the left front wheel arch liner. This will give you better access to the side repeater assembly.
Disconnecting the Wiring Harness:
- Release the push clip that secures the left front side repeater to the fender assembly.
- Push the repeater locator tab to release the repeater from the fender. Gently guide the tab to clear the fender and remove the repeater.
- Disconnect the left front side repeater connectors. There should be two connectors to disconnect.
- Press down on the lock release and pull the connector away from the side repeater camera.
- Release the red locking tab and press down to disconnect the side repeater connector.
- Wrap the terminals of the camera and wiring harness to protect them from moisture and potential damage.
Removing the Camera:
- Remove the bolts securing the left front side repeater camera to the repeater assembly. There should be two bolts to remove.
- Gently wiggle the camera to clear the o-ring from the repeater assembly.
By following these steps, you will be able to safely disconnect the camera's wiring harness and proceed with removing the side camera from your Tesla. Remember to refer to the official Tesla service manual for your specific model and always take the necessary safety precautions when working on your vehicle.
Galaxy Watch 4: Camera Expectations Unveiled
You may want to see also

Removing the camera from the repeater assembly
To remove the camera from the repeater assembly, follow these steps:
Firstly, open the left front door and lower the left front window. Press the brake pedal to turn on the drive rails. Using the centre display, set the air suspension ride height to "Very High". Turn the steering wheel fully to the left and enable service mode.
Now, apply masking tape to the left front fender assembly at the edges of the left front side repeater. Partially remove the rear portion of the left front wheel arch liner. Insert a plastic trim tool between the edge of the wheel liner and back of the fender, and then open a portion of the wheel liner to gain access to the side repeater assembly.
Release the push clip that attaches the left front side repeater to the left front fender assembly. Push the repeater locator tab to release the repeater from the fender, guide the locator tab to clear the fender, and then remove the repeater from the fender. Disconnect the left front side repeater connectors (there are two).
Now, you can remove the camera from the repeater assembly. To do this, remove the bolts (x2) that attach the left front side repeater camera to the repeater assembly, and then remove the camera from the repeater assembly.
To reinstall the camera, simply follow these steps in reverse.
Finding Your Logitech Camera on a Network
You may want to see also

Clearing camera calibration data
To clear the camera calibration data, follow these steps:
- Go to "Controls" (the car icon).
- Tap "Service".
- Tap "Camera Calibration".
- Tap "Clear Calibration".
Please note that clearing the calibration data will disable Autopilot features until the system recalibrates. This may take up to 100 miles (160 km) of driving, preferably on roads with highly visible lane lines. During this time, the blue ring around the Autopilot icon will indicate the progress of the camera calibration.
After clearing the calibration data, the vehicle must be manually driven so that the cameras can self-calibrate. This typically takes 20-25 miles (32-40 km), but the distance may vary depending on road and environmental conditions. Driving on a straight road with multiple lanes and clear lane markings will expedite the process.
In some cases, clearing the calibration data may not resolve all camera and sensor issues. If problems persist, contact Tesla to set up a service appointment for further diagnosis and resolution.
Eliminating Alcohol Odor from Cameras: Effective Methods
You may want to see also

Reattaching the camera to the repeater assembly
To reattach the camera to the repeater assembly, follow these steps:
- Position the LH front side repeater camera on the repeater assembly.
- Install the bolts (x2) that attach the camera to the repeater assembly.
- Wiggle the camera o-ring through the repeater assembly.
- Install the bolts that attach the camera to the repeater assembly.
- Connect the LH front side repeater connectors (x2).
- Secure the side repeater connectors, and then engage the red locking tab on the side repeater connector.
How Subaru's EyeSight Camera Technology Enhances Your Driving
You may want to see also


