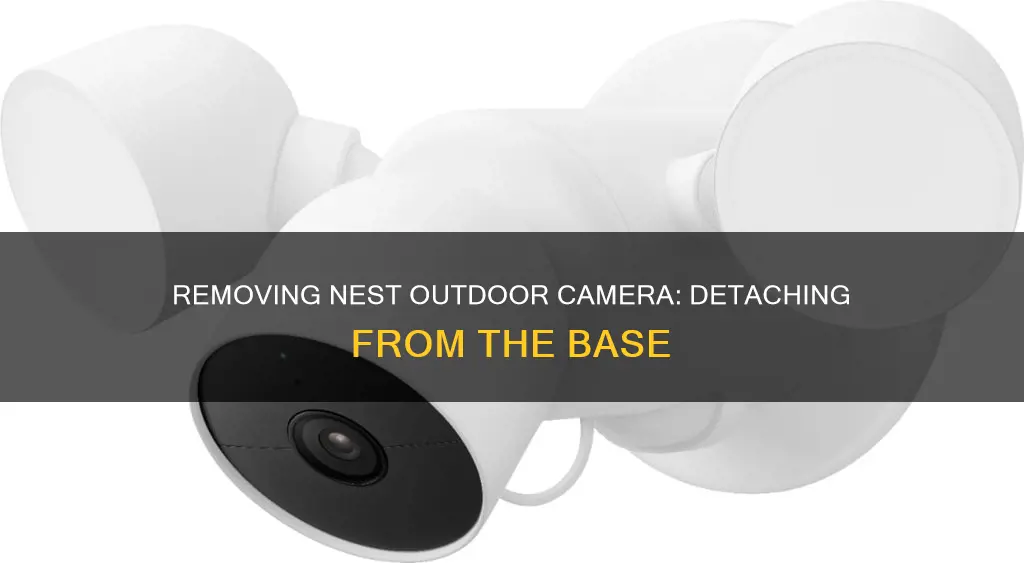
If you want to remove your Nest Cam Outdoor camera from its base, you've come to the right place. In this paragraph, we will outline the steps you need to take to safely detach your camera from its mount. It's important to note that different models of the Nest Cam Outdoor camera may require slightly different methods for removal, so be sure to check which model you have before proceeding. The Nest Cam IQ Outdoor, for example, requires the use of a hex key for removal, whereas other models may simply twist or pull away from their base. If you have the Nest Cam IQ Outdoor, locate the hex key that came with your camera. If you've misplaced it, don't worry! You can easily purchase a 2.5mm or 3/32-inch hex key from your local hardware store. Once you have the hex key, insert it into the hole on the camera's base and turn it counterclockwise to loosen the screw that holds the camera in place. Your camera should now be detached from the wall. From here, you can proceed to remove the cables and wires and fill any remaining holes, if desired.
How to Remove Nest Outdoor Camera from Base
| Characteristics | Values |
|---|---|
| Camera Type | Nest Cam IQ Outdoor |
| Removal Tool | Hex Key |
| Hex Key Size | 2.5 mm or 3/32 inch |
| Steps | 1. Locate the hex key. 2. Insert the hex key into the camera base. 3. Turn the hex key counterclockwise to detach the camera from the wall. |
What You'll Learn
- Use a hex key to detach the camera from the wall mount
- Grip the base of the camera and pull it away from the wall plate
- Turn the camera counter-clockwise to release it from the mount
- Remove the secure loop from the wall mount by pulling down on its tab
- Use a 2.5 mm or 3/32 hex key to detach the camera if you don't have the Nest-provided tool

Use a hex key to detach the camera from the wall mount
To remove your Nest Cam IQ Outdoor from its base, you will need to use a hex key. This is because the Nest Cam IQ Outdoor uses a lock to securely attach to your wall. If you have lost your hex key, you can purchase a 2.5mm (3/32") hex key from your local hardware store.
Once you have the hex key, you can begin the process of detaching your camera from the wall mount. First, locate the hex keyhole on your camera's base. This should be located above the camera. Insert the hex key into the hole. Now, turn the hex key counterclockwise. As you do this, you should feel the camera beginning to detach from the wall. Keep turning the hex key until the camera is completely separated from the wall mount.
It is important to note that the Nest Cam IQ Outdoor is not a portable device. Once it is installed, it is more like a permanent installation. Therefore, if you are removing the camera from your home permanently, there are a few more steps to take. After detaching the camera from the wall mount, you will need to remove the cables and wires, and then fill any remaining holes.
Avoid Canary Camera Intruder Alerts: Tips for Users
You may want to see also

Grip the base of the camera and pull it away from the wall plate
To remove your Nest Cam Outdoor camera from its base, you'll need to locate the hex key that came with your camera. This is an essential tool for the job, so if you've misplaced yours, you can easily purchase a replacement 2.5 mm or 3/32" hex key from your local hardware store.
Now, grip the base of the camera and prepare to gently pull it away from the wall plate. Before you do this, however, you must first insert the hex key into the hole on the camera's base and turn it counter-clockwise to loosen the screw that holds the camera in place. Once you've done this, you can gently pull the camera away from the wall plate.
If you haven't already, be sure to unplug the camera from its power source before you begin. It's also a good idea to familiarise yourself with the installation video, which will give you a clear visual guide to the process. Starting at 4:12, you'll see how the camera is twisted on and can then simply perform these steps in reverse to safely remove your Nest Cam Outdoor camera from its base.
Remember, if you encounter any resistance or difficulty, don't force it. Nest cameras are designed with professional installation in mind, so if you're unsure, consult a professional for assistance.
Finding IPC Cameras on Your Network
You may want to see also

Turn the camera counter-clockwise to release it from the mount
To remove your Nest outdoor camera from its base, you'll need to turn the camera counter-clockwise. This will release the camera from its mount, allowing you to detach it from the wall. Here's a step-by-step guide to ensure you do this correctly:
First, locate the base of your Nest outdoor camera. The base is the section where the camera connects to the wall mount or stand. It's important not to confuse the base with the camera head. Once you have located the base, you'll be ready to proceed with the removal process.
Next, grip the base of the camera securely. Ensure that you are holding the base itself and not any other part of the camera. This will provide you with the stability needed to safely turn the camera counter-clockwise. A firm grip will also help prevent any accidental drops during the removal process.
Now, turn the camera counter-clockwise. This is the key step to releasing the camera from its mount. Apply gentle force as you turn, being careful not to strain or damage any parts of the camera. You should feel the camera start to detach from the mount as you turn it in the counter-clockwise direction.
As you continue turning, you may hear a clicking sound. This is a positive indication that the camera is being released from the mount. The camera should now be almost entirely detached from the wall or stand.
Finally, complete the removal by fully detaching the camera from the base. Once the camera has been turned counter-clockwise and released from the mount, you can carefully pull the camera away from the base. Ensure that you are still holding the base securely as you do this to prevent any accidental damage.
By following these steps, you can safely and effectively remove your Nest outdoor camera from its base. Remember to grip the base firmly and turn the camera counter-clockwise to release it from the mount.
The Eye of Corporate: Watchful Cameras at Work
You may want to see also

Remove the secure loop from the wall mount by pulling down on its tab
To remove the secure loop from the wall mount of your Nest outdoor camera, you'll need to locate the tab on the loop. This tab is a small, protruding part of the loop that you can grip and pull. Once you've found the tab, simply pull it down firmly and steadily. As you do this, the loop should open up and slip off the wall mount, allowing you to separate the two components.
The tab is designed to be easy to grip and pull, so you shouldn't need any tools for this step. Just make sure you have a firm hold on the tab and pull straight down. If you find that the loop is stuck, check that you are pulling the tab in the correct direction—straight down—and that you are applying enough force. You may need to pull quite firmly, especially if the loop has been on the wall mount for a long time.
It's important to note that this process is for removing the secure loop from the wall mount, not for detaching the camera itself. The Nest Cam IQ Outdoor uses a hex key to detach the camera from its base. If you need to detach the camera completely, you will need to insert and turn a hex key in the hole on the camera's base. This is a separate process from removing the secure loop.
Additionally, if you are looking to remove the entire wall mount, you will need to twist the camera counter-clockwise to release it. This is a separate step from removing the secure loop and detaching the camera from its base.
By following these steps, you will be able to safely and effectively remove the secure loop from the wall mount of your Nest outdoor camera, allowing you to adjust or relocate your camera as needed.
Simplisafe Cameras: Watching or Not?
You may want to see also

Use a 2.5 mm or 3/32 hex key to detach the camera if you don't have the Nest-provided tool
If you don't have the Nest-provided tool, you can use a 2.5 mm or 3/32 hex key to detach your Nest Cam IQ Outdoor camera from its base. This tool can be purchased from your local hardware store.
To remove the camera, first, insert the hex key into the hole on your camera's base. Then, turn the hex key counterclockwise, and the camera should detach from the wall.
It is important to note that you should not grab the camera head when removing it from the wall mount. Instead, grip the base of the camera and turn it counterclockwise until you hear a click, indicating that it has detached from the wall mount.
If you have a Nest Cam (wired) or Nest Cam IQ Indoor, it is important to note that these cameras cannot be detached from their stands.
Accessing Hikvision Camera Feeds on Mobile: A Step-by-Step Guide
You may want to see also
Frequently asked questions
You will need a hex key to remove the Nest Cam IQ Outdoor from its base. The hex key should be included with your camera, but if you have lost it, you can purchase a 2.5mm or 3/32 inch hex key from your local hardware store. Insert the hex key into the hole on the camera's base and turn it counter-clockwise to detach the camera from the wall.
If you have lost the hex key that came with your Nest Cam IQ Outdoor, you can purchase a replacement. The size of the hex key you need is either 2.5mm or 3/32 inches. You should be able to find one at your local hardware store.
Make sure you are turning the hex key counter-clockwise. This is the direction in which you need to turn it to detach the camera from the base.
To remove your Nest Cam (wired, indoor, 2nd gen) from its stand or mount, grip the base of the camera (not the camera head) and turn it counter-clockwise. The camera will click when it detaches.
To remove your Nest camera from its magnetic wall mount, grip the base of the camera and pull it away from the plate.


