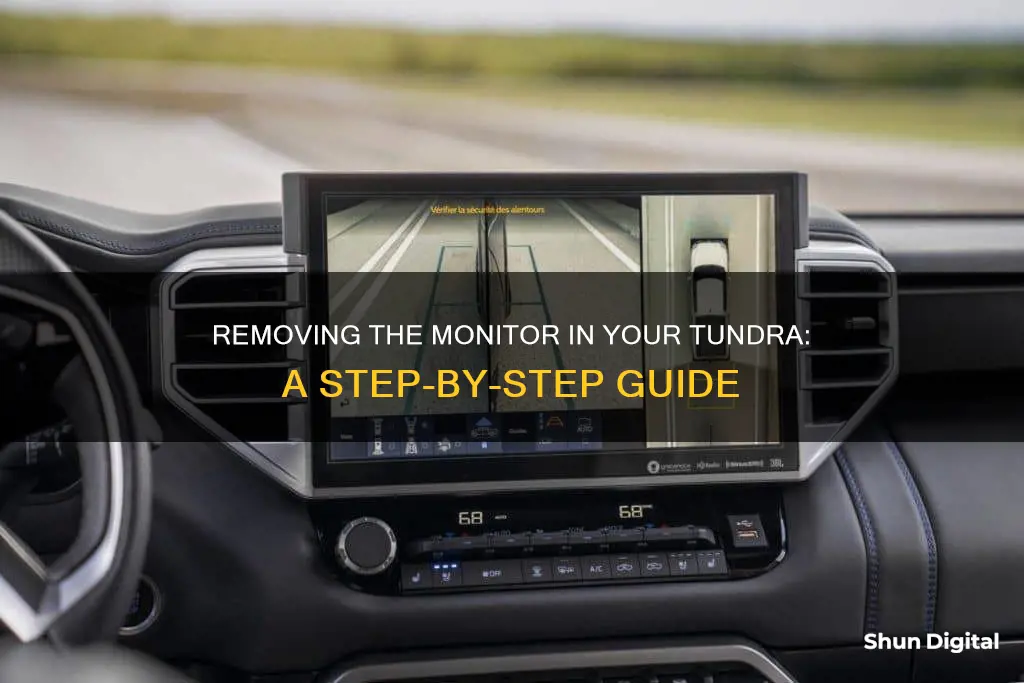
The Toyota Tundra is a pickup truck that comes equipped with an interior overhead console. This console includes a sunglasses holder, a business card holder, and a dome light. If you're planning to make modifications to your Tundra's interior, such as installing a backup camera or a headliner-mounted DVD player, removing the overhead console is a necessary step. The process is straightforward and can be completed in about 15 minutes with the right tools. It involves disconnecting the negative battery cable, prying off the dome light lens, removing screws, and unplugging the wiring harness. Similarly, you can also remove the center console by locating and unscrewing the bolts and fasteners.
| Characteristics | Values |
|---|---|
| Vehicle | Toyota Tundra |
| Model Year | 2002, 2010, 2014-2021 |
| Part Being Removed | Overhead Console, Center Console |
| Reason for Removal | Installing a backup camera system, headliner-mounted DVD player, running wires for a brake controller, cleaning and removing stains |
| Tools Required | Pliers, Plastic/Nylon Trim Removal Tool, Small Flat Head Screwdriver, Straight Pick Tool, T-20 Torx Screwdriver |
| Steps | Disconnect negative battery cable, pry off dome light lens, bend back metal tabs, remove screws, open and unscrew compartments, pull down and push forward to unhook console, unplug wiring harness |
What You'll Learn
- Removing the overhead console: disconnect the negative battery cable, then the electrical harness
- Removing the centre console: lift the cup holder section, then the entire cup holder assembly
- Removing the fasteners: locate the two fasteners at the front of the console, near the floorboard
- Removing the map light lens: use a plastic tool to pry off each corner of the lens
- Removing the sunglass holder: open the holder and remove two screws with a T-20 Torx screwdriver

Removing the overhead console: disconnect the negative battery cable, then the electrical harness
To remove the overhead console in your Tundra, you'll first need to disconnect the negative battery cable with a pair of pliers. This step is important for your safety as the overhead console has an electrical harness attached.
Now, we can begin removing the console. First, use a plastic or nylon trim removal tool to pry off each corner of the dome light lens. Insert the tool into the small slots in each corner, and then pull the dome light lens down to remove it.
Next, use a small flat-head screwdriver or a straight pick tool to bend back the metal tabs behind the dome light lens. Behind these tabs, you'll find two screws. Remove these screws with a T-20 Torx screwdriver.
Then, open the two compartments closest to the windshield, the business card holder, and the sunglasses holder. Inside each compartment, there are two more T-20 screws that need to be removed with the T-20 Torx screwdriver.
At this point, you can grasp the rear part of the overhead console. Pull it down a few inches, and then push it forward to unhook the front clips. Lower the console a few more inches, and finally, unplug the wiring harness to completely remove it from the Tundra.
And that's it! You've successfully removed the overhead console in your Tundra. This process should only take around 15 minutes with the right tools.
Get Rid of Insects in Your Monitor
You may want to see also

Removing the centre console: lift the cup holder section, then the entire cup holder assembly
To remove the centre console, you must first lift the cup holder section. There are no screws holding this in place, so simply lift it from the back, by the courtesy light. Pull the cup holder section up and then back, and it will come away.
Next, you will see a plastic Phillips-head screw holding the silver shifter section in place. Remove this screw. There are also two 10mm bolts holding the front of the console to the centre shifter section. Remove these, and the entire cup holder assembly will now be free.
Now, you can lift the centre console right out.
Blind Spot Monitor Placement: Nissan's Interior Design Choice
You may want to see also

Removing the fasteners: locate the two fasteners at the front of the console, near the floorboard
Removing the fasteners can be a tricky process, but it is essential to do it correctly to avoid damaging your Tundra's console. Here is a detailed guide to help you through the process:
Locate the Fasteners:
Begin by identifying the two fasteners at the front of the console, near the floorboard. These fasteners are crucial for holding the console securely in place, but they will need to be removed to access the monitor.
Understand the Fastener Type:
Before attempting to remove the fasteners, it is important to identify their type. Different types of fasteners will have distinct removal processes. The most common types are push-type, screw-type, or clipped-type fasteners.
Gather the Right Tools:
Ensure you have the appropriate tools on hand for the job. Flathead screwdrivers, flat putty knives, or specialized trimming tools are excellent choices for removing plastic fasteners. If you are dealing with a plastic screw, make sure to have a screwdriver with a matching drive tip for smooth removal.
Removing Push-Type Fasteners:
If the fasteners are of the push-type variety, start by gently prying the head of the fastener with a flathead screwdriver or a similar flat and sturdy tool. If there is a center pin, lift that out first to make it easier to remove the rest of the fastener. Be gentle and careful during this process to avoid damaging the plastic.
Removing Screw-Type Fasteners:
For screw-type fasteners, select the appropriate screwdriver for the specific type of screw. Turn the screw counterclockwise to release it from the setting. If the screw is stubborn and reluctant to move, you can gently increase the pressure. Again, be cautious not to apply too much force, as this may break the fastener, making it difficult to remove the broken parts from the setting.
Removing Clips and Clamps:
In the case of clips and clamps, the process is slightly different. Simply pry apart the non-connected ends of the clip and pull it away. Be careful not to pull the ends too far apart, as this can put excessive pressure on the hinge, potentially causing it to break or bend.
By following these steps and choosing the correct method for your fastener type, you will be able to successfully remove the fasteners and access the monitor in your Tundra. Remember to work carefully and methodically to avoid any damage to your vehicle's interior.
LCD Monitors: Understanding Their Most Accurate Statement
You may want to see also

Removing the map light lens: use a plastic tool to pry off each corner of the lens
To remove the map light lens, you'll need to use a plastic tool or a thin, non-metallic object. Here's a step-by-step guide:
- Before starting, turn off your vehicle to avoid any accidental button presses or touchscreen interactions during the removal process.
- Gently wipe the surface of the lens and the surrounding area with a soft microfiber cloth to remove any dust or debris. This will ensure a smooth and lint-free removal process.
- Identify the corners of the map light lens. You will be prying at these corners to remove the lens.
- Carefully insert the plastic tool or thin, non-metallic object under one corner of the lens. Be gentle and avoid applying too much pressure, as you don't want to scratch the lens or the surrounding area.
- Gently pry and lift the corner of the lens with a slight upward motion. You may need to wiggle the tool a little to loosen the lens.
- Once you've successfully lifted one corner, move to the next corner and repeat the process. Work your way around the lens, lifting each corner gently.
- As you lift each corner, the lens should start to come loose. Continue prying slowly and steadily, working your way around the lens. Avoid using excessive force, as you don't want to damage the lens or the surrounding area.
- If necessary, use a hairdryer set to a low or medium heat setting to warm up the adhesive around the lens gently. This will help loosen the adhesive and make the lens removal process easier. Be careful not to overheat the area, as you don't want to damage any surrounding components.
- Once you have lifted and loosened all corners of the lens, slowly and carefully peel away the lens from the overhead console. Again, avoid using excessive force to prevent damage.
- After removing the lens, use a microfiber cloth and a small amount of lens cleaning solution to gently wipe away any remaining adhesive or residue from the overhead console and the lens itself.
By following these steps, you will be able to safely remove the map light lens in your Tundra. Remember to work slowly and gently to avoid any damage to the lens or surrounding components.
Hooking Up Monitors: The Right Card for the Job
You may want to see also

Removing the sunglass holder: open the holder and remove two screws with a T-20 Torx screwdriver
Removing the sunglass holder from your Tundra's overhead console is a simple task that can be done in just a few steps. Here's a detailed guide to help you through the process:
Step 1: Open the Sunglass Holder
Start by opening the sunglass holder, which is typically located in the overhead console of your Tundra. This will expose the interior of the compartment and give you access to the screws that need to be removed.
Step 2: Gather Your Tools
For this step, you'll need a T-20 Torx screwdriver. The T-20 size is important, as it is specifically designed to fit the screws in the sunglass holder. Ensure you have the correct size to avoid damaging the screws or the compartment.
Step 3: Remove the Two Screws
With the T-20 Torx screwdriver in hand, locate the two screws inside the sunglass holder. These screws are what secure the holder to the overhead console. Turn them counterclockwise with your screwdriver to loosen and remove them. Place the screws in a safe place so you don't lose them.
Step 4: Detach the Sunglass Holder
Once the screws are removed, you can carefully detach the sunglass holder from the overhead console. It may require a gentle pull to detach it completely, but be careful not to apply excessive force.
By following these steps, you can efficiently and safely remove the sunglass holder from your Tundra's overhead console. Remember to handle the components with care and ensure you have the correct tools before beginning the process.
If you're planning to reinstall the sunglass holder or attach a new one, make sure to keep the screws in a safe place and follow the installation instructions carefully.
Finding Your Monitor's OSD: A Quick Guide
You may want to see also


