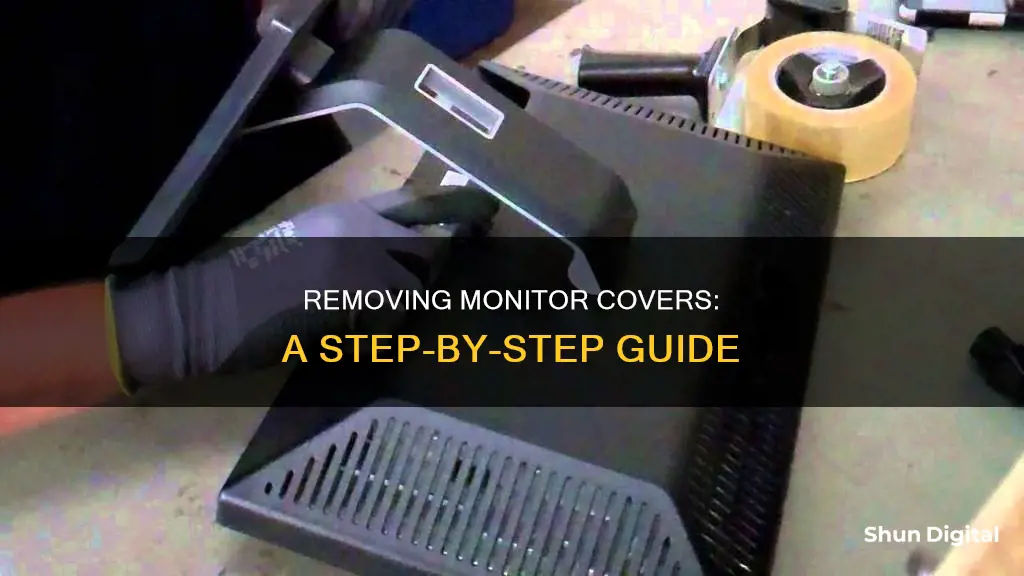
Removing the cover of a monitor can be a tricky task, and it is important to proceed with caution to avoid damaging the device. While some people choose to remove the plastic cover from their monitor, others prefer to leave it on for protection against dust and scratches. In some cases, the plastic cover may be necessary to remove in order to access the internal components of the monitor for repairs or modifications. When removing the back cover of a monitor, it is important to first remove all visible screws and then carefully pry the cover open using a flat tool such as a guitar pick or a flathead screwdriver wrapped in cloth to avoid scratching the surface.
What You'll Learn

Removing the back cover of a monitor
Step 1: Prepare Your Workspace
Before you begin, gather the necessary tools, such as a screwdriver, and create a safe workspace. Place the monitor on a flat, cushioned surface to protect the screen from any potential damage. Ensure you have unplugged the monitor and given it some time to discharge any residual power.
Step 2: Remove Visible Screws
Start by removing any visible screws at the back of the monitor. Carefully set the screws aside to avoid misplacing them. In some cases, there may be hidden screws behind pads or other components, so be sure to check thoroughly.
Step 3: Pry Open the Cover
Once the screws are removed, use a thin, flat tool, such as a guitar pick or a flathead screwdriver wrapped in cloth or tape, to gently pry the back cover away from the monitor. Work your way around the seams of the monitor, slowly prying bit by bit to avoid applying too much force in one area. Be cautious not to damage the internal components or plastic covers.
Step 4: Decouple Internal Latches
Most monitors have internal plastic latches that hold the front and back covers together. Using your thin, flat tool, carefully wedge it between the covers to decouple these latches. Follow the line around the monitor, slowly working your way through each latch. This step requires patience and a gentle touch to avoid scratching or breaking the plastic.
Step 5: Separate the Covers
After decoupling the internal latches, you should now be able to separate the back cover from the front. Carefully lift and remove the back cover. If you need to remove the stand, you can now do so by unscrewing it.
Step 6: Reassembly
When you are finished with your repairs or adjustments, remember to carefully snap the covers back together. Ensure that all screws are tightened, and any pads or components are properly placed before plugging the monitor back in and turning it on.
It is important to note that different monitor models may have unique designs and requirements for disassembly. Always refer to the manufacturer's instructions or seek model-specific guidance if available.
Removing the Base of an ASUS Monitor: A Step-by-Step Guide
You may want to see also

Removing the front cover of a monitor
Step 1: Prepare Your Workspace
Before beginning, ensure you have a clean, flat surface to work on. It is recommended to place a soft cloth or cushion on the surface to prevent scratches or damage to the monitor. Gather the necessary tools, such as a screwdriver, plastic tools (e.g., guitar pick or thin plastic card), and any other items suggested by your monitor's manual.
Step 2: Remove External Components
If your monitor has any external components attached, such as stands or mounts, carefully remove them according to the manufacturer's instructions. This may involve unscrewing or detaching specific parts. Make sure to keep track of any screws or small parts removed during this process.
Step 3: Locate and Remove Screws
Identify the screws holding the front cover in place. These are typically located along the edges or at the back of the monitor. Carefully unscrew and remove them, placing them in a safe location to avoid misplacing them.
Step 4: Separate the Front and Back Panels
Use a plastic tool, such as a guitar pick or thin plastic card, to gently pry the front cover away from the back panel. Start from one corner and slowly work your way around the edges. Be careful not to apply too much force, as this can damage the internal latches or scratch the screen. If necessary, use soft cloth or tape around your tool to prevent scratches.
Step 5: Lift and Remove the Front Cover
Once you have successfully separated the front and back panels, carefully lift and remove the front cover. Be mindful of any cables or components that may be attached to the cover. Place the cover in a safe location, ensuring it is protected from scratches or damage.
Step 6: Access Internal Components
With the front cover removed, you will now have access to the internal components of the monitor. Proceed with your intended task, such as cleaning the screen or repairing/replacing parts.
Step 7: Reassemble the Monitor
When you have completed your task, carefully reassemble the monitor by following these steps in reverse. Ensure all screws are tightened securely and that the front cover is properly aligned and attached before powering on the monitor.
It is important to note that different monitor models may have unique designs and requirements for disassembly. Always refer to your monitor's manual or seek guidance from the manufacturer if you are unsure about any steps. Additionally, exercise caution when working with electronic devices to avoid damage or injury.
Removing Acer Monitor Base: A Step-by-Step Guide
You may want to see also

How to remove a monitor's plastic cover
It is common for new monitors to come with a plastic cover or film that needs to be removed before use. This cover is to protect the screen during shipping and is not meant to be a permanent fixture.
To remove the plastic cover, start by peeling it off slowly. If you notice air bubbles, it is definitely a protective cover that can be peeled off. However, be careful not to peel off any polarizers, as these should not be removed. If you are unsure, contact the manufacturer for clarification.
If you are trying to remove the back cover of the monitor, the process may be more complicated. First, place the monitor on a flat, cushioned surface to avoid damaging the screen. Remove all the screws from the back of the monitor. Then, use your fingernails, a guitar pick, or a flat-head screwdriver wrapped in cloth or tape to pry the front and back apart. Work your way around the seams of the monitor, forcing the tabs apart one at a time. Be careful not to force only one side, as this can result in broken tabs and dents on the plastic.
For specific models, you can search for disassembly videos on YouTube or look for a service manual from the manufacturer.
Removing Android Monitor: A Step-by-Step Guide
You may want to see also

Removing a monitor's protective film
When you buy a new monitor, it often comes with a protective plastic film covering the screen. This film is meant to protect the monitor during shipping and is not intended to be a permanent screen protector. While it is not necessary to remove the film, some people choose to do so for aesthetic reasons or because it can start to look worn and collect dust over time.
If you decide to remove the protective film from your monitor, it is important to exercise caution to avoid damaging the screen. Here is a step-by-step guide on how to safely remove the protective film:
- Begin by inspecting the monitor to ensure that the film is meant to be removed. Look for signs such as air bubbles or peeling corners, which indicate that the film is intended to be peeled off.
- Gather the necessary tools. You may need a flathead screwdriver, guitar pick, or your fingernails to gently pry the film away from the screen. It is recommended to wrap any sharp tools in a layer of cloth or tape to avoid scratching the screen.
- Work slowly and carefully. Start peeling the film away from the screen at a corner or edge, taking care not to apply too much force.
- Once you have lifted a small portion of the film, continue peeling it back slowly and steadily, ensuring that you are only removing the protective film and not any other layers.
- If you encounter resistance or the film seems difficult to remove, stop and re-evaluate. It is possible that the film is not meant to be removed or that you have encountered a particularly sticky area. Try using a hairdryer on low heat to gently warm the film, which can make it more pliable and easier to remove.
- After removing the film, inspect the screen for any remaining adhesive residue. If necessary, use a soft, slightly damp cloth to gently wipe down the screen and remove any residue.
It is important to note that some monitors have an anti-reflective film attached to the screen, which should not be removed. Always check with the manufacturer's instructions or support services before removing any film from your monitor to avoid causing damage.
Understanding Chrome's Energy Usage: A Task Monitor's Perspective
You may want to see also

Dismantling a monitor
- Disconnect the power cable and any peripherals connected to the monitor. Place the monitor screen-side down on a soft cloth on a stable surface.
- If your monitor has a stand, disconnect it. The stand may be screwed into the base or snapped in with plastic tabs. Use the appropriate tool or method for your model.
- Remove all the screws fastening the back panel to the front panel. These screws are typically located around the perimeter and in the middle of the back panel.
- Use a flat-head screwdriver to gently pry up the tabs on the shield lamp. Lift the shield lamp away from the monitor.
- Gently pull on the cables on the left and right sides of the monitor to remove them from their sockets.
- Lift the shield away from the panel and disconnect any remaining cables, such as the LVDS cable.
- You should now be able to lift the LCD panel away from the frame. If you are working with a CRT monitor, additional steps may be required, such as discharging the capacitor and cutting ground wires.
- Continue to remove screws and disconnect cables from the inner back panel.
- Remove any remaining screws on the side of the inner back panel and carefully separate the back of the monitor from the front.
It is important to note that the steps may vary depending on the make and model of your monitor. Always refer to manufacturer guidelines or seek expert advice if you are unsure about any part of the dismantling process.
Finding Monitor Information in the Windows Registry
You may want to see also
Frequently asked questions
If your monitor has a plastic cover, it is most likely a protective film that can be peeled off. However, it is important to be cautious as some monitors have a plastic cover that is not meant to be removed. It is recommended to check with the manufacturer or refer to the user manual before attempting to remove any plastic coverings.
Removing the back cover of a monitor can be tricky and may require prying it open with a tool. It is important to be cautious as you can easily damage the monitor. Before attempting to remove the back cover, make sure to unplug the monitor and place it on a flat, cushioned surface to avoid scratching or breaking the screen. Start by removing any visible screws, then use a thin, flat tool wrapped in cloth or tape to gently pry the cover open. Work your way around the seams of the monitor, releasing the tabs that hold the front and back covers together.
If you accidentally damage your monitor while attempting to remove the cover, it is recommended to contact the manufacturer or a professional technician for repair advice. Do not attempt to repair the monitor yourself as you may cause further damage.


