Background noise can be a real nuisance, especially when you're trying to record audio or video content. Luckily, there are several ways to reduce or eliminate it, both during recording and after.
Before recording, you can try to find a quiet space, turn off any noisy appliances, and ensure your microphone is set up correctly. During recording, you can use noise reduction software or features built into the platform you're using, such as Zoom, Google Meet, or Discord. After recording, you can use audio editing software to remove background noise.
Let's dive into the details and explore the best practices for removing mic background noise during camera recording.
What You'll Learn

Use a noise-cancelling microphone
Using a noise-cancelling microphone is a great way to reduce background noise. This is a critical piece of equipment for sound quality as it addresses sound issues at the source. Investing in a good-quality, noise-cancelling microphone will ensure your voice is clear and crisp, and background noise is minimised.
There are several types of microphones to choose from, each with their own benefits. Dynamic microphones, for example, are less sensitive than condenser microphones and are therefore better suited to noisy environments. Using a dynamic microphone will increase your speech-to-noise ratio.
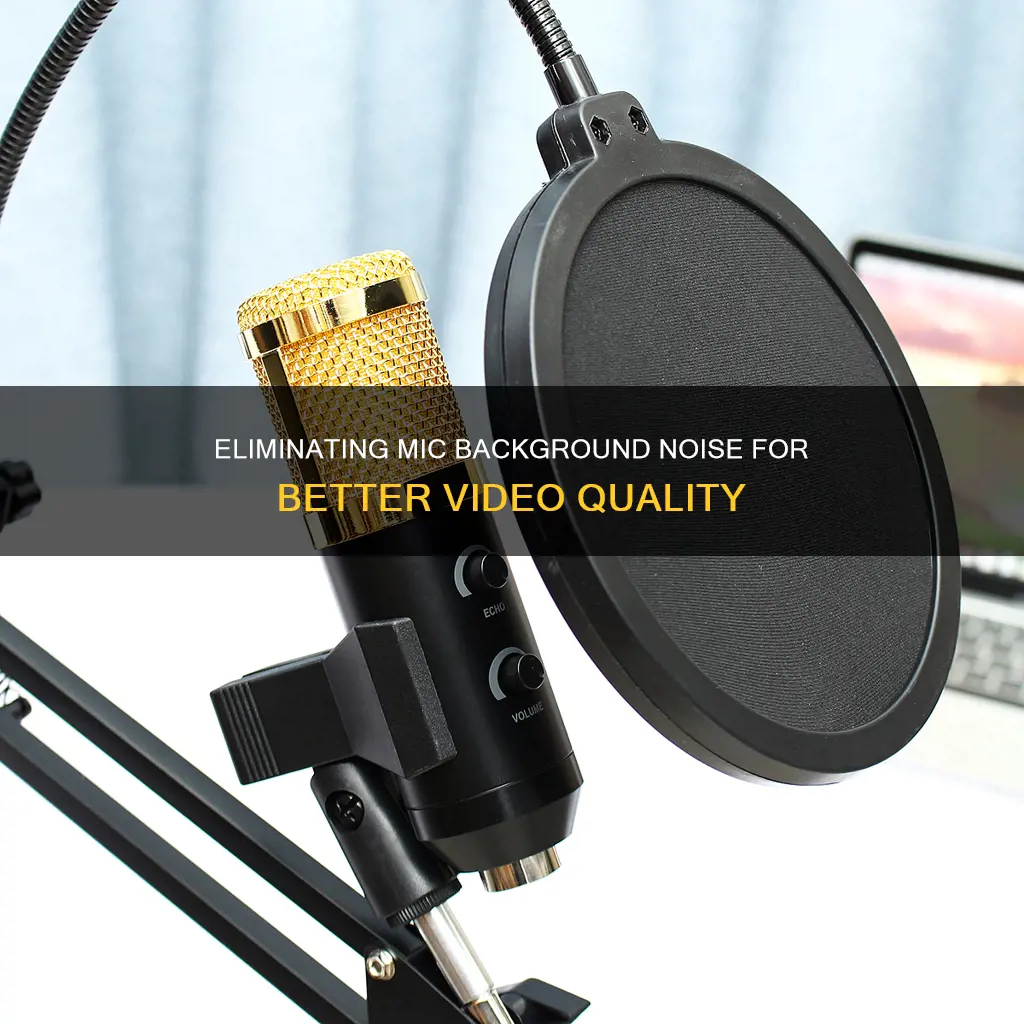
Additionally, you can opt for a microphone with a built-in pop filter. A pop filter is a thin membrane of fabric that blocks the popping sounds created by certain consonants (plosives, like the "p" sound). This is particularly useful if you are speaking close to the microphone.
You can also invest in a shock mount for your microphone. A shock mount will protect your recording from any noise caused by vibrations and is especially useful if you are recording in a busy environment with lots of footfall.
When setting up your microphone, try to find the quietest space possible. If you are recording at home, a clothes closet is a good option as the hanging clothes will help to absorb sound. You can also try recording in a carpeted room as carpets absorb more noise than hard floors. Be sure to close any windows and doors to help keep ambient noise to a minimum.
If you are recording on a laptop or desktop computer, you can also adjust the microphone settings to reduce background noise. Go to the "Levels" tab in the "Properties" section of your microphone settings and turn the dial on the microphone boost all the way down.
Joe Jonas' Doorbell Camera: What Did He See?
You may want to see also

Record in a quiet room
Recording in a quiet room is one of the most effective ways to reduce background noise. Here are some tips to create a quiet recording environment:
- Choose a quiet room: Select a room with minimal external noise, such as a room without windows or a closet where hanging clothes can help absorb sound.
- Close doors and windows: Keep doors and windows closed to prevent outside noise from entering the recording space.
- Use a carpeted room: Carpets can help absorb noise, reducing sound reflections and echoes.
- Turn off electrical appliances: Appliances such as fans, air conditioners, and televisions can create unwanted noise, so it's best to turn them off during recording.
- Inform others: If you're recording at home, let your family or roommates know about your recording schedule so they can minimise noise.
- Opt for a room with fewer hard surfaces: Hard surfaces can reflect sound and cause echoes, so choose a room with softer furnishings or use blankets to cover reflective surfaces.
- Soundproof the room: Consider using soundproofing materials such as acoustic panels or foam to reduce noise reflections and create a more controlled recording environment.
- Choose a quiet time: Be mindful of external noise sources, such as traffic or construction, and schedule your recording sessions during quieter times of the day.
- Use a microphone with noise cancellation: Some microphones have built-in noise cancellation features, which can help reduce background noise.
Remember, combining multiple techniques will help you achieve the best results. By creating a quiet recording environment and using the right equipment, you can significantly reduce background noise and improve the quality of your recordings.
Capturing Joy: My Smile for the Camera
You may want to see also

Use a mic stand and a pop filter
Using a mic stand and a pop filter is an effective way to reduce unwanted noise and improve sound quality.
If you are using an external microphone for recording audio and video calls, a mic stand or something that works as a mic stand can help you avoid the buzzing sound from movement and bumps. You can purchase a cheap pop filter or make one yourself with a thin sock and a wire hanger.
A pop filter is a thin fabric membrane that blocks the popping sounds created by certain consonants (plosives, like the "p" sound). These gusts of air become more apparent when you are close to the microphone. Clip a pop filter to your mic stand so that it hovers right between you and your mic.
You can also use a shock mount mic clip, particularly for condenser microphones. This lets your mic hover just off the stand, eliminating certain creaky sounds that might happen without a clip.
Where are the XF Camera Crews?
You may want to see also

Use high-pass and low-pass filters
High-pass and low-pass filters are a great way to reduce background noise and give your mix clarity. They are a specific application of EQ-ing, which shapes sounds by either reducing or boosting certain frequency regions.
High-Pass Filters
High-pass filters remove low-frequency sounds from an audio signal, allowing high-frequency signals to pass through. They are used to clean up woofy signals and tighten up arrangements. They are also used to:
- Remove low-end rumble
- Unmask the low end
- Tighten up the low end
- Remove extraneous low frequencies
- Remove environmental noise
- Remove handling noise
- Isolate sound sources
- Shape tone for mix clarity
- Increase gain before feedback
- Optimise headroom
- Set speaker crossover
Low-Pass Filters
Low-pass filters, on the other hand, let through frequencies below a certain cutoff point, while attenuating frequencies above that point. They are used to:
- Remove high-end noise
- Remove frequencies introduced by saturation
- Isolate specific elements from a loop
When using high-pass and low-pass filters, it is important to remember that they can be overused, leading to disastrous results. Subtle, intentional moves are often more effective than heavy-handed filtering.
Understanding the Vibrating Camera Symbol on Your Apple Watch
You may want to see also

Use noise-cancelling software
If you're looking to remove background noise from your recordings, there are several software options available to you. Many of these tools use AI to identify and remove unwanted sounds, leaving you with clear and crisp audio. Here are some of the most popular noise-cancelling software options:
- Krisp: Krisp is a free online tool that removes background noise from your recordings, leaving only the human voice. It integrates seamlessly with any communication and recording app that allows you to change audio settings and select your microphone. Krisp works with any microphone or headset and can help you achieve studio-like audio quality at home.
- CrumplePop: CrumplePop's noise-cancelling software automatically reduces background noise and other unwanted sounds. It uses AI technology to identify and suppress noise, including wind, plosive sounds, rustling, and traffic. CrumplePop's tools are easy to use and can be applied directly within your DAW.
- Audacity: Audacity is a free and open-source audio editor that allows you to record and edit audio. It has a Noise Reduction Tool that can help you improve the quality of your recordings by removing background noise.
- Captions: Captions is an AI-powered creative studio for recording and editing audio and video content. It offers a feature called "Denoise" that automatically removes background noise and echoes, balances voice volume, and enhances speech quality.
- Descript: Descript is another AI-powered platform that offers a feature called "Studio Sound". Studio Sound enhances voices while reducing and removing background noise, room echo, and other unwanted sounds. It uses AI and machine learning to improve the quality of your recordings.
- Zoom: Zoom has a built-in background noise suppression feature that can be enabled in the settings. This feature helps to suppress intermittent background noise and echo, improving the audio quality of your recordings.
- Discord: Discord also has a built-in noise suppression feature that can be enabled in the Voice & Video settings. This feature helps to reduce background noise during your calls, improving the clarity of your audio.
These software tools can be incredibly useful if you're looking to improve the quality of your recordings by removing unwanted background noise. They offer various features and integration options, so you can choose the one that best suits your needs and preferences.
Accessing Street Camera Footage: A Step-by-Step Guide
You may want to see also
Frequently asked questions
There are four main types of background noise: broadband noise, narrowband noise, impulse noise, and irregular noise.
Try to block out the noise during the recording process. Use a noise-cancelling microphone, find a quiet room, and stabilise your mic with a stand or tripod.
If you are using a Windows OS, go to "Hardware and Sound" in the Control Panel. Then, select "Sound" and go to the "Recording" section. Right-click on the microphone bar and go to "Properties". In the "Levels" tab, adjust the "Microphone Boost" tool to reduce background noise.
Audacity is a free, open-source audio editor software for Windows 10 that allows you to apply noise reduction and other effects to improve audio quality.
Krisp is a noise-cancelling app that uses AI to recognise and remove unwanted sounds from your recordings.


