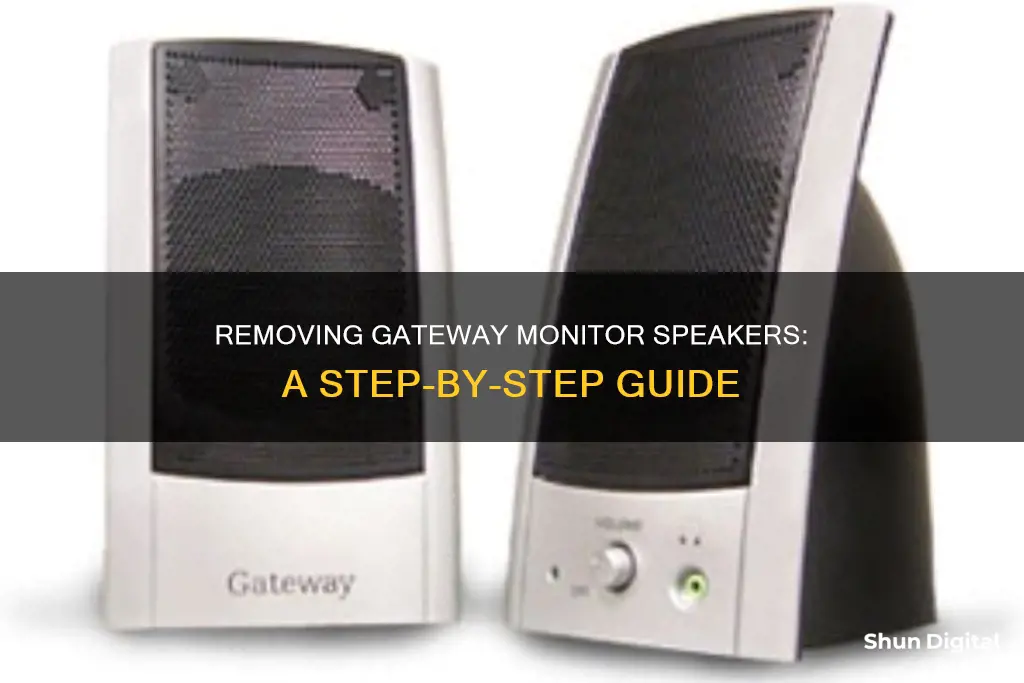
The Gateway MultiMedia USB Flat Panel LCD Monitor Speaker Bar System is a set of speakers that can be attached to certain Gateway monitors. The speaker bar is turned on by a volume knob on its front and has a 6-foot-long cable with a line in (green connector), mic in (pink connector), and a USB connector. The speaker bar can be mounted onto the bottom rear of the monitor using threaded holes and mounting screws. To remove the speaker bar, you would likely need to detach the mounting screws and disconnect the cable.
What You'll Learn

Power off the monitor and disconnect the cables
To remove your Gateway monitor speaker, it is important to first power off the monitor and disconnect the cables. This will ensure a safe disassembly and prevent any potential damage to the hardware. Here is a detailed, step-by-step guide to powering off the monitor and disconnecting the cables:
Begin by locating the power button on your Gateway monitor and press it to turn off the device. If you have a hard-to-reach power outlet or need to reach the back of the monitor, be sure to do so safely and consider using a power strip with a switch that is easier to access. Once the monitor is powered off, you can begin the process of disconnecting the cables.
The next step is to identify and disconnect the video cable that is connected to your PC. This cable is typically connected to the back of the monitor and may be a VGA, DVI, HDMI, or DisplayPort cable, depending on your setup. Gently pull the connector by gripping the head of the cable, not the cord, to avoid any damage to the cable or port.
After disconnecting the video cable, it is important to unplug the AC power cord from the LCD monitor. Again, be sure to grip the head of the connector and gently pull to disconnect. Now that the monitor is no longer receiving power, the next step is to disconnect the audio cable.
The audio cable is typically connected to the speaker bar and leads to the rear of the computer. Carefully disconnect this cable, again, by pulling the connector gently. At this point, all the cables connected to the monitor should be disconnected.
It is important to note that the cable connections may vary depending on the model of your Gateway monitor and speaker setup. If you are unsure about any of the connections, refer to the user manual or seek guidance from a professional.
Now that you have safely powered off the monitor and disconnected all the cables, you can proceed to the next steps of removing the Gateway monitor speaker. Remember to handle all components with care to avoid damage and keep track of the cables and connections for easier reassembly if needed.
Singapore's Best Places for Affordable Monitors
You may want to see also

Place the monitor on a soft towel to avoid scratches
When removing a Gateway monitor speaker, it is important to take precautions to avoid scratches on the device. One way to do this is to place the monitor on a soft towel. This will provide a cushioned surface that can help prevent scratches and other types of damage during the speaker removal process.
It is recommended to use a soft, microfiber cloth or towel, as this material is gentle on the monitor's surface and can effectively protect it from scratches. By placing the monitor on the towel, you create a barrier between the monitor and any hard surfaces it might come into contact with. This is especially important if you are working on a table or desk, as these surfaces can often be hard and unforgiving.
The soft towel provides a safe and scratch-free environment for your monitor. It is important to avoid using paper towels, toilet paper, tissue paper, rags, or clothing items such as shirts, as these materials can be too abrasive and cause scratches. By using a soft towel, you minimise the risk of accidental damage and ensure that your monitor remains in optimal condition.
Additionally, when placing the monitor on the towel, ensure that the screen is facing upwards to avoid putting pressure on the delicate screen. This will also give you easy access to the back of the monitor, where the speakers are usually located. By taking these precautions, you can effectively remove the Gateway monitor speaker while maintaining the condition and appearance of your monitor.
Overall, placing the monitor on a soft towel is a simple yet effective way to prevent scratches and maintain the quality of your device during the speaker removal process.
Stretched Resolution: Remove Black Bars for Immersive Viewing
You may want to see also

Disconnect the speaker bar from the monitor
To disconnect the speaker bar from your Gateway monitor, you will need to first power off both the computer and the monitor. Once they are turned off, you can then disconnect the video cable from the PC and unplug the AC power cord from the monitor.
Next, you will need to locate the audio cable that is connected to the speaker bar and disconnect it. This cable typically leads from the speaker bar to the rear of the computer. Once you have disconnected the audio cable, you can then safely remove the speaker bar from the monitor.
For Dell monitors, the speaker bar is typically attached to the bottom of the LCD screen. To remove it, place a large soft towel on a table or desk and lay the monitor face down to avoid scratching the screen. Grip the thin metal tab handle on the right side of the speaker bar and use your other hand to push the speaker bar slightly to the right. This will disengage the tab locks securing the speaker to the monitor. Continue sliding the speaker bar to the right until it is completely removed from the monitor.
If you are unable to locate a physical audio cable, your monitor may be transmitting audio through a USB or HDMI connection. In this case, you will need to disable the monitor speakers from the Windows sound control panel. Right-click the volume control icon in the taskbar and select "Playback Devices". Then, right-click the audio output corresponding to the monitor speakers and click "Disable".
Installing a New Monitor: Size Adaptation
You may want to see also

Remove the speaker bar by pushing it to the right
To remove the speaker bar by pushing it to the right, follow these steps:
First, power off your computer and monitor. Disconnect the video cable from the PC and unplug the AC power cord from the LCD monitor. Also, disconnect the audio cable from the speaker bar that leads to the rear of the computer. Place the monitor face down on a soft towel on a table or desk to avoid scratching the screen during the process.
Now, grip the thin metal tab handle on the right side of the speaker bar, where it attaches to the bottom of the LCD screen, using your right hand. Use your left hand to grip the far-left end of the speaker bar. Push the thin metal tab handle slightly inward while simultaneously using your left hand to push the speaker bar to the right.
After pushing the speaker bar slightly to the right, the tab locks securing the speaker to the monitor will disengage. Continue sliding the speaker bar to the right until you can completely remove it from the monitor.
With the speaker bar removed, you can now connect another pair of headphones or speakers to your computer as needed. Move your monitor back to your desk or work area, reconnect the monitor cable, and plug the AC power adapter cord back into the monitor. Finally, power on the monitor first, then the computer, and use your setup as usual.
Best Monitor Brand: Acer, Asus, or AOC?
You may want to see also

Connect another pair of headphones or speakers to the computer
To connect another pair of speakers or headphones to your computer, you will need to identify the type of connection your device uses. The most common connections are 3.5mm audio jacks, USB, HDMI, and Bluetooth.
For speakers or headphones with a standard 3.5mm audio jack, you can connect them to the corresponding audio port on your computer. The audio port is usually colour-coded green and is typically located on the back or side of your computer. If you are using a laptop, the audio port is often on the side.
If your device uses a USB connection, simply plug the USB cable into one of the available USB ports on your computer. USB ports are usually located on the back or sides of desktop computers, while laptops typically have USB ports on the sides.
For devices with an HDMI connection, such as a monitor with built-in speakers, you will need to connect the HDMI cable to the HDMI port on your computer. Ensure that the sound control panel is set up to have the default device as the HDMI port to receive audio through the monitor.
If your headphones or speakers support Bluetooth, you can connect them wirelessly to your computer. First, ensure that your computer has Bluetooth enabled. Then, put your device into pairing mode and locate it on your computer's Bluetooth settings to establish the connection.
Once you have connected your device, you may need to select it as the output device in your computer's sound settings. This will ensure that the audio plays through your chosen device.
Understanding Chrome's Energy Usage: A Task Monitor's Perspective
You may want to see also
Frequently asked questions
You need to find and unscrew the screws attaching the stand to the monitor. These may be hidden under a panel on the neck of the stand, or they may be accessible from the bottom of the stand.
First, power off the monitor and disconnect the video cable and AC power cord. Disconnect the audio cable from the speaker bar. Place the monitor face down on a soft towel to avoid scratching the screen. Grip the thin metal tab handle on the right side of the speaker bar and push it in slightly, then push the speaker bar to the right to disengage the tab locks. Continue sliding the speaker bar to the right until it is completely removed.
First, power off the monitor and disconnect the video cable and AC power cord. Disconnect the audio cable from the speaker bar. Place the monitor face down on a soft towel to avoid scratching the screen. Grip the thin metal tab handle on the right side of the speaker bar and push it in slightly, then push the speaker bar to the right to disengage the tab locks. Continue sliding the speaker bar to the right until it is completely removed.
The Gateway Speaker Bar is a USB-powered speaker bar with a line-in (green connector), mic in (pink connector), and USB connector. It fits Gateway monitor models FPD1975W, FPD1976W, FPD2275WH, FPD2275W, FPD1760, FPD1765, FPD1775A, FPD1960, FPD1965, FPD1975, and FPD1985A.


