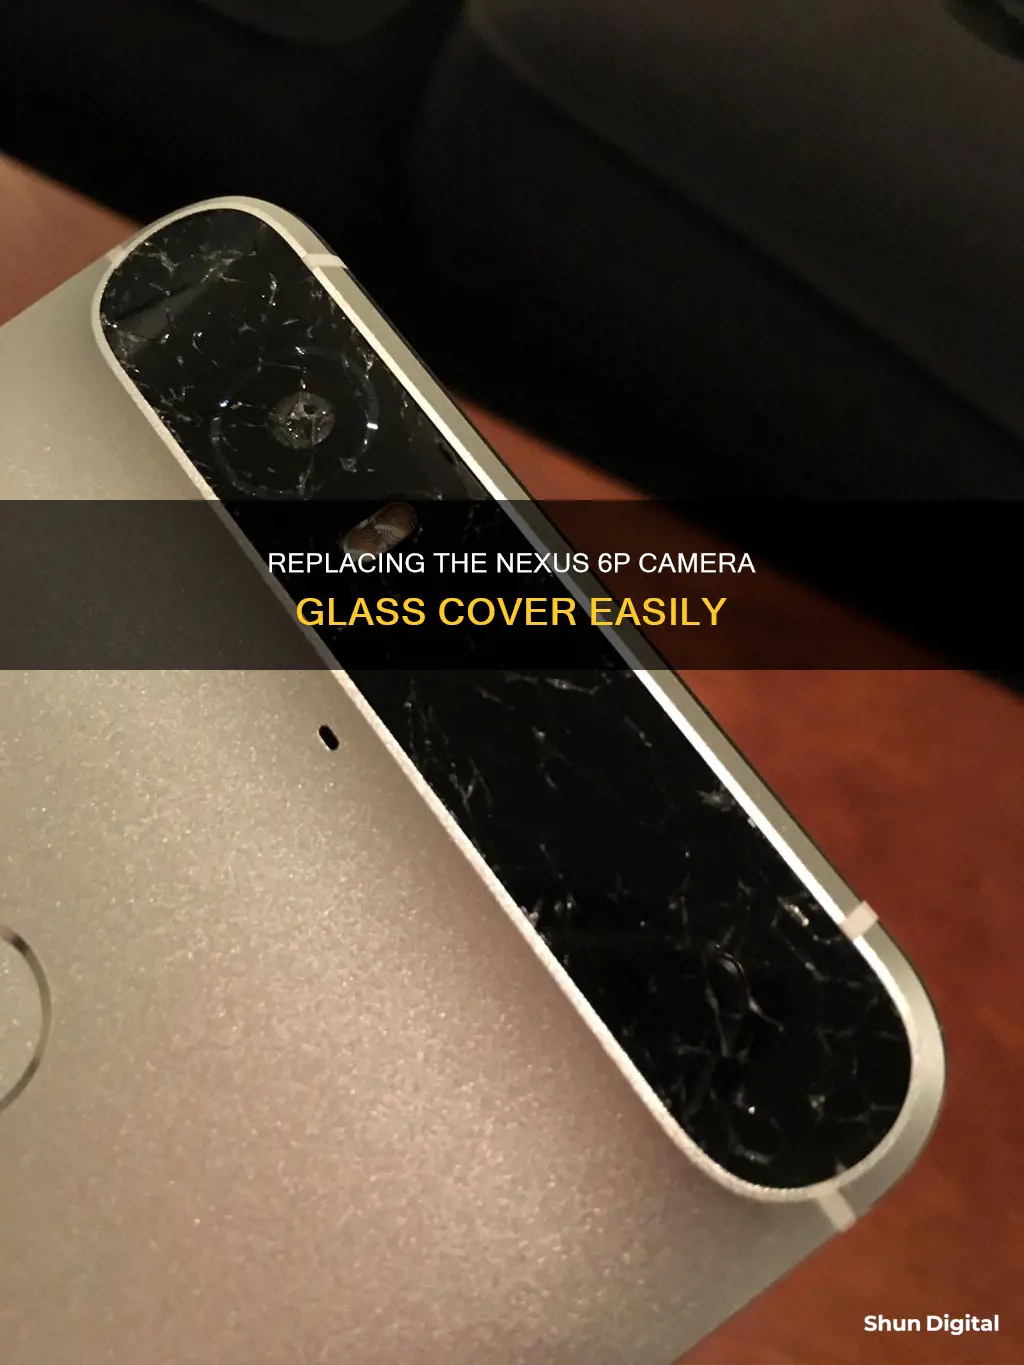
The Nexus 6P has a reputation for being difficult to repair, and the glass camera cover is no exception. The glass is fragile and glued down with strong adhesive, so removing it without breaking the glass can be challenging. To remove the glass cover, you'll need tools such as a heat gun or iOpener, a razor blade or knife, and gloves for safety. The process involves heating the adhesive to loosen its grip, carefully prying up the glass, and cutting the adhesive underneath. It's important to be cautious and patient throughout the process to avoid damaging the camera or other phone components.
| Characteristics | Values |
|---|---|
| Difficulty Level | Difficult and lengthy procedure |
| Tools Required | iOpener, heat gun, SIM card eject tool, knife, opening pick, razor blade, tweezers, gloves, protective glasses |
| Adhesive | Heavy-duty, extremely sticky |
| Glass | Extremely fragile |
What You'll Learn

Heat the glass with a heat gun
Heating the glass with a heat gun is an important step in removing the camera glass cover from your Nexus 6P. The adhesive underneath the glass cover is extremely sticky, and heating it will help loosen its grip. Here's a step-by-step guide on how to do it effectively:
Prepare Your Workspace:
Before you begin, ensure you have a heat gun and a temperature gauge to monitor the heat. It is also recommended to wear protective gear, such as safety glasses and gloves, as the glass may break during the process. Have a flat work surface ready and lay out all the tools you'll need, including a guitar pick, an opening pick, and a playing card.
Heat the Glass:
Set your heat gun to a temperature of around 400° F. Direct the hot air from the heat gun onto the glass for approximately 3 minutes. Keep the heat focused on the glass throughout the procedure to ensure the adhesive remains warm and pliable. Be careful not to overheat the area, as excessive heat can damage the camera's focus mechanism.
Apply Gentle Force:
While keeping the heat on the glass, use a guitar pick to gently slide under the cover. Start at one corner and work your way to the opposite corner. You can also use a playing card to apply slow, steady tension and help release the adhesive without causing damage.
Cut the Epoxy:
Once you have created an opening, use an Exacto knife or a similar tool to carefully cut through the epoxy or adhesive holding the glass cover in place. Work your way around the edges of the glass, being mindful not to apply too much force, which could result in cracking or breaking the glass.
Pry Up the Glass:
After cutting through the adhesive, gently pry up the glass cover using an opening pick or a thin blade. It is important to work slowly and carefully to avoid damage. If needed, reapply heat to ensure the adhesive remains warm and pliable.
Final Steps:
With the glass cover removed, you can now access the camera lens and battery for further repairs or replacements. Remember to clean any exposed areas and ensure no dust or debris remains before reassembling. When putting your device back together, apply new adhesive where necessary.
Heating the glass with a heat gun is a crucial step in successfully removing the Nexus 6P's camera glass cover. By following these steps and working carefully, you can effectively remove the glass without causing damage to your device.
Removing Camera Background in Lightstream: A Step-by-Step Guide
You may want to see also

Wear gloves to protect yourself
When removing the glass cover of your Nexus 6P camera, it is important to wear gloves to protect yourself. This is because the glass and plastic cover on the backside of the phone can easily break or bend during the repair process. By wearing gloves, you can protect your hands from cuts and injuries.
Additionally, gloves provide a barrier between your fingers and the phone's internal components, reducing the risk of leaving fingerprints or smudges on the lens or screen. This is especially important if you are repairing a device that is not your own, as it ensures the device is returned to its owner in pristine condition.
In some cases, gloves can also protect you from electrostatic discharge (ESD). While this is not a concern for all phone repairs, it is important to be aware of the potential risks and take appropriate precautions. Gloves can help prevent accidental damage to the phone's circuitry, ensuring a safer repair process.
Furthermore, wearing gloves can protect you from exposure to adhesives, solvents, and other chemicals used in phone repairs. Continued exposure to these substances can be harmful to your skin, and some chemicals are known to cause nerve damage. By wearing gloves, you can safeguard your health and create a physical barrier between your skin and these potentially hazardous materials.
Overall, wearing gloves during phone repairs is a simple yet effective way to protect yourself, maintain a clean device, and ensure a safer working environment.
Unlocking Your Action Camera: Removing Waterproof Housing
You may want to see also

Use a thin, sharp knife
To remove the camera glass cover from your Nexus 6P, you can use a thin, sharp knife. Here's a step-by-step guide on how to do it:
Step 1: Prepare the Necessary Tools and Safety Gear
Before you begin, make sure you have the following items ready: a thin, sharp knife (such as an X-Acto knife), protective gloves, and safety glasses. The adhesive in the Nexus 6P is extremely sticky, and the glass cover can easily break during this process, so it's important to take the necessary precautions.
Step 2: Loosen the Adhesive
Use an iOpener or a heat gun to loosen the adhesive underneath the glass cover. Apply heat for a few minutes to soften the adhesive, making it easier to remove the glass. Be careful not to overheat, as excessive heat can damage the camera mechanism.
Step 3: Insert the Knife
Once the adhesive is loosened, carefully insert the thin, sharp knife between the phone and the glass cover. Take your time and be gentle to avoid damaging the phone or injuring yourself. Work the knife around the edges of the glass cover to slowly pry it up.
Step 4: Use an Opening Pick
After you've created a gap with the knife, insert an opening pick. Slide the pick underneath the glass cover, being careful not to apply too much force, as the glass may break. Work the pick around the edges to cut through the adhesive.
Step 5: Remove the Glass Cover
Once you've cut through the adhesive, gently pry off the glass cover. It should come off with a gentle force. If there are any remaining adhesive residues, use a tool like a plastic card to carefully scrape them off without damaging the phone.
Step 6: Clean and Replace
After removing the glass cover, clean the exposed camera lens gently. If you plan to replace the glass cover, make sure to purchase a compatible replacement and apply new adhesive when installing it.
Remember to work carefully and slowly throughout the process to avoid any damage to your phone or injury to yourself.
WebOS TV: Built-in Camera Convenience?
You may want to see also

Be careful not to cut yourself or the phone
When removing the back cover of your Nexus 6P, it is important to be cautious and careful throughout the process to avoid any accidental cuts or damage to yourself or the phone. The knife you will be using to pry up the plastic and glass covers is extremely sharp, so it is crucial to handle it with care. Wear protective gear, such as gloves and glasses, to shield yourself from any potential harm.
To start, make sure you have the necessary tools, such as a SIM card eject tool, an iOpener, and a knife. Before inserting the knife, loosen the adhesive underneath the small plastic cover at the bottom of the phone using the iOpener. This will help create some space to work with. Once the adhesive is loosened, gently insert the knife between the phone and the plastic cover. Be cautious not to apply too much pressure or insert the knife too deeply, as you risk cutting yourself or damaging the internal components of the phone.
Slowly pry up the plastic cover with the knife until you create a gap large enough to insert an opening pick. This step requires patience and a gentle touch to avoid any accidental slips. Once the opening pick is inserted, slide it underneath the plastic cover to cut the adhesive. Repeat this process for the glass cover at the top of the phone, taking extra care as the glass may break. Always be mindful of the sharp knife and keep a safe distance from the blade during these steps.
After prying up the glass cover, you can proceed to insert the opening pick and cut the adhesive underneath. Throughout this process, remember to maintain a gentle touch and be cautious of the knife's sharp blade. It is important to work slowly and methodically to avoid any accidental cuts or damage to yourself or the phone. By taking your time and being careful, you can successfully remove the back cover of your Nexus 6P without causing any harm.
Simplisafe Cameras: Watching or Not?
You may want to see also

Insert an opening pick to cut the adhesive
To remove the back cover of a Nexus 6P smartphone, you'll need to cut the adhesive underneath the glass cover. Here's a detailed guide on how to do this:
Before starting, ensure you're wearing protective gloves and glasses. The glass may break during this process, so it's important to take the necessary safety precautions.
First, use a knife to pry up the glass cover. Be extremely careful not to cut yourself or your phone. Once you've created a gap between the phone and the glass cover, it's time to insert the opening pick.
Slide the opening pick underneath the glass cover. You may need to use an iOpener to loosen the adhesive first. Work the pick underneath the cover until you reach the adhesive. Then, use the pick to cut the adhesive.
It's important to note that the adhesive in the Nexus 6P is extremely sticky, so this process may take some time and patience. If you're having trouble, try reheating the adhesive with an iOpener or a similar tool to soften it.
Once you've cut the adhesive, you can continue with the rest of the steps to remove the back cover. Remember to follow the instructions carefully to avoid damaging your phone. When reassembling, apply new adhesive where necessary.
If you're uncomfortable performing this procedure yourself, consider seeking the help of a professional or a repair service.
Westinghouse Smart TV: Camera and Microphone Features Explained
You may want to see also
Frequently asked questions
Removing the camera glass cover from a Nexus 6P can be a difficult and lengthy procedure. The glass is fragile and glued down with strong adhesive. It is recommended that you use a heat gun to heat up the adhesive and wear gloves in case the glass breaks. You will also need a very thin, sharp knife or razor blade to fit into the gap between the glass and the phone case.
You will need a heat gun or similar tool, protective gloves, and eye protection in case the glass breaks. You will also need a sharp knife or razor blade to fit into the gap between the glass and the phone case. It is recommended that you use an opening pick to cut the adhesive and pry up the glass.
The adhesive underneath the Nexus 6P camera glass cover is very strong, so it is recommended that you use a heat gun to heat it up and loosen it. You can also use an iOpener to loosen the adhesive, but this may not be as effective. Once the adhesive is loosened, use a knife or opening pick to cut it and pry up the glass.
If you damage the camera while removing the glass cover, you may need to purchase a replacement camera. These can be found on eBay or Amazon. You can also try to fix the camera by reseating the connection or polishing the lens.


