Bubbles on your monitor can be frustrating, but there are a few ways to get rid of them. If the bubbles are under a screen protector, you can try removing and reapplying it, using a smoothing tool, or applying a small amount of heat with a hairdryer. If the bubbles are caused by dirt or dust, you can try using sticky tape to remove the particles. If the bubbles are due to delamination of the glass layers, then the only solution is to replace the monitor.
How to remove bubbles from your monitor
| Characteristics | Values |
|---|---|
| Cause of bubbles | Improper application, microscopic dust, debris, oil from fingertips, pressure on the screen |
| Prevention | Apply the screen protector in a clean space, take time to align the screen protector |
| Removal | Push bubbles out with a plastic card, use lubricating liquid, use a hair dryer |
What You'll Learn

Clean your screen with a lint-free cloth and alcohol pad
To clean your screen with a lint-free cloth and alcohol pad, start by turning off your monitor or unplugging your laptop. It is important to ensure that your device is not in use when cleaning the screen to avoid permanent damage.
Next, dampen a corner of a lint-free or microfiber cloth with an alcohol-based solution. If your screen protector came with alcohol pads, you can use one of those. If not, you can use a small amount of rubbing alcohol or a screen-cleaning spray. Avoidsection-end=
Avoid using large amounts of liquid, and never spray the screen directly. Instead, spray the cleaning solution onto the cloth.
Afterward, gently wipe the cloth across the screen, using tight, overlapping "Z" strokes from the top of the screen to the bottom. Ensure you apply gentle and consistent pressure to avoid pressing too hard, which could damage the monitor.
Finally, use a dry corner of the cloth or a different lint-free cloth to dry the screen completely. This step will help buff away any remaining lint or residue.
By following these steps, you can effectively clean your screen and remove any dust, fingerprints, or smudges while also reducing the risk of bubbles forming under your screen protector.
Monitoring GPU Performance: FPS, Temps, and Usage During Gameplay
You may want to see also

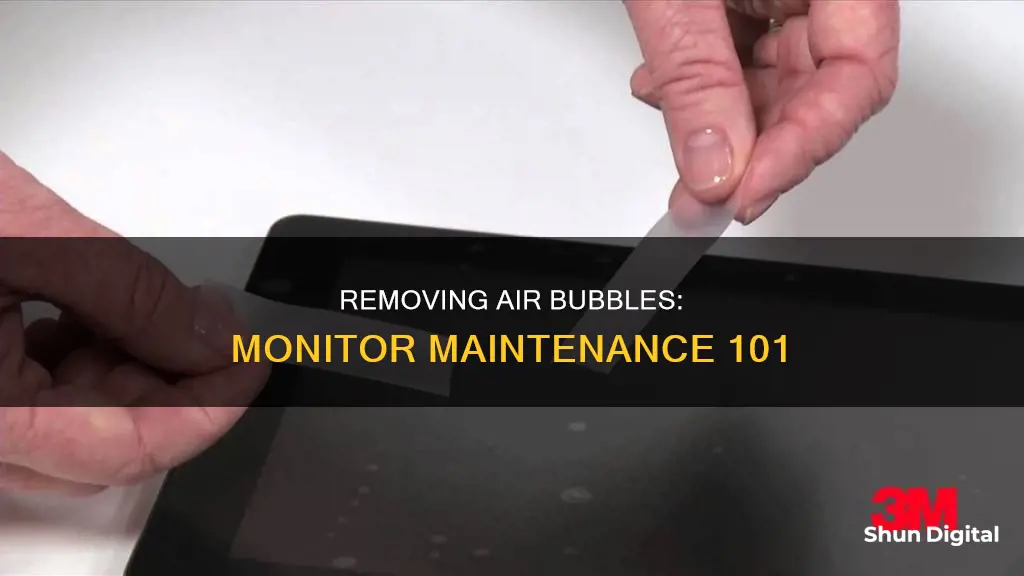
Remove dust with sticky plastic or Scotch tape
Removing dust with sticky plastic or Scotch tape is an effective way to get rid of bubbles from your monitor. Here's a step-by-step guide:
Firstly, it is important to prepare your workspace. Ensure you are in a clean, dust-free environment to minimise the chance of new dust particles settling on your screen during the process. Turn off any fans or AC units to prevent air circulation from blowing dust onto the screen.
Next, you will need to source some Scotch tape or sticky plastic. If you are using Scotch tape, cut a strip that is long enough to cover the width of your screen. If you are using sticky plastic, cut a strip that is slightly longer than the width of your screen.
Now, carefully place the strip of tape or sticky plastic onto your screen, starting at the top edge. Gently press it down, ensuring it adheres to the screen. Slowly lift the tape or plastic, working your way from top to bottom. The adhesive side will pick up any dust particles or lint from the screen. If needed, use multiple strips of tape or plastic to cover the entire screen, slightly overlapping the previous area to ensure no spots are missed.
Once you have finished, check your screen for any remaining dust particles. If necessary, repeat the process until your screen is completely dust-free.
Finally, you can reapply your screen protector, ensuring the screen is free of dust and bubbles.
This method is a simple and effective way to remove dust and eliminate bubbles from your monitor, improving its appearance and functionality.
Best Places to Buy Prism Monitor in Singapore
You may want to see also

Reapply the screen protector
Re-applying your screen protector is a surefire way to remove bubbles. Here is a step-by-step guide:
Step 1: Warm up the Screen Protector
Use a hairdryer on the lowest heat setting for around 15 seconds. This weakens the adhesive, making it easier to remove the screen protector. Switch off any fans or air conditioners to prevent dust from interfering.
Step 2: Lift the Screen Protector
Use a thin, hard, plastic object, like a credit card, to slowly lift the screen protector from the device. Work it along the edges until you can peel it off with your fingers. Avoid using anything metal, like coins or safety pins, as these can scratch your device's screen.
Step 3: Remove the Screen Protector
Slowly and carefully remove the screen protector, starting at one end and working your way to the other. Do not bend the screen protector, as it may break.
Step 4: Clean the Screen
Use a dry microfiber cloth or a soft, lint-free cloth with a screen-cleaning solution to wipe away any remaining adhesive or dust from your device's screen.
Step 5: Clean the Screen Protector
Use Scotch tape to remove any dust from the sticky side of the screen protector. Make a ring with the tape, with the sticky side facing outward, and place it on your finger. Dab this on the adhesive side of the screen protector to ensure it is dust-free.
Step 6: Reapply the Screen Protector
Carefully reapply the screen protector, lining up the edges and allowing the adhesive to stick naturally. If possible, use an application tool to help with this process.
Tips for Successful Reapplication:
- Ensure your hands are clean and dry before handling the screen protector.
- Work in a clean, dust-free environment to minimise the chance of dust particles interfering.
- If possible, apply the screen protector in a humid room, such as a bathroom, to reduce air bubbles.
- Take your time to align the screen protector correctly before application.
- Only touch the edges of the screen protector to avoid leaving fingerprints on the adhesive side.
Setting Up Dual Monitors: Easy Steps for Beginners
You may want to see also

Push out bubbles with a plastic card
Bubbles can form under your monitor's screen for a variety of reasons. They can be caused by improper installation, such as incorrect alignment or dust and oil residue on the screen. Over time, your screen protector may also experience wear and tear, leading to the formation of bubbles.
Step 1: Prepare the necessary tools
You will need a plastic card, preferably one with a clean, hard edge without any nicks. A credit card or any similar non-oily plastic card should work well. Ensure that the card is clean and free of any dust or oil residue.
Step 2: Identify the location of the bubbles
Before attempting to push out the bubbles, identify their location on the screen. Are they in the centre or along the edges? This will determine the best approach to remove them effectively.
Step 3: Start pushing from the centre
If the bubbles are located in the centre of the screen, place the plastic card at the centre of the monitor. Apply gentle pressure and slowly push the card outwards towards the edge of the screen. It is best to push in one direction if possible, as this will help to ensure a firmer grip and effectively remove the bubbles.
Step 4: Work your way around the screen
Repeat the process for any other bubbles on the screen, always pushing from the centre outwards. Work your way around the entire screen, pushing out each bubble one by one.
Step 5: Address bubbles along the edges
If you encounter bubbles along the edges of the screen protector, you may need to adjust your technique slightly. Instead of pushing directly on the bubble, focus on lifting the nearest corner of the screen protector gently with a thin piece of plastic. Be careful to keep your fingers and natural oils away from the screen, as this can affect the glue on the protector.
Step 6: Secure the screen protector
Once you have successfully removed the bubbles, use the plastic card to secure the screen protector back onto the monitor's surface. Start at one edge and slowly work your way across the screen, pressing down gently to ensure a firm seal.
By following these steps, you should be able to effectively remove bubbles from your monitor using a plastic card. Remember to work carefully and avoid using excessive force to prevent any damage to your monitor or screen protector.
GMC Sierra: Blind Spot Monitoring Feature Explained
You may want to see also

Use a hairdryer to remove bubbles
Using a hairdryer is an effective way to remove bubbles from your screen protector. It is a simple process but requires care and attention to avoid damaging your device.
Firstly, power off your device. Then, turn on the hairdryer and switch it to blow hot air. Gently heat the area of the screen with the bubbles, being careful not to overheat the screen. You only need to heat the screen for a short time, around 10-15 seconds, and it is recommended to use the lowest heat setting. Once the screen is softened, turn off the hairdryer.
Now, use your fingers to press the air bubbles until they disappear. Be gentle, as too much pressure could cause the screen protector to lift or peel off. If the bubbles are not going away, you may need to reapply the screen protector.
It is important to note that this method may not work if the bubbles are caused by dust or dirt particles. In that case, you can try using tape to remove the particles from the adhesive. Additionally, be cautious not to overheat your device, as this could damage the screen or other components.
Asus Monitor Models: Identifying Your Display
You may want to see also
Frequently asked questions
Removing bubbles from your monitor screen depends on the type of screen and the location of the bubbles. For a glass screen protector, you can try to lift the corner of the screen protector with a thin, sharp object, such as a credit card, and then clean the screen with a lint-free cloth and rubbing alcohol. Reapply the screen protector, ensuring it is properly aligned, and use a card to push out any remaining bubbles. If the bubbles are near the edges, you can also try massaging them out with cooking oil.
Bubbles can form due to improper application of the screen protector, microscopic dust and debris caught beneath, or oil from fingertips. They can also appear due to pressure on the screen from drops or mashing, causing the screen to shift and creating a small bubble that grows over time.
To prevent bubbles from forming, it is important to apply the screen protector in clean conditions. Ensure your work area is dust-free, and clean the screen with an alcohol pad before application. Wash your hands with soap to remove dirt and oils, and take time to properly align the screen protector before application to avoid having to remove and adjust it later.
You can use a plastic card, such as a credit card or debit card, to push out bubbles from the centre to the edge of the screen. If the bubbles are along the edge of the screen, gently lift the corner with a thin piece of plastic and use the card to secure the screen protector back in place.
If you are unable to remove the bubbles, you may need to remove the screen protector and reapply it, ensuring the screen is thoroughly cleaned before reapplication. If the bubbles still persist, you may need to seek the assistance of a professional smartphone repair shop to remove and replace the screen protector.


