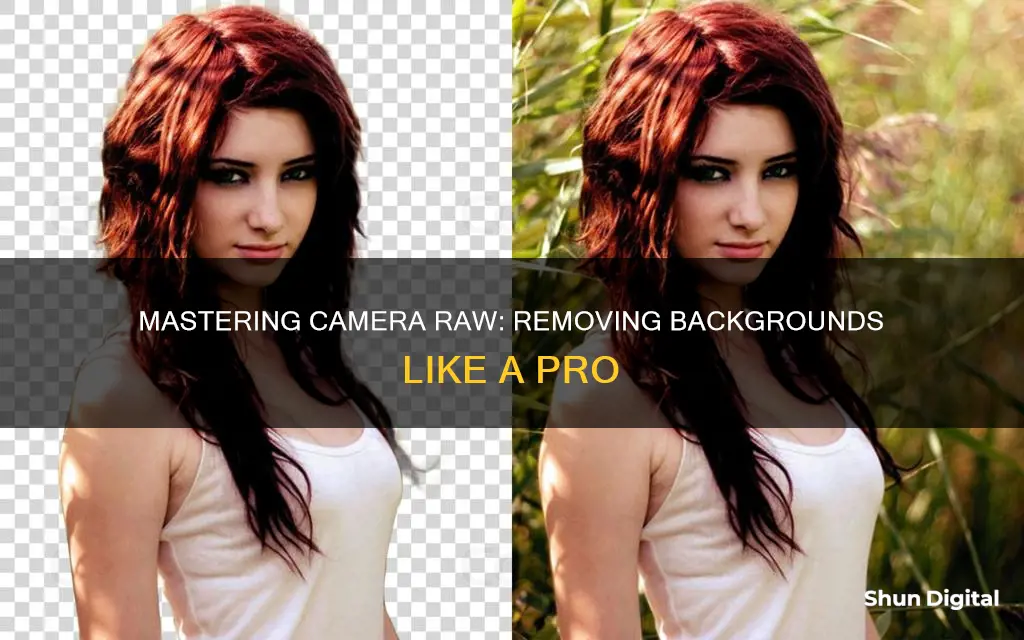
Adobe Camera Raw is a powerful tool for editing photos and offers a range of features to enhance your images. One of its key features is the ability to remove unwanted backgrounds with just a few clicks. In this guide, we will explore the steps to effectively remove backgrounds in Camera Raw, including utilizing the Healing panel's Content-Aware Remove tool, and the Select Background masking feature, to achieve precise editing results.
Characteristics of Removing Background in Camera Raw
| Characteristics | Values |
|---|---|
| Software | Adobe Photoshop |
| Tools | Quick Actions, Content-Aware Remove, Masking |
| Steps | Open image, Access Discover Panel, Navigate to Quick Actions, Select Remove Background, Click Apply, Optional: Select Different Layer, Click Refresh/Revert |
| Additional Features | Healing Panel, Size and Opacity Definition, Manual Sampling Area Changes, Reset Adjustments, People/Objects/Background Selection, Editing Sliders |
What You'll Learn

Using the Healing panel
To access the Healing panel in Camera Raw, click the "Healing" button in the toolbar on the right side of the "Camera Raw" dialog box. This will activate the Healing tool and display the "Healing" tab in the panel to the left of the toolbar, where you can adjust the tool's settings.
The Healing panel in Camera Raw offers three retouching modes: "Content-Aware Remove", "Heal", and "Clone". To select the desired mode, click one of the buttons at the top of the "Healing" tab.
"Content-Aware Remove" is the default healing choice and allows you to remove unwanted spots and objects from your photo. It does this by analysing and filling the selected area with content generated from other parts of the photo. To manually change the sampled area, use Cmd + drag on macOS or Ctrl + drag on Windows.
The "Heal" button will match the texture, lighting, and shading of the sampled area to the selected location. The "Clone" button, on the other hand, will only copy pixels from the sampled area to the selected location.
Before using the "Heal" or "Clone" tools, you can adjust the amount of feathering for the Healing tool using the "Feather" slider or by entering a value into the adjacent field. This will allow you to soften the edges of the selected area for a smoother blend.
To define the size of the brush, use the "Size" slider or enter a value into the adjacent field. You can also use the bracket keys on your keyboard to change the brush size; the left bracket makes the brush smaller, while the right bracket increases its size.
To remove all adjustments made with the Healing tool, select the "Reset" button.
Viewing Multiple Cameras in Teams: A Guide
You may want to see also

Removing spots and objects
To get started, open a camera raw file or, with an image open in Photoshop, select Filter > Camera Raw Filter. Next, choose the Spot Removal tool. You can then zoom in on the area to be repaired and press [ or ] to size the brush cursor. You can also drag across a blemish to create a target region. When you release the mouse, a red pin and dashed border will surround the target region, and a green pin and dashed border will surround a source region.
If you want to control which area Camera Raw uses as the source, you can Cmd-drag/Ctrl-drag from the target area to the desired source area. A red dashed circle will surround the target region, and a green dashed circle will surround the source area. You can also use the brush size control in the interface to adjust the size of the target circle.
To remove the spots or objects, you can choose between the Heal and Clone options. Heal will match the sampled area's texture, lighting, and shading to the selected location. Clone will apply the sampled area of the image to the selected location without any healing. You can also use the Opacity slider to control the opacity of the repair.
For spots that are more challenging to remove, you can use the Visualize Spots feature in Camera Raw. This feature inverts the image, making it easier to identify and remove imperfections that may not be immediately visible. You can adjust the black-to-white threshold via the slider to better pinpoint dust spots or other irregularities.
By following these steps, you can effectively remove spots and objects in Camera Raw, enhancing your images and creating a more polished final product.
A Dog's Perspective: Capturing Unique Views with My Camera
You may want to see also

Selecting People, Objects, and Background
Adobe Camera Raw 15 and Lightroom 12 make it easy to select people, objects, and backgrounds in your photos using AI masking. This feature is accessible via the Masking Panel in Photoshop.
To select people, objects, and backgrounds in your photos, follow these steps:
- Open the photo you want to edit in Photoshop.
- From the top menu, go to Filter > Camera RAW Filter.
- Click on the Masking Icon.
- From the Masking Panel, select "People" to automatically detect all the people in the photo. You can then select a specific person by clicking on their face.
- You can also create specific masks for the whole person, skin, teeth, eyes, and hair, allowing you to make precise adjustments to only the selected areas.
- To select objects, use the Brush or Rectangle Select tool to roughly outline the object you want to select. Camera Raw will then analyze and automatically create a mask for the object.
- To select the background, go to the Masking Panel and select "Background." Camera Raw will analyze and automatically select the background for you.
With these tools, you can easily select people, objects, and backgrounds in your photos, making precise editing and adjustments a breeze.
Sharing Wyze: Who Can Access Your Camera Feed?
You may want to see also

Using the Masking panel
The Masking panel in Camera Raw offers a variety of local adjustment tools that allow you to edit specific areas of a photo with precision and creative control. Here's a detailed guide on using the Masking panel to remove backgrounds or make other adjustments:
- Access the Masking Panel: Open your image in Photoshop and navigate to the Camera Raw workspace. Click the masking icon in the right-hand toolbar to access the Masking panel.
- Select a Masking Tool: The Masking panel provides several options, including Select Subject, Select Sky, Adjustment Brush, Linear Gradient, Radial Gradient, Color Range, Luminance Range, and Depth Range. Choose the tool that best suits your editing needs.
- Make Adjustments: Each masking tool offers different settings to refine your selection. For example, the Adjustment Brush allows you to adjust the size, feathering, flow, and density of the brush. The Linear and Radial Gradients let you control the angle, width, and softness of the gradient. The Color Range tool lets you select specific colors to adjust, and the Luminance Range tool helps you adjust brightness.
- Create and Manage Masks: You can create multiple masks by clicking "Create New Mask" at the top of the Masking panel. Add, subtract, or intersect masks to refine your selection further. You can also rename, duplicate, hide, or delete masks using the options in the panel.
- Apply Adjustments: With your masks in place, you can now use the editing sliders in the right panel to make local adjustments. These adjustments can include changes to light, color, effects, and details.
- Fine-tune and Refine: Experiment with different adjustments and refine your selections until you achieve the desired result. You can also use the Show Overlay option in the Masking panel to visualize the mask overlay and make sure it aligns with the areas you want to edit.
Remember that the Masking panel in Camera Raw offers a non-destructive editing approach, allowing you to experiment and make adjustments without permanently altering your original image.
Simplisafe Camera Setup: Viewing Your Camera Footage
You may want to see also

Editing outside of the Camera Raw filter
While the Camera Raw filter is a great tool for editing your images, there are several limitations to be aware of. For instance, you will lose some of the functionality of the white balance adjustment tools as you are not working from a RAW file. As such, it is beneficial to get things as close to perfect as possible in the RAW stage of post-processing. That way, you will have more versatility when using the filter in Photoshop.
Additionally, the Camera Raw filter does not have the same cropping and rotating tools as Adobe Camera Raw (ACR) or Lightroom. This means that cropping and rotating must be done with Photoshop's native tools.
Photoshop also has its own Curves tool, which produces similar results to the Curves tool in Camera Raw. The same goes for the Exposure, Contrast, and other settings under the "Light" panel. Therefore, it may not always make sense to jump into Camera Raw versus using native Photoshop adjustments.
However, some tools in Camera Raw offer clear advantages over native Photoshop tools. For example, the Black and White Mixer in Camera Raw provides control over eight colours, whereas Photoshop's Black and White adjustment layer only has six. The Orange slider, in particular, is useful for adjusting skin tones in black-and-white images.
The Color Mixer in Camera Raw is also an effective way to make quick and easy adjustments to specific colour ranges in an image. This can also be done with the Hue/Saturation adjustment or curves in Photoshop, but the Color Mixer can effect changes more simply and swiftly.
The Vignette tool in Camera Raw is another useful feature that is easy, fast, and intuitive. It can be used to create a subtle or extreme vignette effect in just a few seconds.
The Clarity and Texture tools in Camera Raw can also be beneficial, although they are not always the perfect solution. Small amounts of positive or negative clarity can be helpful, and a lot of positive clarity can create "crunchy" effects. The Texture tool can be useful for bringing up tiny details in fabrics or gentle skin smoothing.
The Dehaze tool is another useful feature of Camera Raw, particularly when editing photos of people wearing glasses. The Dehaze tool can be used to match the contrast of the area inside the lens to the rest of the face.
Lastly, the Moiré tool in the Details panel of Camera Raw is a quick and effective way to reduce or remove the moiré effect from an image.
Where is the Camera on LG 65-inch TV?
You may want to see also
Frequently asked questions
Adobe Camera Raw has a Select Background masking feature in the Masking panel that helps you achieve precise editing goals. To remove the background, open the photo you want to edit, and select Masking > Background. Camera Raw will run an analysis and automatically select the background for you. You can view the selection as an overlay and a mask is created in the Masks panel. Once you're happy with the selection, use the editing sliders on the right to make local adjustments.
Yes, you can use Camera Raw to edit any image format, including raw, PNG, or JPEG.
Camera Raw offers ultimate image control, allowing you to achieve your desired editing goals. It provides precise editing capabilities, such as selecting and adjusting specific parts of the image, including people, objects, and backgrounds.


