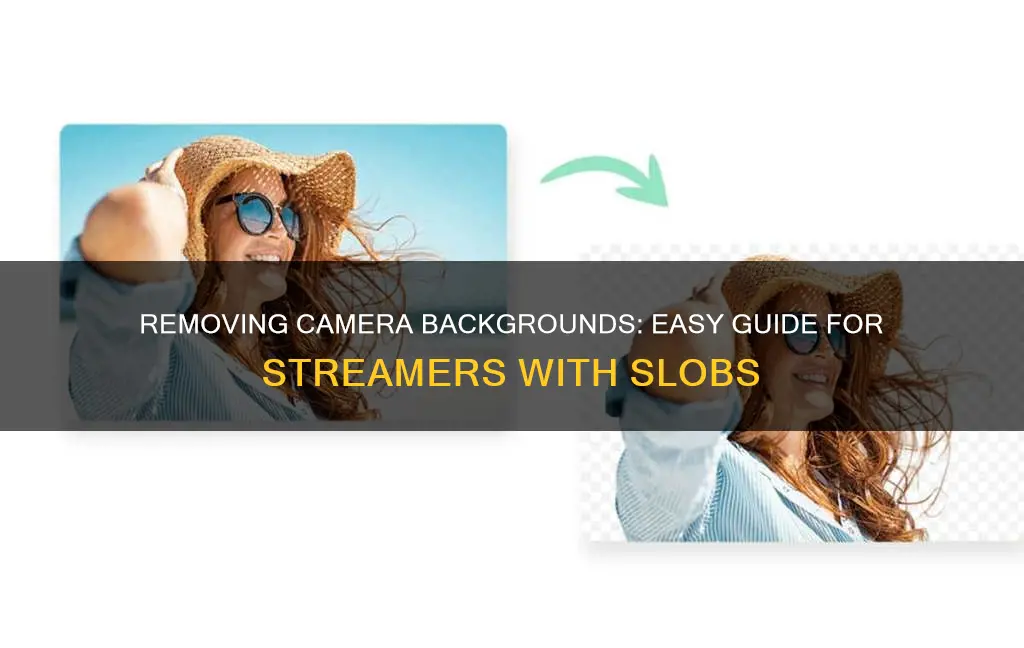
If you want to remove your background from camera slobs, you can use a green screen or chroma key software. A green screen involves purchasing a large piece of green fabric to place behind you, which can then be edited out of your video footage. Chroma key software, on the other hand, uses video effects to remove the background of a video scene, which can then be composited over another scene or image. Both options will give your content a more professional look and feel.
| Characteristics | Values |
|---|---|
| Software | ChromaCam, XSplit VCam, Streamlabs Desktop, Twitch Studio, NVIDIA Broadcast, Elgato Camera Hub |
| Green screen required? | No, but can be used |
| Lighting requirements | Evenly lit without any bright spots or shadows |
| Camera resolution | Higher resolution results in a sharper chroma key |
What You'll Learn

Use a green screen
Using a green screen is a great way to remove the background from your camera in SLOBS (Streamlabs OBS). This technique has been used in cinematography and video production for many years and can add a level of professionalism to your stream. Here's a step-by-step guide on how to set up and use a green screen with SLOBS:
Step 1: Get Your Supplies
First, you'll need an actual green screen. You can purchase a pullout or popup green screen, or simply use a green screen backdrop or cloth. You'll also need lighting equipment to ensure even lighting across the entire screen, as this will make it easier for the software to remove the background.
Step 2: Set Up Your Green Screen
Place your green screen as far away from you as possible to reduce the amount of green light reflecting onto your clothing or other objects in the scene. Even lighting is crucial, so make sure there are no shadows on the green screen.
Step 3: Adjust Camera Settings in SLOBS
Open SLOBS and go to your camera source. Right-click on it and navigate to the "Filters" option. Here, you'll find the "Chroma Key" filter type.
Step 4: Fine-Tune the Chroma Key Settings
Within the Chroma Key settings, you'll find several options to adjust:
- Similarity: This controls how similar the green pixels and the background are. With even lighting, there should be a noticeable difference between you and the background. Adjust the similarity down for a cleaner image, and be careful not to broaden the range too much, or it may start removing pixels from your skin, hair, or clothing.
- Smoothness: This setting adjusts the smoothness of the pixels being removed. Moving it to the left will create more jagged edges, while moving it to the right will smooth out the edges but may start removing parts of your image.
- Key Color Spill Reduction: This reduces the amount of green light reflecting from the green screen onto other objects in the scene, such as your hair, skin, or clothing.
- Opacity: This setting controls the transparency of your image.
- Contrast, Brightness, and Gamma: These settings provide overall changes to the image source, allowing you to fine-tune the image for different lighting conditions.
Step 5: Test and Refine
Play around with the settings until you find the right balance for your setup. Once you're happy with the image quality, crop out any unwanted parts, resize your image, and you're ready to start streaming with your new background!
Using a green screen with SLOBS can be a fun and effective way to enhance your streaming setup, and with these steps, you'll be well on your way to creating a professional-looking stream in no time!
Accessing Amazon's Security Cameras: Computer Viewing Guide
You may want to see also

Set up lighting
Setting up the lighting for your green screen is crucial to achieving a clean and professional-looking final product. Here are some tips to help you get the best lighting for your setup:
Space Considerations
Before you begin setting up your lighting, it's important to consider the space you have available. Make sure you have enough room to safely and accessibly set up your green screen, allowing for additional space when moving around your streaming setup. If space is limited, consider using a collapsible screen or hanging the screen with hooks or clamps.
Lighting Equipment
The type of lighting equipment you use will depend on your budget and preferences. You can use professional photography lights, LED tabletop lamps, softboxes, or even simple desk lamps without shades. Clamp lamps with LED daylight bulbs and oven parchment paper attached are a cheap and effective way to diffuse the light and reduce harsh shadows.
Lighting Placement
Position your lights so that they illuminate the green screen evenly. Place two lights directly at the green screen, ensuring they are the same distance away and at the same angle to avoid shadows. You can also use lights to illuminate the subject separately, including a key light, backlight, and fill light. The subject should ideally be about eight feet away from the green screen to avoid light leaks.
Lighting Intensity
Avoid using super bright lights, as this can create harsh shadows. Instead, aim for even lighting across the green screen. Any shadow on the green screen will mess up your chroma key. You can adjust the brightness of your lights or use techniques like bouncing light off a wall to soften the lighting.
Camera Settings
Adjust your camera monitor's exposure and ISO settings to control the amount of light captured. Slightly lower brightness and ISO can help prevent capturing colours outside of green and reduce random specks of colour in your shot. However, be careful not to lower the ISO too much to avoid underexposing the green screen.
Smart TV Cameras: Is TCL Watching You?
You may want to see also

Choose a camera
Choosing the right camera is essential for a successful live stream. Here are some key considerations to help you select the best camera for your needs:
Webcam
For most streamers, webcams are a convenient option due to their ease of setup and use. External webcams generally offer better image and video quality than integrated webcams, and some models are specifically designed for livestreaming, offering broadcast-quality videos and features catering to professional content creators. When choosing a webcam, consider the following:
- Resolution and frame rate: Aim for a minimum resolution of 720p, but if you're looking for professional-quality videos, opt for models capable of 1080p or 4K resolution. A higher frame rate is also crucial for capturing smooth, fast-motion videos, with 60 fps being ideal for streamers who move around a lot during their broadcasts.
- Autofocus and low-light performance: Look for a webcam with fast and precise autofocus, especially if you'll be moving around during your stream. Additionally, consider a webcam with impressive low-light performance if you'll be streaming from dimly lit areas.
- Field of view (FOV): The FOV of a webcam typically ranges from 50 to 120 degrees. Choose a smaller FOV if you only need to capture one person and a wider FOV for livestreaming larger groups or spaces.
- Adjustability: Select a webcam that is easy to adjust without removing it from its mounted position, allowing you to reframe your shot and change camera angles smoothly during your stream.
- Audio recording capabilities: While a standalone microphone is ideal, a webcam with a built-in microphone can be a more budget-friendly option. For better audio quality, look for a model with a stereo mic design.
- Lens type and quality: Glass lenses generally produce sharper images and are commonly found in webcams with 1080p and higher resolutions. However, some plastic lenses can still offer good performance.
- Software control and support: Ensure that your chosen webcam is compatible with your computer's operating system and livestreaming software. Also, consider the availability of software to edit your recordings and control features like digital pan, tilt, and zoom.
Digital Single-Lens Reflex (DSLR) Cameras, Action Cameras, and Camcorders
While webcams are popular for streaming, you can also consider using a DSLR camera, action camera, or camcorder. These options typically require additional equipment like tripods or mounting hardware and may be bulkier, but they can offer superior image and video quality.
Secondary Camera
Using a secondary camera can enhance your live stream by providing different camera angles or allowing you to step away from your primary setup without interrupting your stream. You can use your iPad or iPhone as a secondary camera with Streamlabs Desktop's Collab Cam feature, which is a simple and user-friendly way to add additional camera angles to your stream.
Accessing Home Camera Footage on Your Mobile Device
You may want to see also

Configure chroma key filter
To configure the chroma key filter, you will need to have a green screen set up. You can use a fancy pullout or popup green screen, or a simple green screen backdrop or cloth. It is important to ensure that your green screen is evenly lit, as this will make it easier for the software to detect and remove the colour. Lighting from the front may not be sufficient, so consider using two lights angled at 45 degrees from the subject.
Once your green screen is set up, open Streamlabs Desktop and go to your camera source. Right-click on it and select 'filters'. From the available options, select 'chroma key'. This will open up the chroma key settings.
There are several settings you will need to adjust to get the best image quality. Firstly, select the key colour type or choose a custom colour. Green usually works well for green screens. The similarity setting tells the software how similar the green pixels and background are. If your green screen is evenly lit, you can set the similarity down, which will help to get a cleaner image. The smoothness setting defines how smooth the pixels being pulled out are. The farther to the left, the more jagged the edges will be, and the farther to the right, the smoother the image will be, but it may start to pull you out of the frame. You will need to play around with these settings to find what works best for you.
The key colour spill reduction setting reduces the amount of green bouncing off your green screen and onto your hair, skin or chair. Adjusting the opacity setting will change how solid or transparent you appear in the frame. Finally, the contrast, brightness and gamma settings provide overall changes to the image source. Fine-tune these settings to adjust for different light and dark situations.
Snapchat Camera: How Accurate is Your Reflection?
You may want to see also

Optimise green screen effects
Using a green screen is a great way to add special effects to your videos. But if you want to ensure your keying is smooth and seamless, there are a few things you need to do to optimise your green screen setup.
Firstly, make sure your green screen is as flat and smooth as possible. Any wrinkles or imperfections will affect the final shot. Light your screen first, aiming for diffused, non-directional lighting that hits the screen from above. You want to achieve one consistent shade of green, so light the screen evenly at about 40 to 50 percent luminance. Use multiple high-quality lights and, if possible, measure the lighting with a waveform monitor—a flat line across the monitor means your screen is lit well.
Next, light your subject. Try to match the lighting of the background you plan to add in post-production. If you're adding a bright, sun-filled background, match that lighting as closely as possible in terms of quality, colour, direction and quantity of light. Keep your subject at least 5 feet away from the green screen to avoid any green spill and to make it easier to match the lighting of your new background.
When it comes to what your subject is wearing, avoid anything that's reflective or has a hint of green. Greenish khakis, for example, can make your subject look semi-translucent. Bring some makeup powder to get rid of any shine on the face or head that might interfere with the effect.
Finally, when you're ready to edit your video, use a video editing program or green screen software to remove the green screen and add your new background. Most programs have built-in functions for this, so it should be a simple drag-and-drop process. You can then make any final adjustments to your new background, such as adding depth of field to make it look more realistic.
Uncover Camera Details: Unraveling Image Metadata Secrets
You may want to see also
Frequently asked questions
You can remove the background from your camera in Streamlabs by setting a chroma key filter on your webcam.
Yes, you will need a green screen to effectively remove the background from your camera in Streamlabs. Make sure the green screen is well-lit and positioned at a sufficient distance behind you to avoid any shadows or spills from affecting the background.
Some alternatives to Streamlabs for removing the background from your camera include OBS Studio, Twitch Studio, and XSplit VCam. These software tools offer similar functionality and allow you to easily remove your green screen background or apply virtual backgrounds.


