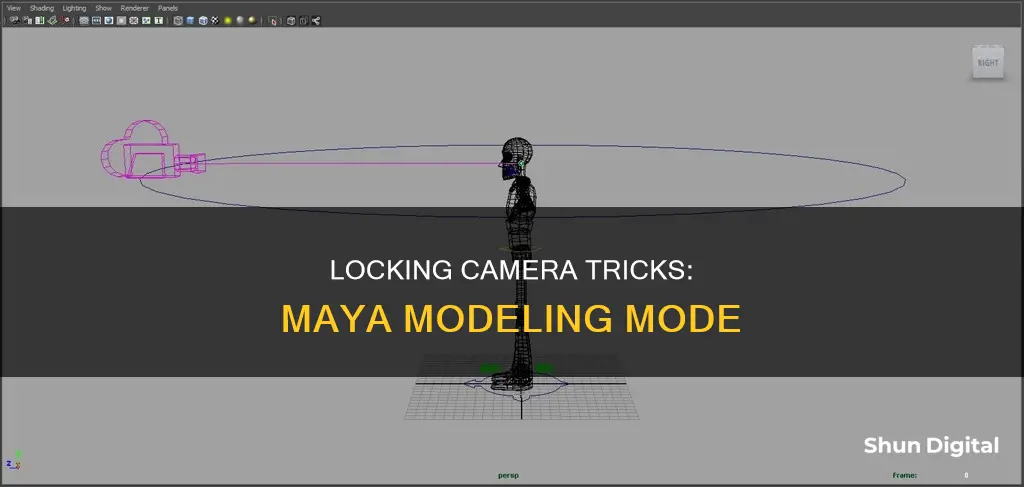
Learning how to lock a camera on an object in Maya can be a tricky process, but it's a valuable skill for creating 3D animations. There are several methods to achieve this, including using the Viewport panel menu, the Constrain function, or parenting the camera to the object. Additionally, users can adjust the camera's rotation, angle of view, and position to get the desired effect.
What You'll Learn

Locking the camera's movement in a specific way
Using the Viewport Panel Menu
Go to the View menu and choose Lock Camera. This will prevent you from accidentally moving the camera and losing your framing. When enabled, a checkbox will appear next to the menu item. With the camera locked, you won't be able to manipulate it in first-person or third-person mode, and keyboard shortcuts like Alt + middle mouse won't work. The move and rotate tools will also be disabled for the locked camera.
Using the Channel Box
Select the camera you want to lock in the Outliner (Window -> Outliner). Then, click on Channel Box / Layout Editor. Shift + left-click on the rotate X, Y, and Z values to highlight them, right-click, and select Lock Selected. This will allow you to slide the camera up, down, left, and right while keeping the viewing angle perfectly horizontal. To unlock the camera later, follow the same steps and choose Unlock Selected.
Using the Attribute Editor
Go into the Attribute Editor and select the "Limit Information" tab. From there, you can limit or completely lock the Trans/Rot/Scale on anything, including the camera.
Using the Camera Command
You can also use the camera command with the lockTransform flag to lock or unlock any camera. Set the flag to true to lock and false to unlock.
iPad Night Mode Camera: Does It Exist?
You may want to see also

Linking the camera to an object
To link the camera to an object in Maya, you can try "parenting" it to the object. This will keep the camera still while it follows the object across the screen.
- Select the object you want the camera to follow.
- Shift-select the camera.
- Go to the Hotbox and select Constrain -> Aim.
- Adjust the vector of the aim constraint to ensure the camera looks down the correct axis.
- Move your object, and the camera will follow it.
Another method is to create a camera and aim it using the camera rollout. First, position the camera and move the aim to the centre of your object. Then, select the aim object in the outliner and shift-select the object you want the camera to follow. Hit "P" to parent the camera to the object. Now, when you move the object, the camera should follow it.
You can also try the following method:
- Duplicate the object.
- Parent the duplicated object to the camera.
- Parent-constraint the duplicated object to the original object.
- Bake the duplicated object's transform, then delete the constraint.
- On the first frame, unparent the duplicated object and delete all keyframes on the camera.
- Set the camera translate and rotate to 0 0 0.
- Delete the original object.
Additionally, if you want to lock the camera's movement, you can do so through the Viewport panel menu. Go to the View menu and choose Lock Camera. This will prevent you from accidentally moving or manipulating the camera.
Charged Camera Batteries: Marking Them Efficiently
You may want to see also

Locking the camera from the Viewport panel menu
To lock the camera from the Viewport panel menu in Maya, follow these steps:
- Ensure you have the desired camera framing.
- Go to the View menu.
- Choose "Lock Camera" from the Viewport panel menu.
- A checkbox will appear next to the "Lock Camera" option in the View menu.
- With the camera locked, you cannot manipulate it in first-person or third-person mode. Keyboard shortcuts like Alt + middle mouse button will not work, and the track cursor icon will not respond.
- You also cannot use the move or rotate tool to adjust the camera. Selecting the camera and attempting to use the move tool will show a greyed-out move manipulator, indicating the camera cannot be moved.
- To unlock the camera and adjust its position or rotation, simply go back to the View menu, deselect the "Lock Camera" option, and the camera will be unlocked.
Additionally, if you want to lock the camera's translate and rotate channels, you can do so from the Channel Box:
- Select the camera.
- In the Channel Box, left-click and drag to highlight the translate and rotate channels.
- Right-click on the highlighted channels and select "Lock Selected."
- To unlock the channels and adjust the camera, repeat the process and select "Unlock Selected."
Inverting Radial Filters in Camera Raw: A Step-by-Step Guide
You may want to see also

Using an environment map or image plane
When working with 3D models in Maya, references are critical for creating accurate models and animations. One way to achieve this is by using image planes, which are nodes that you can import your reference images to. Here's a detailed guide on using image planes or environment maps to lock a camera on an object in Maya:
Using an Image Plane
Image planes can be set up in different ways in Maya, depending on your specific needs. Here are three common methods:
- Image Plane Attached to the Camera: This method is quick and easy to set up. Go to the "View" drop-down menu, select "Image Plane", and then choose "Import Image". Navigate to your reference image, and once imported, you'll see the image plane placed directly in your viewport. The image plane will stay locked in place while you orbit around the perspective view. However, if you switch to the orthographic views (front, top, or side view), the image plane will rotate with the view. To have the image plane only show up in the perspective view, go into the Attribute Editor of the image plane, and under "Display", choose "looking through camera". This ensures that the image plane remains locked to your perspective camera.
- Free Image Plane: In this method, the image plane is not attached to the camera, allowing you to transform it directly in your scene. To add a free image plane, go to "Create" and then select "Free Image Plane". Place the image plane in your desired location, and then apply your reference image by selecting the image plane, going to the Attribute Editor, and navigating to your reference image. You can add multiple free image planes by duplicating the first one and swapping out the image in the Attribute Editor. Free image planes are visible in all camera angles.
- Image Plane with Movie File: If you're working with animations, you can bring in movie files in the same way as images. Go to "View" > "Image Planes" > "Movie File" and navigate to your movie file. The movie file will be placed within the perspective camera in the Outliner. You can scale and position the movie file by selecting the imagePlane1 node inside your perspective camera and adjusting the Size and Offset values in the channel box.
Using an Environment Map
Environment maps are not specifically mentioned in the sources provided, but they are a type of image plane that can be used to create reflections and lighting effects in a scene. To use an environment map, you would follow similar steps as creating a free image plane. First, create a new image plane by going to "Create" > "Free Image Plane". Then, apply your environment map image by selecting the image plane, going to the Attribute Editor, and navigating to your image file. With an environment map applied, you can now use it as a reflective surface or to light your scene.
By using image planes or environment maps, you can effectively lock the camera on an object in Maya, providing a reference to create accurate models and animations.
Recovering RAW Camera Files on V20: A Step-by-Step Guide
You may want to see also

Creating an orthographic camera
Orthographic cameras are used to create isometric renderings, which have no correct perspective and where all edges are parallel. This type of camera is often used in gaming or maps to ensure that objects at the bottom of the screen are the same size as those in the distance.
To create an orthographic camera in Maya, follow these steps:
- Open your file in Maya. You will usually be in the perspective view. If not, go to Panels > Perspective > persp.
- Create a new camera by navigating to Create > Cameras > Create Camera and Aim. This will create a target camera rather than a free camera.
- Position the camera by using the move tool to get it at a 45-degree angle in the corner. Make sure the camera aim is at the base of the object. If you place it at 0,0,0, it should be set correctly.
- Go to Panels > Cameras > View through Selected. You will now be viewing through the camera.
- Adjust the camera view so that it is pointed at the corner of the object using the move tools on the selected camera. Since this is a camera with an aim, you only need to move the camera without worrying about rotation and aim.
- Jump into the camera by selecting it from the list, then clicking Panels > View through Selected.
- In the properties, select the Orthographic panel and check "Orthographic".
- At this point, you may need to adjust the view by zooming in or out to ensure your model fits the frame.
- Now your model is in orthographic or isometric view and ready for export.
You can also create an orthographic camera by going to the main menu bar: Create > Cameras > Camera Type. If you want an orthographic camera view, click the Orthographic checkbox and change the Orthographic Width if necessary.
Additionally, if you want to lock the camera in place, you can do so by going to the View menu and choosing Lock Camera. This will prevent you from accidentally moving or manipulating the camera in any way.
Loading Camera Batteries: A Step-by-Step Guide
You may want to see also
Frequently asked questions
To lock your camera on an object, first select the object, then shift-select the camera, go to the Constrain menu and choose 'Aim'. You will then need to adjust the vector of the aim constraint so that the camera looks down the correct axis.
To lock the transformation information, click the icon on the Panel toolbar, or select View > Lock Camera. This will prevent you from accidentally changing the camera position and losing your animation.
To lock the camera's rotation, select the camera you want to lock, then go to Window > Outliner. This will bring up a list of all the objects in your scene. Select the camera and click on the Channel Box / Layout Editor tab on the right side of the screen. Highlight the rotate X, Y and Z values by shift-left-clicking on them, then right-click and select 'Lock Selected' from the drop-down menu.
To lock the camera so that it can only move up, down, left or right, but not tilt, select the X, Y and Z rotate options in the channel box for the camera. Then right-click and lock those options.


