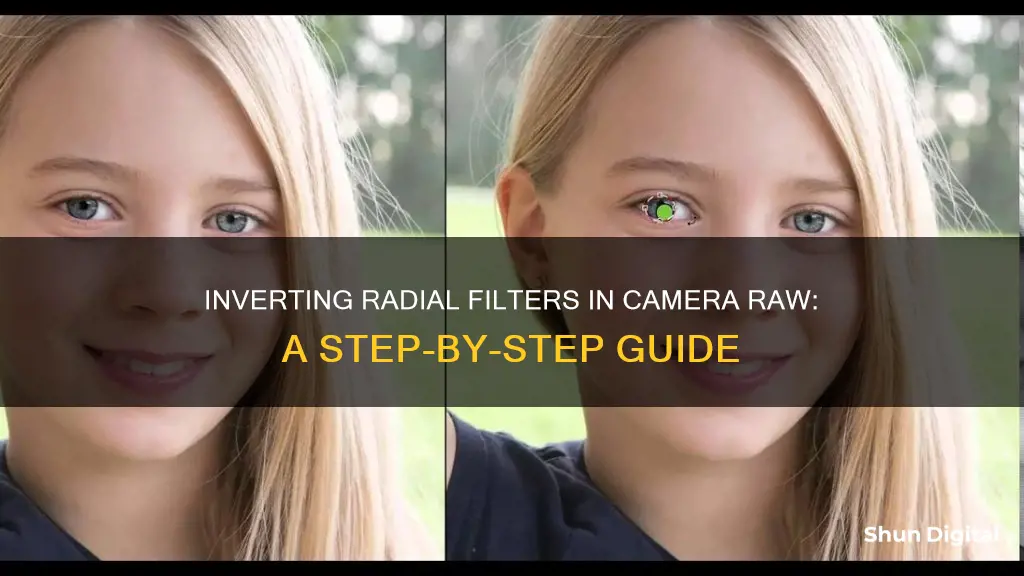
Radial filters are a powerful tool for photo editing, allowing you to apply adjustments to specific portions of your images. While it may seem complicated at first, it's actually quite easy to use and offers a range of creative possibilities. In this article, we will discuss how to invert a radial filter in Camera Raw, a powerful photo editing software. We will also explore some tips and tricks to enhance your editing skills and create stunning visual effects.
| Characteristics | Values |
|---|---|
| Radial Filter Tool | J |
| Purpose | To direct attention to specific portions of the image |
| Shape | Elliptical |
| Effect Options | Outside, Inside |
| Adjustment | Full strength to gradual diminution to no adjustment |
| Feather Slider | Adjusts the falloff of the applied effect |
What You'll Learn
- How to invert a radial filter in Camera Raw to add a vignette?
- How to invert a radial filter in Camera Raw to adjust the exposure?
- How to invert a radial filter in Camera Raw to adjust the colour?
- How to invert a radial filter in Camera Raw to adjust the focus?
- How to invert a radial filter in Camera Raw to adjust the tone?
![]()
How to invert a radial filter in Camera Raw to add a vignette
Vignettes are a great way to add a retro look to your images or to draw attention to a particular subject. In this article, we will show you how to invert a radial filter in Camera Raw to add a vignette to your images.
Using the Radial Filter Tool
The Radial Filter tool in Camera Raw allows you to define an elliptical area with an overlay and then make adjustments to the area inside or outside the overlay using sliders. To add a vignette, you will need to adjust the area outside the overlay. Here's how to do it:
- Open your image in Camera Raw.
- Click on the Radial Filter tool (usually accessed by pressing 'J' on your keyboard).
- Click the '+' or '-' button on any slider to reset them to zero, except for the one you want to adjust.
- At the bottom of the panel, click "Effect: Outside" to apply the filter effect outside the overlay.
- Drag over the area of the photo you want to adjust to create an overlay.
- Use the sliders to adjust the filtered area. For a vignette, you will typically adjust the exposure slider to darken or lighten the edges of your image.
- Use the Feather slider to control how gradual the adjustment is at the edge of the overlay.
- If you need to reposition or resize the overlay, drag inside it or drag one of the handles.
- To invert the filter, click the "Effect: Inside" button or press 'X' to swap the adjustment from outside to inside the overlay.
- Make any further adjustments to the inside area as needed.
Additional Tips
- When adding a vignette, be subtle and gentle. A gradual and very subtle vignette often works best, especially for portraits.
- If you want to add a spotlight effect to your image, a vignette can be essential.
- Play around with different shapes and blend modes to create unique vignettes.
- If you want more flexibility and control over your vignettes, consider using Adobe Photoshop's Curves Adjustment Layer method.
Charging the Bdpower Wi-Fi Camera: A Step-by-Step Guide
You may want to see also
![]()
How to invert a radial filter in Camera Raw to adjust the exposure
The Radial Filter tool in Adobe Camera Raw allows you to direct attention to specific portions of an image by drawing an elliptical shape around the subject and adjusting the exposure and clarity of the area within the shape. Here's a step-by-step guide on how to invert a radial filter in Camera Raw to adjust the exposure:
- Open a photo in Adobe Camera Raw: Start by opening the image you want to edit in Adobe Camera Raw. You can do this by opening a camera raw file or by choosing "Filter > Camera Raw Filter" in Photoshop with an image open.
- Identify areas of focus: Determine one or more areas in the photo where you want to attract the viewer's attention. You can use radial filters to highlight the subject or to weaken the focus on the background.
- Select the Radial Filter tool: In the toolbar, select the Radial Filter tool. You can also press "J" on your keyboard to toggle the Radial Filter tool.
- Create or edit a Radial Filter: Use the "New" and "Edit" radio button options to choose whether you want to create a new filter or edit an existing one. To create a Radial Filter, click and drag to draw a circular or elliptical shape around the area you want to adjust. To edit an existing Radial Filter, click on any of the gray handles on the photo, which will turn red when selected.
- Choose the Effect option: Select "Inside" or "Outside" as the Effect option to determine where the modifications will be applied. Choosing "Inside" will apply the adjustments to the selected area within the shape, while "Outside" will apply them outside the selected area.
- Adjust the size and orientation: You can adjust the size and orientation of the Radial Filter by clicking and dragging its centre to reposition it. To change the size, hover over any of the four filter handles and drag when the pointer icon changes. To change the orientation, hover close to the edge of the filter and drag when the pointer icon changes.
- Modify the selected Radial Filter area: Use the sliders to adjust the exposure, clarity, and other settings for the selected Radial Filter area. The Feather slider will adjust the falloff of the applied effect.
- Repeat and refine: Repeat steps 3 to 7 to continue adding or editing Radial Filters as needed. Clear the Overlay checkbox to preview the final result. If you want to start over, click "Clear All" (this action cannot be undone).
- Enable mask visualization: Use the "Mask" option to enable mask visualization, which will show you how the adjustments are affecting the selected areas. You can also press "Y" to toggle the Mask setting.
- Invert the Radial Filter: To invert the Radial Filter and adjust the exposure for the area outside the selected area, click the "Outside" Effect button or press "X" to swap between "Inside" and "Outside". This will apply the adjustments to the area outside the elliptical shape you drew in step 4.
- Fine-tune adjustments: Use the sliders to fine-tune the exposure and other adjustments for the inverted Radial Filter. You can also control the gradual adjustment at the edge of the overlay using the Feather slider.
- Add or edit additional overlays: If needed, you can add another overlay by clicking "New" and following the previous steps. Remember that adjustments will be cumulative where the overlays overlap.
- Delete or hide overlays: To delete a selected overlay, press the "Backspace" or "Delete" key. To hide the overlay and gauge the adjustments, uncheck "Show Overlay" or press "V".
By following these steps, you can invert a radial filter in Camera Raw to adjust the exposure and fine-tune the image to your desired result.
Don't Drain Your Camera Battery: Here's Why
You may want to see also
![]()
How to invert a radial filter in Camera Raw to adjust the colour
Radial filters in Adobe Camera Raw 8.0 allow you to direct attention to specific portions of an image. You can use the Radial Filter tool to draw an elliptical shape around the subject, and increase the exposure and clarity of the area within the shape to bring more attention to the subject. The subject can be off-centre, or anywhere in the photograph.
- Open a photo in Adobe Camera Raw.
- Identify one or more areas where you'd like to attract the viewer's attention.
- (Optional) Use a Radial filter to weaken the focus on the background.
- Use a Radial filter to highlight the subject. You can do this by selecting the Radial Filter tool from the toolbar or pressing J to toggle the Radial Filter tool.
- Use the New and Edit radio button options to choose whether you want to create a filter or edit an existing filter.
- To create a Radial filter, click and drag across the region to draw a circular or elliptical shape. This shape determines the area affected or excluded from the alterations you are about to perform.
- To edit a Radial filter, click any of the grey handles on the photo. When selected, the handle will turn red.
- To determine what area of the photo is modified, choose an Effect option (located below the sliders). Select "Outside" to apply modifications outside the selected area or "Inside" to apply modifications inside the selected area.
- Adjust the size (width and height) and orientation of the Radial filter.
- Use the sliders to modify the selected Radial filter area. The Feather slider adjusts the falloff of the applied effect.
- Repeat steps 4 through 7 to continue adding or editing Radial filters.
- Clear the Overlay checkbox to show how the finished photo appears. If you want to delete all the Radial filters and start over, click Clear All (this action cannot be undone).
- Use the Mask option to enable mask visualization. Alternatively, press Y to toggle the Mask setting.
You can also modify Radial Filter masks using brush controls. Once you've added a mask, select the Brush option next to New/Edit or press Shift+K to access the brush controls.
- You can use the Radial Filter to balance the tones throughout the frame by darkening the highlights and brightening the shadows.
- To make local colour adjustments, use the white balance and tint sliders to enhance the different tones in your image.
- You can also use the colour panel inside the radial filter to add colours to a certain part of your image.
- When making local colour adjustments, be sure to use a matching colour to avoid an unnatural appearance.
Fuji Batteries: Are They Made by Fuji Camera Company?
You may want to see also
![]()
How to invert a radial filter in Camera Raw to adjust the focus
Radial filters in Adobe Camera Raw 8.0 allow you to direct attention to specific portions of an image. You can use the Radial Filter tool to draw an elliptical shape around the subject and adjust the focus by increasing the exposure and clarity of the area within the shape.
Step 1: Open a Photo in Adobe Camera Raw
Start by opening the image you want to edit in Adobe Camera Raw. This software offers various adjustment possibilities and makes post-processing more accessible.
Step 2: Identify the Areas to Highlight or Adjust
Decide on the areas where you want to attract the viewer's attention. You can use the Radial Filter to highlight the subject or to weaken the focus on the background.
Step 3: Select the Radial Filter Tool
Choose the Radial Filter tool from the toolbar. You can press the letter 'J' as a keyboard shortcut to toggle the Radial Filter tool.
Step 4: Create or Edit a Radial Filter
Use the 'New' and 'Edit' radio button options to choose whether you want to create a new filter or edit an existing one.
To create a Radial Filter:
- Click and drag across the desired region to draw a circular or elliptical shape.
- This shape determines the area affected by your adjustments.
To edit an existing Radial Filter:
Click on any of the gray handles on the photo. The handle will turn red when selected.
Step 5: Choose the Effect Option
Select whether you want the modifications to be applied inside or outside the selected area.
- "Outside": All modifications will be applied outside the selected area.
- "Inside": All modifications will be applied inside the selected area.
Step 6: Adjust the Size and Orientation of the Radial Filter
You can adjust the size (width and height) and orientation of the Radial Filter.
- To move and reposition the filter, click and drag the centre of the filter.
- To change the size, hover the pointer over any of the four filter handles, then click and drag.
- To change the orientation, hover the pointer close to the edge of the filter, then click and drag.
Step 7: Modify the Selected Radial Filter Area
Use the sliders to make adjustments to the selected Radial filter area. The Feather slider, for example, adjusts the falloff of the applied effect.
Step 8: Invert the Radial Filter
To invert the Radial Filter, adjust the "Effect" setting to "Outside" if you want the modifications outside the selected area. This will create an inverted effect, enhancing the focus on your chosen subject.
Step 9: Fine-Tune and Finalize
Repeat steps 3 through 8 to continue editing and refining your Radial filters.
You can also clear the "Overlay" checkbox to preview the final image without the overlay. If you want to start over, click "Clear All" to delete all Radial filters (this action cannot be undone).
By following these steps, you can effectively use Radial Filters in Camera Raw to adjust the focus and enhance specific areas of your image.
Charging Your Panasonic Lumix: A Step-by-Step Guide
You may want to see also
![]()
How to invert a radial filter in Camera Raw to adjust the tone
Radial filters in Adobe Camera Raw 8.0 allow you to direct attention to specific parts of an image. You can use the Radial Filter tool to draw an elliptical shape around the subject, increasing the exposure and clarity of the area within the shape to bring more attention to the subject.
Step 1: Open a Photo in Adobe Camera Raw
Open the photo you want to edit in Adobe Camera Raw. You can do this by opening a camera raw file or by choosing "Filter > Camera Raw Filter" in Photoshop with an image already open.
Step 2: Identify Areas for Adjustment
Determine one or more areas in the photo where you want to attract the viewer's attention or make adjustments. You can use radial filters to highlight the subject or to reduce the focus on the background.
Step 3: Select the Radial Filter Tool
Select the Radial Filter tool from the toolbar or press "J" on your keyboard to toggle it.
Step 4: Create or Edit a Radial Filter
Use the "New" and "Edit" radio button options to choose whether you want to create a new filter or edit an existing one.
- To create a Radial Filter: Click and drag across the region to draw a circular or elliptical shape. This shape determines the area that will be affected by your adjustments.
- To edit a Radial Filter: Click on any of the gray handles on the photo. The handle will turn red when selected.
Step 5: Choose the Effect Option
Select either "Outside" or "Inside" from the Effect options below the sliders to determine where the modifications will be applied.
- Outside: All modifications will be applied outside the selected area.
- Inside: All modifications will be applied inside the selected area.
Step 6: Adjust the Size and Orientation of the Radial Filter
You can adjust the size (width and height) and orientation of the radial filter by:
- Clicking and dragging the center of the filter to reposition it.
- Hovering over the filter handles and clicking and dragging to change the size.
- Hovering close to the edge of the filter and clicking and dragging to change the orientation.
Step 7: Modify the Selected Radial Filter Area
Use the sliders to modify the selected radial filter area. The "Feather" slider adjusts the falloff of the applied effect, creating a softer or harder transition between the adjusted and unadjusted areas.
Step 8: Repeat and Fine-Tune Adjustments
Repeat steps 3 through 7 to continue adding or editing radial filters as needed. You can also clear the "Overlay" checkbox to preview the final photo without the overlays.
Step 9: Enable Mask Visualization (Optional)
Use the "Mask" option to enable mask visualization, which will show you the areas that are being adjusted. You can also press "Y" to toggle the Mask setting.
Step 10: Invert the Radial Filter
To invert the radial filter and adjust the tones outside the selected area, choose the "Outside" option from the Effect settings. This will apply your adjustments to the area outside the elliptical shape you drew in Step 4.
You can now use the sliders to adjust the tones in the selected area, such as exposure, contrast, or brightness, to achieve the desired effect.
Charging the Wyze Camera: Quick and Easy Steps
You may want to see also