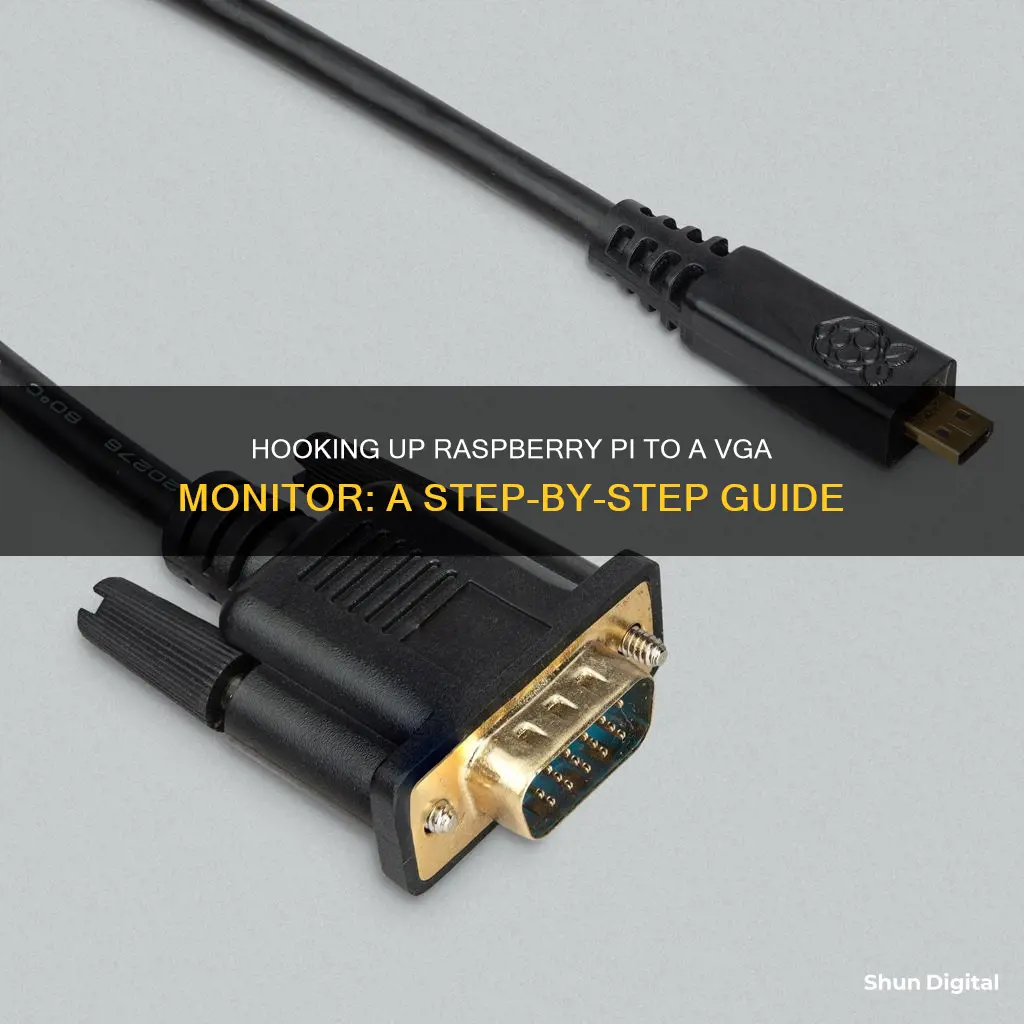
The Raspberry Pi is a $25 ARM GNU/Linux box that comes with RCA and HDMI ports. While connecting the Raspberry Pi to an HDMI-supported TV or monitor is straightforward, some monitors only have VGA connectors. To connect your Raspberry Pi to a VGA monitor, you will need to purchase a power-free HDMI-to-VGA adapter. Once you have the adapter, you may need to edit the config.txt file located in the Raspberry Pi distro to obtain a picture on the VGA monitor. You can do this by uncommenting the following four lines: hdmi_force_hotplug=1, hdmi_drive=2, hdmi_group=1, and hdmi_mode=1. After editing the config.txt file, connect the Raspberry Pi to the HDMI-to-VGA adapter, and then connect the adapter to the VGA monitor.
What You'll Learn

Purchase a power-free HDMI-to-VGA adapter
To connect your Raspberry Pi to a VGA monitor, you'll need to purchase a power-free HDMI-to-VGA adapter. This is because the Raspberry Pi does not include a VGA connector, as this would increase the power consumption of the board.
There are several options available for power-free HDMI-to-VGA adapters that are compatible with the Raspberry Pi. The Pi Hut, for example, sells an HDMI-to-VGA adapter for the Raspberry Pi 3, a mini-HDMI-to-VGA adapter for the Pi Zero, and a micro-HDMI-to-VGA adapter for the Raspberry Pi 4.
Amazon also offers a wide range of similar products, including:
- Gold-plated HDMI-to-VGA adapters
- Adapters with 3.5mm audio jacks
- Adapters with power supply functions
When purchasing an adapter, it is important to ensure that it is compatible with your specific Raspberry Pi model and that it meets your audio requirements. Some adapters, for example, do not support audio output from the HDMI port, so you may need to connect external speakers.
Additionally, keep in mind that you may need to adjust the display settings in the config.txt file to get your VGA monitor to work with your specific monitor and resolution.
Powering LCD Monitors via USB: A Simple Guide
You may want to see also

Edit the config.txt file in the Raspberry Pi distro
To edit the config.txt file in the Raspberry Pi distro, you will need to make your SD card bootable by installing the Raspberry Pi distribution into it. Once you have done this, insert the SD card into your computer and open the config.txt file, which is located under the "/boot directory".
You will see a set of lines for the different functions in this file. To obtain a picture on your VGA monitor, you will need to uncomment the following four lines by removing the # at the start of the line:
- Hdmi_force_hotplug=1
- Hdmi_drive=2
- Hdmi_group=1
- Hdmi_mode=1
- Hdmi_force_hotplug=1 pretends that an HDMI device is always attached.
- Hdmi_drive=2 forces the monitor to HDMI mode so that sound signals are carried from HDMI cables.
- Hdmi_group specifies whether the monitor is DMT type (Computers) or CEA type (TV).
- Hdmi_mode specifies the resolution of the monitor.
If you are using the output as a computer monitor, replace the value '1' with '2' in the hdmi_group line, so the new config will be:
- Hdmi_force_hotplug=1
- Hdmi_drive=2
- Hdmi_group=2
- Hdmi_mode=1
Now, open eLinux RPi config and scroll down. In hdmi_mode, two tables are given; select the correct resolution as per your monitor. (Table 1 if you are using a TV and Table 2 if you are using a monitor).
For example, if your monitor's resolution is 1366x768 px, hdmi_mode=39 would be the best option. So, the modified config.txt file will look like this:
- Hdmi_force_hotplug=1
- Hdmi_drive=2
- Hdmi_group=2
- Hdmi_mode=39
Now, save the edited config.txt file and insert the SD card back into your Raspberry Pi device. Note that you will need to reboot your device for these changes to take effect.
Monitoring Internet Usage on iPads: A Comprehensive Guide
You may want to see also

Connect the Raspberry Pi to the HDMI-to-VGA adapter
To connect your Raspberry Pi to a VGA monitor, you will need to purchase an HDMI-to-VGA adapter. The Raspberry Pi has an HDMI connector, but VGA monitors do not.
There are many HDMI-to-VGA adapters available on the market, but not all of them work with the Raspberry Pi. You may need to try a few different ones to find one that works for you. Some options that have been tested and confirmed to work with the Raspberry Pi include:
- The Pi Hut's HDMI to VGA adapter for Raspberry Pi 3
- The Pi Hut's Mini-HDMI to VGA adapter for Pi Zero
- The Pi Hut's Micro-HDMI to VGA adapter for Raspberry Pi 4
- Adafruit HDMI to VGA adapter
- Amazon Basics HDMI to VGA adapter
- Pimoroni HDMI to VGA converter
- CPC/Farnell HDMI to VGA adapter
Once you have purchased your adapter, follow these steps to connect your Raspberry Pi to your VGA monitor:
- Connect the HDMI end of the adapter to the HDMI port on your Raspberry Pi.
- Connect the VGA cable from your monitor to the VGA end of the adapter.
- Power on your Raspberry Pi and your monitor.
- If you are using a KVM switch, make sure it is powered on and connected properly to the Raspberry Pi and the monitor.
- If you are using an external power supply for your adapter, connect it to the adapter and power it on.
- If you are using an HDMI-to-VGA adapter that requires power from the Raspberry Pi's USB port, connect the USB cable from the adapter to the Raspberry Pi's USB port.
- If you are still not getting any output on your VGA monitor, you may need to edit the config.txt file on your Raspberry Pi. This file is located in the /boot directory.
- To force the Raspberry Pi to output at the HDMI port, add or uncomment the line "hdmi_force_hotplug=1" by removing the '#' symbol at the beginning of the line.
- To force the Raspberry Pi to output at a low resolution that is supported by most displays, add or uncomment the line "hdmi_safe=1".
- If you are still having issues, you can try boosting the HDMI signal by adding or uncommenting the line "config_hdmi_boost" and changing the value from 0-7 (0 is the default, 7 is the maximum).
Monitoring Internet Bandwidth: Tracking User Activity
You may want to see also

Ensure you have the correct Raspberry Pi cable
To connect your Raspberry Pi to a VGA monitor, you will need to purchase an HDMI-to-VGA adapter. The type of adapter you need will depend on the model of your Raspberry Pi. For example, if you have a Raspberry Pi 4, you will need a micro-HDMI-to-VGA adapter. If you have a Pi Zero, you will need a mini-HDMI-to-VGA adapter.
There are many HDMI-to-VGA adapters available on the market, but not all of them are compatible with the Raspberry Pi. Here are some options that are known to work:
- Female-female HDMI-VGA switch from Amazon
- Adapter from Aliexpress
- Adapters from The Pihut
- Adapters from CPC/Farnell
- Adapters from Pimoroni
- Adapters from Adafruit and Amazon
Once you have the correct adapter, you can connect your Raspberry Pi to the VGA monitor by plugging the adapter into the HDMI port on the Raspberry Pi and the VGA cable from the monitor into the adapter.
In some cases, you may also need to edit the config.txt file on the Raspberry Pi to force the Raspberry Pi to output at the HDMI port and to output at a low resolution supported by your monitor.
Fixing the ViewSonic VA 1930WM LCD Monitor: A Step-by-Step Guide
You may want to see also

Use a Raspberry Pi with a TRRS port
The Raspberry Pi B+ models, released in 2014, and later versions feature a 3.5 mm TRRS port. TRRS refers to the three parts of a phone connector: "Tip, Ring, Ring, Sleeve". The Raspberry Pi uses the CTIA-style AV TRRS standard, similar to older MP3 players (e.g. iPods, Zunes) and the Xbox 360.
The TRRS port provides multiple media output options, including the use of a TRRS to RCA cable or adapter. On the Raspberry Pi B+ to Raspberry Pi 3 B+, the TRRS port is located between the CSI ribbon port and the Ethernet port. On the Raspberry Pi 4, the TRRS is located between the CSI port and the USB 2.1 ports.
To use a Raspberry Pi with a TRRS port, you will need to connect it to a display. You can do this by using a TRRS to RCA cable or adapter. This will allow you to connect the Raspberry Pi to a TV or monitor with RCA inputs.
Alternatively, you can use an HDMI to VGA converter to connect the Raspberry Pi to a VGA monitor. This requires purchasing a power-free HDMI to VGA adapter and editing the config.txt file on the Raspberry Pi to specify the correct monitor resolution.
Note that the TRRS port on the Raspberry Pi is for audio and video output only and cannot be used to power the device.
Hooking Up Your GameCube to an ASUS Monitor
You may want to see also
Frequently asked questions
You will need a Micro-HDMI to VGA adapter cable for the Raspberry Pi 4, a Mini-HDMI to VGA adapter cable for the Pi Zero, or an HDMI to VGA adapter cable for the Raspberry Pi 3.
Yes, you will need to edit the config.txt file located in the "/boot" directory. You will need to uncomment the following four lines by removing the # at the start of the line:
- hdmi_force_hotplug=1
- hdmi_drive=2
- hdmi_group=1 or hdmi_group=2 (hdmi_group=1 for TV, hdmi_group=2 for monitor)
- hdmi_mode=1 (or another number depending on your monitor's resolution)
You may need a USB cable to power the adapter, and you will need external speakers as the adapters do not support audio from the HDMI port.


