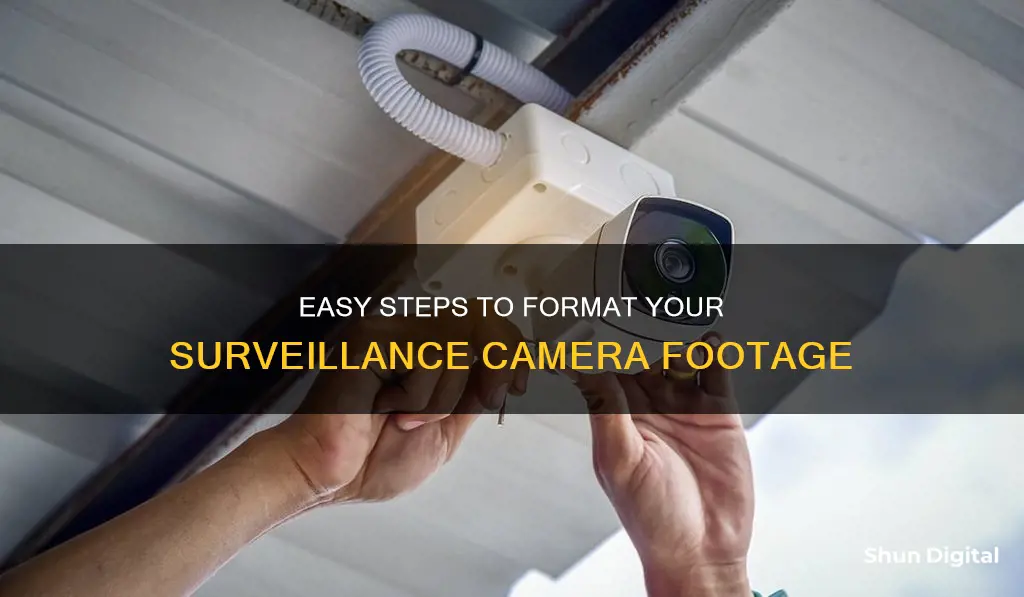
Surveillance cameras are an essential tool for security and monitoring, and formatting them correctly is crucial to ensure optimal performance. Formatting a surveillance camera involves configuring its storage system to prepare it for data recording. This process typically includes steps such as connecting the camera to a power source, accessing the camera's menu, selecting the appropriate format type, and initiating the formatting process. Proper formatting ensures the camera can effectively capture and store video footage, which is vital for security, evidence collection, and incident review. This guide will outline the steps to format a surveillance camera, covering different camera models and storage media, such as hard drives and SD cards.
What You'll Learn

Formatting a new surveillance camera
Step 1: Prepare the Camera
Turn off your camera and insert the memory card into the SD card slot. Ensure that the card is inserted properly and securely.
Step 2: Access the Camera's Menu
Turn on the camera and press the "Menu" button. This will bring up the camera's display menu. From here, you will be able to access various settings and options.
Step 3: Navigate to the Format Option
Using the camera's navigation buttons, find and select the "Setup" menu. This menu will contain options related to the camera's basic functions and settings. Once you are in the "Setup" menu, look for the "Format" option. This is usually found under the "Disk" or "Storage" menu.
Step 4: Initiate the Format
Select the "Format" option and confirm the action. This will start the formatting process. Depending on your camera, you may be asked to select a specific format type (e.g., FAT32, exFAT). If you are unsure, it is generally recommended to use the exFAT file system, especially for cards larger than 64GB.
Step 5: Wait for the Format to Complete
Formatting can take a few moments, so be patient and do not turn off the camera during this process. Once the formatting is complete, your camera will notify you, usually with an on-screen message or a blinking light.
Step 6: Turn Off the Camera
After the formatting is done, power off your camera. Your memory card is now ready to store new data and recordings.
It is important to note that formatting will erase all data on the memory card. Always back up important data before initiating the format process. Additionally, it is recommended to format memory cards specifically for your camera, as this optimizes the file system and reduces the risk of errors.
Think Tank Camera Bags: Where Are They Manufactured?
You may want to see also

Formatting an SD card for a camera on a PC
Formatting an SD card for your camera on a PC is a straightforward process. Here is a step-by-step guide to help you get started:
Step 1: Insert the SD Card into Your PC
Locate the SD card slot on your computer and insert the SD card. If your computer does not have a built-in card reader, you can use a USB-style card reader.
Step 2: Open Windows File Explorer
Once the SD card is inserted, open Windows File Explorer. In the Folder pane, select "This PC". If you are using an older version of Windows, select "My Computer".
Step 3: Select the SD Card
In the Windows File Explorer, you will see the SD card listed. Right-click on the SD card and select "Format". This will open the format application.
Step 4: Choose the File System
The file system for the SD card depends on its capacity. For cards below 32GB, the file system should typically be FAT32, while for cards above 32GB, exFAT or exFAT32 is recommended. However, Windows usually automatically selects the appropriate file system.
Step 5: Format the SD Card
Leave the "Quick Format" checkbox selected if you have formatted the SD card before. If this is your first time formatting the card, uncheck the "Quick Format" box to perform a full format. Click the “Start” button to begin the formatting process.
Step 6: Confirm the Format
A warning will pop up to confirm that you are formatting the correct card or drive. Review the information and click "OK" to proceed. This will initiate the formatting process, which may take some time to complete.
Once the format is done, you will receive a notification. Your SD card is now ready to be used in your camera.
It is important to note that formatting the SD card will erase all data on the card. Therefore, it is recommended to back up important files before proceeding with the formatting process.
How to Keep Date and Time Settings on Canon A560
You may want to see also

Formatting an SD card for a camera on a Mac
Before Formatting:
- Ensure the SD card is compatible with your Mac. Most common brands of SD cards are usually compatible. If unsure, check the manufacturer's instructions or website.
- Remove the SD card from any devices currently using it.
- Back up any important data on the SD card, such as images or files, as formatting will erase everything on the card.
Formatting Process:
- Insert the SD card: Insert the SD card into your Mac's SD card slot. If your Mac lacks a built-in SD card slot, use an external card reader.
- Open Disk Utility: Go to "Applications" > "Utilities" > "Disk Utility." You can also use Spotlight (Command + Space Bar) to search for "Disk Utility."
- Select the SD card: In the left pane of the Disk Utility window, select the SD card you want to format. Be cautious if you have multiple cards connected.
- Click "Erase": With the SD card selected, click the "Erase" button at the top of the Disk Utility window.
- Choose the format type: Select the appropriate file format, such as FAT or ExFAT, which are commonly compatible with cameras. Refer to your camera's manual for confirmation. Other options like NTFS or HFS+ are less common.
- Name your SD card (optional): You can assign a name to the SD card for easier identification. This step is optional, and the card will function even without a name.
- Execute the formatting: After choosing the format and name, click "Erase" again to initiate the formatting process. The duration of this process will depend on the card's size, chosen format, and card reader speed.
After Formatting:
- Eject the SD card from your Mac by dragging it to the trash or using the eject icon.
- You can now reinsert the SD card into your camera or device.
Remember, it is generally recommended to format SD cards in the device they will be used in. However, if your device doesn't have a format option, using your Mac is a viable alternative.
Unleashing Camera Raw: A Guide to Unlocking the Power
You may want to see also

Formatting an SD card for a camera on Android
Formatting an SD card for a surveillance camera on an Android device is a straightforward process. However, it's important to note that this will only delete data from the SD card, and a complete format requires a PC or Mac.
Before formatting your SD card, ensure that you have backed up any important files, as formatting will erase all data on the card.
- Insert the memory card into the memory card slot on your Android device.
- Open the Settings app and select "Storage".
- Click on "SD card".
- At the top right of the menu bar, tap "Storage settings".
- You will now have two options: "Format" or "Format as internal". Choose the appropriate option for your needs.
- Confirm the formatting process by clicking on the "Format SD card" or "Erase SD card" button.
- Wait for the Android device to finish formatting your SD card. This may take a few moments.
- Once the process is complete, click "Done".
Your SD card is now formatted and ready to use with your surveillance camera.
Understanding Camera's Focus Assist Feature for Sharp Images
You may want to see also

Formatting a hard drive for a surveillance camera
When to Format a Hard Drive
Before formatting, it's important to understand why you're doing it. There are two main reasons to format a hard drive for a surveillance camera:
- New Hard Drive Installation: When you install a new hard drive into your surveillance camera system, you need to format it to prepare it for recording.
- Correct System Malfunctions: If your surveillance camera system suddenly stops recording, formatting the hard drive can help resolve the issue. This is often due to "bad sectors" on the drive, which is normal wear and tear.
Understanding File Systems
When formatting your hard drive, you'll need to choose a compatible file system. The most common file system for surveillance cameras is FAT32, as it is universally accepted and easy to use. However, the maximum file size in FAT32 is 4GB. If you need to store larger files, you can choose other file systems like NTFS, EXT2, EXT3, or ReFS.
Connect the Hard Drive
Before formatting, you need to connect the hard drive to your surveillance camera system. Here are the general steps:
- Power off your system and disconnect any power cables.
- Open the system case using a compatible screwdriver.
- Locate the drive tray and remove it by unscrewing any screws.
- Insert your new hard drive into the empty slot in the drive tray, ensuring the connector side is facing outward.
- Connect the power and data cables from the system to the respective slots on the hard drive.
- Slide the drive tray back into the system and secure it with screws.
- Close the system case.
Formatting Methods
Once your hard drive is connected, you can use one of the following methods to format it:
- Disk Management Tool: Most operating systems have a built-in disk management application. For Windows, use the Disk Management tool to locate the connected hard drive, right-click, and choose to format. You can then assign a drive letter and select the appropriate file system.
- File Explorer: If your computer has detected the hard drive, you can format it using the File Explorer. Locate the hard drive, right-click, and select "Format." Choose the desired file system and rename the volume if needed.
- Command Prompt: This method is more technical and requires familiarity with the Command Prompt. You'll need to use the Disk Partition utility to format the hard drive. Enter the "diskpart" command, then "list disk" to see all connected disks. Note the disk number of your hard drive and use the "select" command. Finally, enter the "clean" command to wipe existing data, followed by the "create partition primary" command, and finish with the "format" command, specifying the file system.
Charging Camera Batteries: Alone Contestants' Strategies
You may want to see also
Frequently asked questions
FAT32 or ExFAT is the best-recommended format for an SD memory card.
You don't need to format an SD card too often. Modern SD cards are rated in duration before failure in hours, not cycles.
You can format an SD card by connecting it to your computer and using a memory card reader or adapter.
Yes, formatting an SD card on your Android device is a straightforward procedure. However, formatting on an Android device only implies deleting data from the SD card. For a complete format, you will need a PC or Mac.
There are several reasons why your camera cannot format your SD card, including bad sectors on the SD card, write protection, or a virus. To fix this issue, try formatting the SD card in Windows disk management or using Windows File Explorer.


