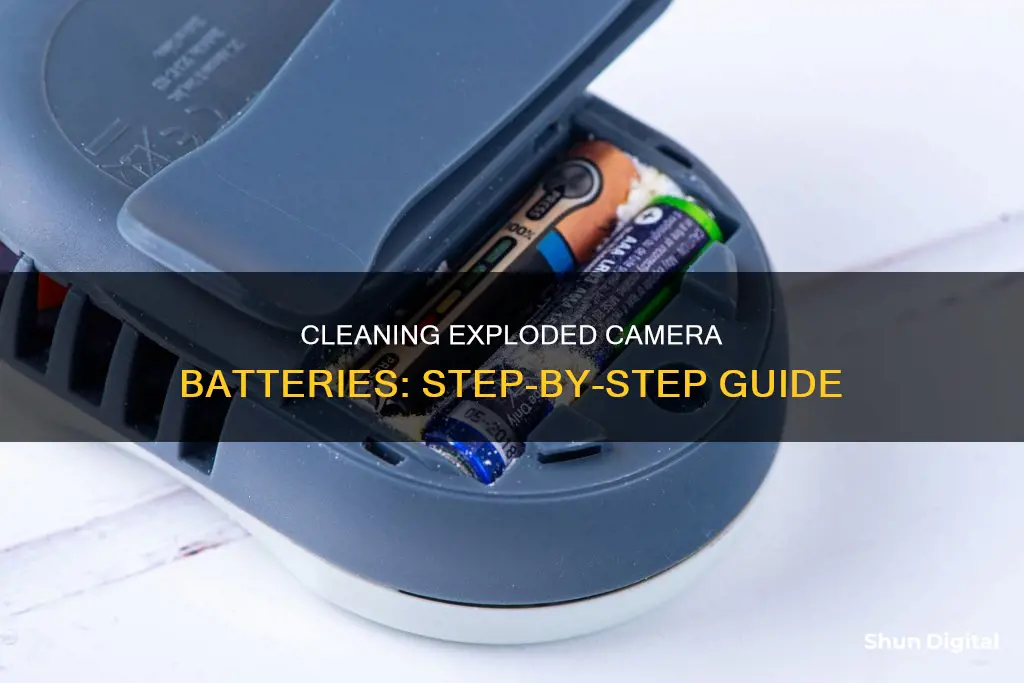
If your camera has stopped working due to an exploded battery, it might be possible to clean it and get it working again. The first step is to remove the battery from the device and place it in a plastic bag for disposal. The next step is to clean the device. It is recommended to wear gloves and safety glasses when cleaning up a battery leak to protect your skin and eyes from irritation and chemical burns. A cotton swab or Q-tip dipped in vinegar or lemon juice can be used to neutralise the alkaline battery leak. For more stubborn corrosion, an old toothbrush dipped in vinegar or lemon juice can be used. The area should then be dried thoroughly before reassembling the device.
| Characteristics | Values |
|---|---|
| Safety equipment | Protective eyewear, gloves |
| Remove batteries | Take out leaking batteries and place in a plastic bag for disposal |
| Clean | Neutralise alkaline leakage with a few drops of a mild acid like white vinegar or lemon juice; use a toothbrush for stubborn leaks |
| Dry | After neutralising, dry the area thoroughly |
| Clean metal contacts | Scrape and polish metal contacts with a pencil eraser |
| Clean tools | Use Q-tips, paper towels or rags to clean tools |
What You'll Learn

Wear gloves and safety glasses to protect yourself
When cleaning an exploded battery in a camera, it is important to prioritise your safety. Before you begin, make sure to wear gloves and safety glasses to protect yourself. The gloves should be thick and durable, such as rubber gloves, to prevent the corrosive battery acid from coming into contact with your skin. Safety glasses with side shields will help to ensure that no liquid or debris enters your eyes. You may also want to consider wearing a long-sleeved shirt and trousers to protect your arms and legs. It is also recommended to work in a well-ventilated area or outdoors to avoid inhaling any harmful fumes.
Once you are properly equipped with gloves and safety glasses, you can begin the cleaning process. The first step is to remove the batteries from the camera. Be gentle during this step to avoid further leakage or damage. Place the batteries in a plastic bag for disposal. If the battery has exploded, there may be debris or fragments that you need to collect and place in the plastic bag as well. Use a brush or a vacuum cleaner with a HEPA filter to remove any remaining residue or powder from the explosion.
After the batteries and debris have been removed, you can start neutralising the alkaline battery acid. Dip a cotton swab or Q-tip in a mild acid like white vinegar or lemon juice, and carefully apply it to the affected areas in the camera's battery compartment. You may hear a slight sizzling noise, which indicates that the neutralisation process is working. For more stubborn leaks or heavily corroded areas, you can use an old toothbrush dipped in vinegar or lemon juice to scrub away the corrosion.
It is important to work carefully and methodically during this process, ensuring that you do not spread the battery acid to other parts of the camera. Use a soft cloth or paper towel to wipe away any excess liquid or residue. You can also use isopropyl alcohol on a cotton swab to clean the affected areas and leave the circuitry clean. Allow the camera to air dry completely before reassembling it and inserting new batteries.
By taking the proper safety precautions, such as wearing gloves and safety glasses, you can effectively clean an exploded battery in a camera while minimising the risk of injury or harm to yourself.
Charging the Vantop Moment 4: A Step-by-Step Guide
You may want to see also

Remove the batteries
Removing the batteries from your camera is an important first step in cleaning an exploded battery. This process should be approached with caution, as the residue from alkaline batteries is caustic and can cause chemical burns. Be sure to wear protective gloves and safety glasses to shield your skin and eyes from any harmful substances.
Before removing the batteries, it is advisable to place your camera on a flat surface and keep it upright. This will prevent any liquid or residue from dripping inside the device and causing further damage. Once the camera is securely positioned, you can proceed to take out the batteries.
When handling the batteries, use a plastic bag to contain them and avoid direct contact. Place the batteries inside the bag and seal it securely. This will ensure that any residual chemicals or leakage are contained and cannot cause further harm. Dispose of the plastic bag with the batteries inside in a trash receptacle.
After removing the batteries, the next step is to clean the affected area. The battery compartment and surrounding areas may have residual acid or corrosion that needs to be addressed. This can be done using a variety of mild acids, such as white vinegar or lemon juice, which will help neutralise the alkaline residue. Gently apply these liquids with a cotton swab or Q-tip, being careful not to apply too much at once.
Gently wipe away any visible corrosion or residue with a soft cloth or tissue. Repeat this process as needed until all signs of corrosion have disappeared. It is important to be thorough and patient during this step to ensure that all harmful substances are removed.
Lithium Batteries: Powering Your Camera, What You Need to Know
You may want to see also

Use a cotton swab to wipe away debris
If you're dealing with an exploded battery in your camera, the first step is to remove the leaking batteries from the device and place them in a plastic bag for disposal. Remember to always wear protective eyewear and gloves when handling battery acid.
Now, let's talk about using cotton swabs to wipe away debris from your camera:
Before you begin, make sure you have the right tools. Use a cotton swab with a plastic or wooden stick, as paper sticks can easily poke through the cotton and leave fibres on the sensor. Some sources recommend using specialised swabs designed for cleaning camera sensors, as they are less likely to fray or leave fibres behind. You can find these at photography stores or online.
For the cleaning agent, a small amount of rubbing alcohol (isopropyl alcohol) can be effective. However, some sources suggest using a mild acid like white vinegar or lemon juice to neutralise the alkaline battery leak. You can also use a specialised contact cleaner, which is designed to be effective and gentle on electronic devices.
When you're ready to start cleaning:
- Remove the battery from the camera.
- Dip the cotton swab in your chosen cleaning agent.
- Gently rub the swab over the affected areas, including the battery contacts and any other components with debris or corrosion. Be careful not to apply too much pressure to avoid damaging the contacts.
- Use additional swabs as needed until all evidence of the leak is gone.
- Allow the cleaned areas to dry completely before reassembling your camera and inserting new batteries.
Remember to always follow the manufacturer's instructions for cleaning and maintaining your specific camera model. Additionally, if the leak has caused extensive damage, you may need to seek professional cleaning services.
Rapid Charging: Powering Your Camera in a Flash
You may want to see also

Clean with vinegar or lemon juice
If your camera has been damaged by an exploded battery, you can try to clean it with vinegar or lemon juice. Here's a step-by-step guide on how to do it:
Step 1: Protect yourself and your workspace
Before you start cleaning your camera, it's important to take some safety precautions. Put on protective gear, such as gloves and safety glasses, to avoid direct contact with the corrosive substances. Cover your work surface with newspaper or any other material that can protect it from spills.
Step 2: Remove and dispose of the corroded batteries
Carefully take the damaged batteries out of your camera's battery compartment. Make sure to dispose of them properly, following the regulations in your area. Check with your local sanitation department or look for specialised drop-off locations or recycling programs.
Step 3: Clean the battery compartment and contacts
Using a cotton swab, gently apply a small amount of vinegar or lemon juice to the corroded areas. Wait for a minute or two, and then wipe away the crystalline corrosion from the battery contacts and other affected areas in the battery compartment. For stubborn spots, try scrubbing with a toothbrush. You can also use a toothpick to scrape off any lingering residue. For heavy corrosion, you may need to use fine-grit sandpaper, an emery board, or a small flathead screwdriver, but be gentle to avoid damaging the camera.
Step 4: Wash and dry the surfaces
After cleaning with vinegar or lemon juice, it's important to neutralise any remaining residue. Dip a fresh cotton swab into some rubbing alcohol and clean the contacts and battery compartment. You can also use a pencil eraser to polish the surfaces. Finally, dry the area with a microfiber cloth and blow away any fibres. Make sure everything is completely dry before installing new batteries and powering up your camera.
By following these steps, you can effectively clean your camera's battery compartment and contacts using vinegar or lemon juice. Just remember to always prioritise your safety when handling corrosive substances and batteries.
Dash Cam Power Drain: How to Protect Your Car Battery
You may want to see also

Dry the area with a paper towel or cloth
Once you have cleaned the area with a suitable cleaning agent, such as vinegar or lemon juice, it is important to dry the area thoroughly. Use a paper towel or a cloth to soak up any remaining liquid in the battery compartment. Make sure to press the towel or cloth into any crevices to absorb the cleaning agent fully. You can use your screwdriver to help you press the towel or cloth into the small spaces.
The drying process is important because it ensures that no liquid is left behind, which could cause further issues. The liquid will also need to be fully removed before you can insert a new battery. The drying process will also help to prevent corrosion, which can be caused by a build-up of liquid.
It is also important to note that you should avoid using a hairdryer or similar to speed up the drying process. This could cause damage to the camera's circuitry and other components. Instead, allow the camera to air-dry naturally. This may take some time, so be patient and ensure that all moisture has evaporated before proceeding.
After drying, you can use a pencil eraser to polish the metal device contacts and remove any remaining residue. This will ensure that the battery compartment is clean and ready for a new battery.
The Ultimate Guide to Cleaning CGR-S006A Camera Battery Contacts
You may want to see also
Frequently asked questions
The first step is to remove the batteries from the device. Then, put on a pair of gloves to protect your skin from the corrosive acid. Next, use a cotton swab or Q-tip to gently wipe away any corrosion debris, being careful to avoid getting any in your eyes. You can then use a mild acid like vinegar or lemon juice to neutralise the alkaline battery leak. After this, dry the area with a paper towel or cloth. Finally, use isopropyl alcohol to clean off any residue from the vinegar or lemon juice.
It is important to wear protective gloves and eyewear when cleaning an exploded battery to avoid chemical burns and irritation to your eyes. You should also be careful not to get any corrosive acid on your skin or in your eyes. In addition, you should never let alcohol come into contact with sulphuric acid as this will release immense heat.
Household items that can be used to clean an exploded battery include:
- White vinegar or lemon juice (to neutralise the alkaline leak)
- Paper towels or cloths (to dry the area)
- Isopropyl alcohol (to clean off any residue)
- Baking soda (to neutralise the acid)


