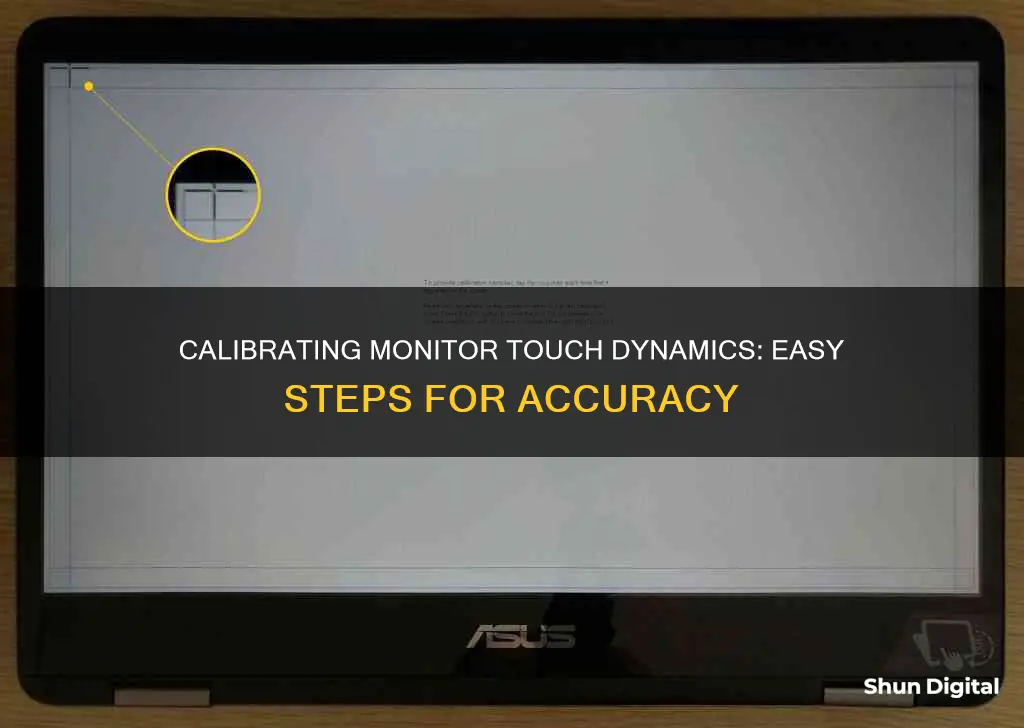
Calibration is the process of fine-tuning a touch screen monitor's settings to enhance the user experience. It ensures accurate touch input and eliminates any discrepancies between finger/stylus movements and what appears on the display. Calibration is essential for achieving precision and sensitivity in touch interactions and can be done manually or through specialised software. This process can differ depending on the device and its operating system. For instance, Windows 7 and older users can open the Control Panel, select Display, right-click on the Touchscreen icon and choose Calibrate. Meanwhile, Windows 8 and newer users can access Tablet PC Settings and click Calibrate the screen for pen or touch input.
| Characteristics | Values |
|---|---|
| Operating System | Windows 7, 8, 10, 11 |
| First Step | Open Control Panel |
| Second Step | Select "Hardware and Sound" |
| Third Step | Click "Tablet PC Settings" |
| Fourth Step | Click "Calibrate the Screen for Pen or Touch Input" |
| Fifth Step | Follow on-screen instructions |
What You'll Learn

Calibration improves accuracy and reduces lag
Calibration is the process of fine-tuning a monitor's settings to improve its accuracy and responsiveness. By calibrating the sensors, a monitor can accurately interpret and respond to user controls, resulting in a more seamless and responsive interaction.
For example, the brightness and contrast settings on a monitor affect how the screen displays tones at different brightness levels. If the brightness is set too high, dark colours will appear washed out, while setting it too low will cause details in dark areas to be lost. By calibrating the brightness and contrast, you can achieve an optimal balance that preserves detail while maintaining an enjoyable viewing experience.
Another important aspect of calibration is colour temperature, which describes how the monitor's colours skew between a "warm" or "cool" character. Lower temperatures provide a warmer look, skewing towards red and orange, while higher temperatures provide a cooler look, skewing towards blue and cyan. By calibrating the colour temperature, you can ensure that the monitor displays colours accurately and avoids an overly harsh or unnatural appearance.
Additionally, calibration can help eliminate or reduce "ghost touches" and erratic behaviour on touch screens. This is achieved by ensuring that the sensor accurately detects and responds to touch inputs, resulting in a more precise and reliable user experience.
Overall, calibration improves accuracy by fine-tuning the hardware settings of a monitor to ensure consistent and reliable performance. It compensates for any inherent inaccuracies or deviations caused by factors like manufacturing variations or ageing components. By calibrating your monitor, you can enhance its performance, improve accuracy, and reduce lag, resulting in a smoother and more enjoyable user experience.
Studio Monitors vs Hi-Fi: Mixing Upgrade Worth It?
You may want to see also

Calibration is device-specific
Calibration is an essential process for maintaining the performance of touch dynamic monitors, and it involves fine-tuning the device's settings to enhance the user experience. The process of calibration can vary depending on the specific device being used, and each device may have unique calibration requirements. This section will provide a detailed guide on calibrating touch dynamic monitors, highlighting the device-specific aspects of the process.
For Windows 10 devices, the calibration process is relatively straightforward. Here are the steps to follow:
- Open the Control Panel: Click on the Start Menu, type "Control Panel" in the search bar, and press Enter.
- Select "Hardware and Sound": In the Control Panel, click on this option to access settings related to your devices.
- Click on "Tablet PC Settings": This is where you'll find the options for calibrating your touch screen.
- Calibrate the Screen: Click on the "Calibrate" button to initiate the calibration process.
- Follow On-Screen Instructions: Pay close attention to each designated contact point and ensure accurate touches on the screen.
- Complete the Calibration: Follow the guided steps until the calibration is successfully finished.
For Windows 8 and newer:
- Click on "Tablet PC Settings": This is usually found in the Display section of the Control Panel's left pane.
- Calibrate the Screen: Click on "Calibrate the screen for pen or touch input" and follow the on-screen instructions.
For Windows 7 and older:
- Open the Control Panel and select "Display".
- Right-click on the Touchscreen icon and choose "Calibrate" from the drop-down menu.
- Click "Continue" when prompted by Windows.
- Select your calibration method and follow the on-screen instructions.
For Mac devices, the process is as follows:
- Go to "System Preferences" and select "Displays".
- Click on the "Color" tab and then choose "Capacitive Touch Screen Calibration".
- Follow the built-in Display Calibrator Assistant to fine-tune your monitor settings.
It's important to note that different devices may have specific calibration software or tools provided by the manufacturer. Additionally, the calibration process may vary slightly depending on the model and brand of your touch dynamic monitor. Always refer to the manufacturer's guidelines for detailed instructions tailored to your specific device.
Collab Edit: Browser Usage Monitored for User Experience
You may want to see also

Calibration is a quick and simple process
Step 1: Open Control Panel
Open the Start Menu and locate the Control Panel. You can do this by clicking on the Start Menu button at the bottom-left corner of your screen, typing "Control Panel" into the search bar, and pressing Enter.
Step 2: Select "Hardware and Sound"
In the Control Panel, navigate to the "Hardware and Sound" section. This section includes settings related to your devices, such as printers, audio systems, and your touch screen.
Step 3: Click "Tablet PC Settings"
In the "Hardware and Sound" window, find and click on "Tablet PC Settings." This is where you will find the options for calibrating your touch screen.
Step 4: Calibrate the Screen
Click on the "Calibrate" button to initiate the calibration process. This will prompt you to touch the screen in specific places to align it correctly.
Step 5: Follow On-Screen Instructions
Complete the calibration process by following the on-screen instructions. Touch or tap specific points on the screen as accurately as possible. The system will guide you through the process, and once finished, it will save your settings.
Tips for Calibration:
- Use a stylus for more precision during the calibration process.
- Ensure your touch screen is clean before starting to avoid any inaccurate touches.
- Perform the calibration in a well-lit area to easily see the touch points.
- Keep your touch screen drivers up-to-date for optimum performance.
- If needed, restart your device after calibration to further improve touch screen response.
By following these steps, you can quickly and easily calibrate your touch screen monitor, improving its accuracy and responsiveness.
Getting the Most from Your Audio Interface and Monitors
You may want to see also

Calibration requires a stylus or finger
Calibration is the process of fine-tuning a touch screen monitor to enhance the user experience. It ensures that the device accurately detects and responds to touch inputs, improving accuracy and responsiveness. During the calibration process, you will be asked to touch specific points on the screen, which will help align the touch screen correctly.
When calibrating a touch screen monitor, it is recommended to use a stylus or your finger to touch the designated points on the screen. Here are some steps to follow for calibrating a touch screen monitor using a stylus or finger:
Step 1: Access Calibration Settings
- Go to the Settings or Control Panel of your device.
- Look for "Display," "Touchscreen," or "Tablet PC Settings" within the settings menu.
Step 2: Initiate Calibration
- Select the "Calibration" option from the available settings.
- If using Windows, you may see a "Calibrate the screen for pen or touch input" button, which will start the calibration process.
- For Android devices, you may need to install a calibration app if your device doesn't have a built-in calibration feature.
Step 3: Follow On-Screen Instructions
- During the calibration process, you will be instructed to touch specific points on the screen with your stylus or finger.
- Ensure that you touch these points as accurately as possible to achieve the best calibration results.
- You may also need to adjust the brightness, contrast, or other display settings as part of the calibration process.
Step 4: Complete Calibration
- Once you have followed all the on-screen instructions, the calibration process will be complete.
- Your device will save the calibration settings, and your touch screen should now be more responsive and accurate.
It is important to note that you should keep your touch screen clean and perform calibration in a well-lit area to ensure accurate results. Additionally, updating your touch screen drivers regularly can help improve performance and address any calibration issues.
Removing the MCot Monitor: A Step-by-Step Guide
You may want to see also

Calibration is an intuitive process
Adjust the Lighting:
First, consider the lighting in the room. The ambient light can affect how colours appear on your screen. Calibrate your monitor in the lighting you most often use.
Familiarise Yourself with the Settings:
Before making any changes, explore the menu options and experiment with the settings to find a good starting point. Take note of the current settings, so you can return to them if needed.
Set the Native Resolution:
Ensure your monitor is set to its native resolution for the sharpest detail.
Calibrate Brightness and Contrast:
These settings are crucial and affect how the screen displays tones at different brightness levels. Adjust the brightness so that the darkest shades of grey are just visible, without appearing pure black. Then, set the contrast so that the brightest shades of grey show some detail, without being too faint.
Adjust Colour Temperature:
The colour temperature setting changes the overall tone of the picture. A cooler temperature gives a blue tint, while a warmer temperature adds a yellow or orange tint. We recommend a 6500k colour temperature, equivalent to midday light, for the most standard setting.
Fine-Tune with ICC Profiles:
If you have a calibration tool, your software will likely create an ICC profile, which is a reference table for accurate content display. However, these profiles are unique to each monitor, so it's not recommended to use a profile from a different device, even if it's the same model.
By following these steps, you can intuitively calibrate your monitor for a much-improved viewing experience.
Monitors with 17-inch Displays: Are They All Uniform in Size?
You may want to see also


