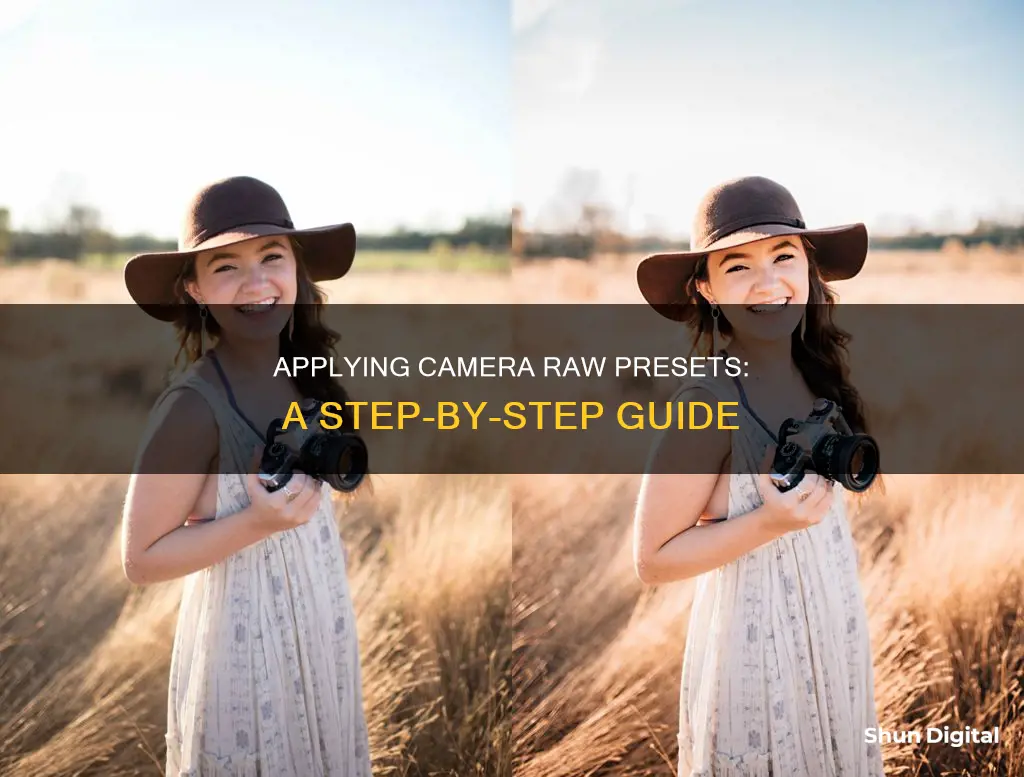
Adobe Camera Raw (ACR) is a powerful photo editor that allows you to apply presets to your photographs with a single click. ACR presets can be easily installed and applied to your images, providing a quick and efficient way to enhance your photos. In this article, we will discuss how to apply presets in ACR, including the process of installing presets, the different methods for applying them, and the benefits of using presets for photo editing. Whether you are a beginner or a professional photographer, ACR presets offer a wide range of creative possibilities to streamline your workflow and take your photo editing to the next level.
| Characteristics | Values |
|---|---|
| How to apply Lightroom presets in ACR | Open an image in the Develop module in Lightroom. Apply the Preset that you want to take to ACR. Export the image as a DNG file so that the changes will be written to the file. Launch Windows Explorer and locate the image on disk. Open it with Photoshop CS5. Click the Presets tab and click the Create New Preset option. Type a name for your preset and then select the options you want to include. |
| How to install ACR presets | Leave your download as a zip file and in ACR, go to Presets. In the top right corner, click the three dots icon and choose Import Profiles & Presets. Choose import presets. Navigate to where you saved your zip file and choose it. Unzip the file and drop the relevant folder into Presets for Adobe Camera Raw. |
| How to use and adjust presets in ACR | Apply the preset first and then adjust. If you don't like the result, select a new preset to try, or just click the three dots on the far-right menu and select Reset to Default to put your photo back to its original state. |
What You'll Learn
![]()
How to create your own presets in ACR
Creating your own presets in ACR (Adobe Camera Raw) is a straightforward process. Here's a step-by-step guide on how to do it:
First, open a photo in ACR. You can do this by launching Photoshop and opening an image, then selecting "Filter" > "Camera Raw Filter" from the top menu. This will open the Camera Raw window, where you can access all the ACR options.
Next, make the adjustments to the photo that you want to include in your preset. Play around with the editing controls until you achieve a look that you like. You can adjust settings such as the profile, texture, clarity, and vibrance to create your desired effect.
Once you're happy with the adjustments, it's time to save your preset. Click the Preset panel icon and then select the option to add a New Preset. Name your preset, choose or create a group for it, and select which settings you want to be saved as part of the preset. Click "OK" or Save to create your preset.
Your custom preset will now appear in the Presets panel, ready for you to apply to other photos. You can easily access and apply your preset with just one click, saving you time and streamlining your photo editing workflow.
Additionally, if you're using Lightroom, your custom preset will automatically sync to the cloud and across all your devices. So, you can create a preset on your desktop and then use it in Lightroom on your mobile device or another computer.
Charging Your PowerShot S110: A Step-by-Step Guide
You may want to see also
![]()
How to apply presets in ACR
Applying presets in Adobe Camera Raw (ACR) is a straightforward process. Here's a step-by-step guide on how to do it:
First, open a photo in Photoshop. Go to the top menus and select "Filter > Camera Raw Filter". This will open your image in the ACR interface.
In the ACR interface, you will see the Presets Panel on the right side. Click on the two interlocking circles icon to open the Presets Panel. This panel contains all your available presets.
To apply a preset, simply click on the desired preset within the folder. The selected preset will automatically be applied to your image. You can experiment with different presets to find the one that suits your image the best.
Additionally, if you want to install third-party presets, you can do so by clicking on the three dots at the top of the Presets Panel and choosing "Import Profiles and Presets". Then, navigate to the downloaded preset file, typically in .
It is worth noting that Lightroom presets can also be used in ACR. By installing presets into Lightroom, they will automatically appear in ACR as well.
Game Winner Camera: How Many Batteries Are Required?
You may want to see also
![]()
How to use Lightroom presets in ACR
To use Lightroom presets in ACR (Adobe Camera Raw), you need to first apply the desired preset to an image in Lightroom. Then, you must open the image in Photoshop, where you can access ACR. The specific steps to do this vary, but the general process is as follows:
- Apply the Lightroom preset to an image in Lightroom's Develop Module.
- Open the image in Photoshop.
- Access ACR through Photoshop.
- Create a new preset in ACR based on the adjustments made in Lightroom.
Method 1:
In Lightroom:
- Apply the desired preset to an image in Lightroom's Develop Module.
- Choose "Photo" → "Edit in" → "Open as Smart Object in Photoshop".
- In Photoshop, click on the Layers Pallet to open ACR.
In ACR:
- Click on the "Presets" tab.
- Click on the "Create New Preset" option.
- Uncheck certain options in the dialogue box that appears: White Balance, Transform, Lens Profile, Chromatic Aberration, Lens Vignetting, and Camera Calibration.
- Rename the preset.
Method 2:
In Lightroom:
- Open an image in the Develop module.
- Apply the preset you want to use in ACR.
- Export the image as a DNG file by right-clicking on the image and choosing "Export" → "Export to DNG".
In Windows Explorer:
- Locate the DNG file on your disk.
- Right-click on the file and choose "Open With" → "Photoshop".
In ACR:
- Click on the "Presets" tab.
- Click on "Create New Preset" and name your preset.
Note that Graduated Filters and local adjustments made in Lightroom may not transfer to ACR, and you may need to fine-tune the preset after applying it in ACR.
Charging Mini DV Cameras: A Quick Guide
You may want to see also
![]()
How to use Mastin Labs presets in ACR
To use Mastin Labs presets in Adobe Camera Raw (ACR), you'll first need to import your chosen presets. To do this, open an image in ACR on your desktop computer. Then, select 'Presets' in the left-side menu, click on the three dots, and select 'Import Profiles & Presets'. From here, you can navigate to and open the .zip file you downloaded from Mastin Labs.
Once you've imported your Mastin Labs presets, open up ACR and make changes to your photos. You can do this in one of three ways: using Bridge to locate the raw file you want to edit and double-clicking it or using the "command/control + R" keyboard shortcut; by choosing a photo in your Lightroom catalog, right-clicking, and selecting "Edit In > Open As Smart Object In Photoshop"; or by opening ACR from within Photoshop as a filter, which can be found under "Filter > Camera Raw Filter" in the Photoshop menu or by using the "shift + command/control + A" keyboard shortcut.
With ACR open, you'll see your image in the middle of the screen with an editing panel on the right. The two tabs you'll be using for a simple Mastin Labs edit are the "Presets" tab and the "Basic" tab. Choose your preset in the "Presets" tab, then move to the "Basic" tab to adjust your exposure and white balance to taste.
If you want to take your image into Photoshop for further edits, you can click the "Open Image" button at the bottom of the screen, or hold the shift key so the button changes to "Open Object" if you want to open the image as a smart object that's linked to the raw file.
Charging the Blackmagic Pocket Cinema Camera 4K: A Guide
You may want to see also
![]()
How to install presets in ACR
Installing presets in ACR (Adobe Camera Raw) is a straightforward process. Here is a detailed, step-by-step guide on how to do it:
Unzip the Preset Files
Locate the downloaded preset files on your computer and unzip/extract the folder. Presets are usually provided in zip files and will contain different file formats for ACR and Adobe Lightroom. Once unzipped, store the Preset folder containing the ACR .xmp files on your computer or desktop for easy access.
Locate the "Settings" Folder
The next step is to find the "Settings" folder, which is the location where you will copy the Preset folder. The path to this folder will differ depending on your operating system.
For Mac:
- Go to the Finder Toolbar and select "Go."
- Hold down the Option key and select "Go to Folder."
- Type in the following path: "Library/Application Support/Adobe/Camera Raw/Settings."
For Windows:
- Navigate to the following path: "C:\ProgramData\Adobe\CameraRaw\Settings."
- Alternatively, you can use this path: "C:\Users\[User Name]\AppData\Roaming\Adobe\CameraRaw\Settings."
Copy the Preset Folder
Copy the Preset folder (containing the .xmp files) and paste it into the "Settings" folder. Make sure you only copy the preset files into the 'Settings' folder, as folders are not supported in Camera Raw.
Open ACR
Open Photoshop and Adobe Camera Raw. If you are working with a RAW image, ACR will open automatically. If you are using a JPG or TIF file, go to "Filter" and select "Camera Raw Filter."
Access Your Presets
In ACR, select the "Presets" tab in the upper right corner (it looks like a slider icon). Your newly installed presets will appear in folders underneath. Click on the desired preset to apply it to your image.
Managing Your Presets
Right-clicking on a Preset Folder allows you to manage your presets. Make sure "Show Partially Compatible Presets" is checked. Right-clicking on a single preset provides additional options, such as renaming or updating it with current settings.
Additionally, selecting "Manage Presets" gives you the option to show or hide Preset folders according to your preferences.
By following these steps, you will be able to successfully install and utilize presets in ACR, enhancing your photo editing experience.
Charging the Kimuvin Spy Pen Camera: A Step-by-Step Guide
You may want to see also
Frequently asked questions
Lightroom presets cannot be directly installed in Camera Raw as the format of the preset files in each program is different. However, you can make a Camera Raw preset from a file that has had the Lightroom preset applied to it. To do this, open an image in the Develop module in Lightroom and apply the preset. Then, export the image as a DNG file. Open the file in Camera Raw and create a new preset.
First, navigate to the following location on your computer: "C:\Users\UserName\AppData\Roaming\Adobe\CameraRaw\Settings". Then, go to the location where you unzipped your presets and open the Camera Raw presets folder. Copy the desired preset folder(s) containing the XMP file(s) and paste them into the 'Settings' folder. Now, you can start Photoshop and the presets are ready for use.
Open a new Finder window and go to "UserName > Library > Application Support > Adobe > Camera Raw > Settings". Then, go to the location where you unzipped your presets and open the Camera Raw presets folder. Copy the desired preset folder(s) containing the XMP file(s) and paste them into the 'Settings' folder. Now, you can start Photoshop and the presets are ready for use.