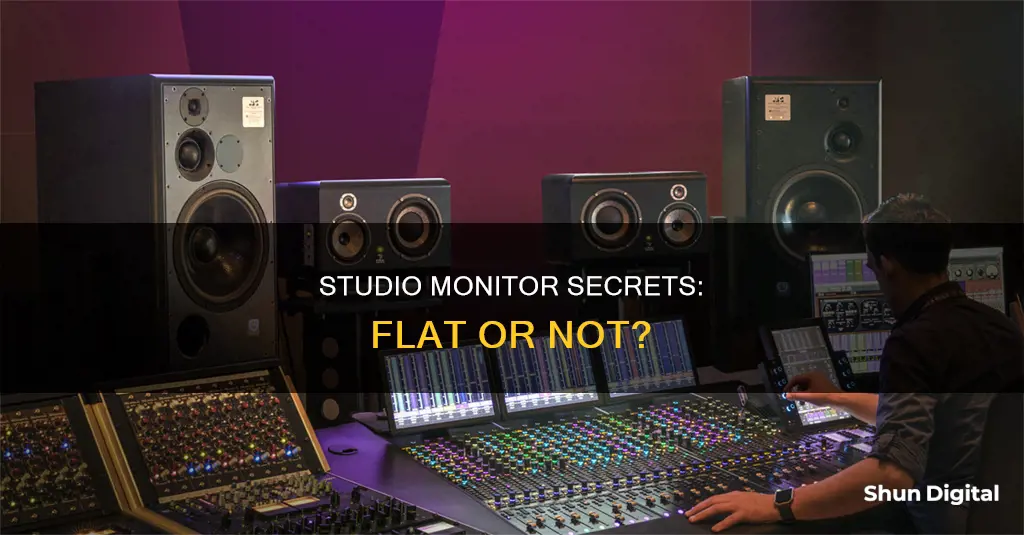
Studio monitors are an essential tool for audio professionals, providing a neutral and flat response that allows for accurate mixing and mastering. However, achieving a truly flat response can be challenging due to variations in speaker design, room acoustics, and listening position. Here are some key considerations for optimising your studio monitor setup and ensuring a flat response:
- Speaker Placement: The ideal geometry is an equilateral triangle, with the distance between the left and right speakers and the distance from each speaker to your head being equal. This ensures a natural stereo sweet spot and minimises high-frequency reflections off side walls.
- Speaker Height and Angle: Adjust the height so that the tweeters are at ear level when seated. Angle the monitors slightly towards your head to ensure on-axis listening and reduce off-axis colouration.
- Room Acoustics: Treat reflections from walls, desks, and ceilings to minimise standing waves and frequency interference. Consider acoustic treatment options such as absorption panels, bass traps, and diffusion.
- Speaker Isolation: Use speaker isolation pads or stands to decouple the speakers from the desk or stands, reducing vibrations and resonances that can affect frequency response.
- Speaker Specifications: Compare specifications like frequency response, distortion levels, bass response, and efficiency across different manufacturers. Look for speakers with tight bass response and low distortion.
- Room Correction Software: Consider using room correction software or DSP speaker management to tailor the speaker response to your room acoustics and achieve a flatter frequency response.
- Speaker Maintenance: Avoid damaging your speakers by keeping volumes at comfortable levels, using limiters, and following safety guidelines in the user manual. Protect dust caps and avoid physical damage to cones.
By carefully considering these factors and making adjustments, you can optimise your studio monitor setup to achieve a flatter frequency response and improve the accuracy of your mixes.
What You'll Learn

Speaker placement and geometry
The placement of your studio monitors in your room is crucial to achieving an accurate frequency response and a solid stereo image. The ideal setup is to have your listening position and the two monitors forming an equilateral triangle. This means that the distance between the left and right speakers and the distance from each speaker to the back of your head should be equal. You can use a tape measure, a piece of string, or even a guitar cable to set up this triangle. The recommended distance between the monitors and the walls is at least 20-30 cm (8-12 inches) to reduce sound waves reflecting back to your listening position.
The monitors should be placed at an angle of around 30 degrees towards the listening position to align with the listener's ears. The height of the monitors should also be adjusted so that the tweeters are at the same height as the listener's ears when seated, typically about 47-55 inches (120-140 cm) from the floor. If you need to clear the top of your computer monitor, the speakers can be placed slightly higher and tilted downwards. However, tilting the speakers can be precarious, and care must be taken to avoid toppling them over.
It is also important to consider the distance between the monitors and the side and back walls. The distances should be different to avoid creating corners in the listening position. A general guideline is to place the monitors 40-60 cm away from the back walls and 60-90 cm from the side walls. Additionally, if your speakers have a rear port, keep them away from the wall by at least the same distance as the diameter of the port (usually about 5-10 cm).
The placement of the monitors and the listening position creates a "sweet spot" where you can experience the best sound. By positioning your head inside the triangle, you can ensure a natural stereo sweet spot that allows for some movement and even accommodates a collaborator sitting next to you.
For nearfield speakers, noted acoustician Carl Tatz recommends a spacing of 67.5 inches (171.5 cm) between the speakers. However, this can be adjusted based on the size of your room and console setup. If you have a small desk, speaker stands can help position the speakers optimally.
It is generally recommended to place your monitors close to the front wall or at least 43 inches (110 cm) away to minimise bass response issues. Symmetry is important, and the left and right speakers should ideally be equidistant from their respective side walls.
Healthcare Performance Monitoring: Strategies for Success
You may want to see also

Speaker isolation pads
There are several options available on the market, with some of the most popular being the Auralex MoPads and ProPADs, Primacoustic RX7, Ultimate Support MS-80, and IsoAcoustics ISO-L8R155. These products range in price and features, with some offering adjustable tilt, shock absorption, and height adjustment.
When choosing speaker isolation pads, it is important to consider the size and type of your speakers, as well as your budget. Some pads are designed for specific monitor sizes, while others are adjustable to fit a range of sizes. Additionally, consider the level of vibration isolation you require and whether you need any additional features such as height or tilt adjustment.
It is worth noting that while speaker isolation pads can help improve the accuracy of your monitors, they may not make a significant difference in sound quality. The effect of isolation pads also depends on the quality of your speakers, the acoustics of your room, and other factors such as speaker placement and room treatment.
Monitoring Disk Performance in AWS: Key Strategies
You may want to see also

Monitor stands
Studio monitor stands are an essential but often overlooked part of your studio setup. They may not be as exciting as purchasing the monitors themselves, but they are just as vital. Monitor stands allow you much more flexibility in your speaker position and help you get your monitors in the sweet spot for listening, which is key to getting great-sounding mixes.
When choosing monitor stands, it is important to select stands that can support the weight of your monitors and safely elevate them up to listening level. You should also consider whether you need your monitors to be portable. If so, you should invest in a set of portable studio monitor stands, which are made from lightweight materials and allow you to home in on your sweet spot without compromising on sturdiness.
The ability to adjust the height of your monitor stands is also important, as you’ll need to locate them at the correct height for your ears. Some stands also allow you to adjust the angle of the speaker, so you can find the perfect balance for your studio and listening position.
- On Stage SMS6000-P: These freestanding stands are constructed from arc-welded steel and are extremely tough. They offer five different height positions and swappable feet, making them ideal for either seated or standing positions and for use on carpet or hard floors.
- IsoAcoustics ISO-155: These desktop studio monitor stands offer tilt adjustment and have two different lengths of leg, allowing you to adjust them to your individual setup. They also provide excellent isolation, ensuring bass frequencies are reproduced accurately and cleanly.
- Behringer SM2001: With a price point of less than $50 for a pair, these are the best budget studio monitor stands on the market. They are super simple to put together and offer height adjustability and a rotatable top.
- Gator Frameworks Clamp-On Studio Monitor Stands: These stands attach directly to your desk, elevating and isolating the speaker while also freeing up valuable space on your desk. They can hold relatively large monitor speakers (up to 60lbs each) and are tilt-adjustable up to 15 degrees.
- Ultimate Support MS-100B: These freestanding studio monitor stands offer a perfect blend of sturdiness and isolation. The aluminium construction is rigid and can withstand the odd wobble, while the high-density acoustic foam on which the monitors sit guarantees optimal sound reproduction.
- Argosy Spire 420i: These high-end studio monitor stands feature IsoAcoustic technology, providing superb isolation and ensuring the sound has the best possible separation from its base. They also include in-stand cable routing, which is a nice touch.
Setting Up Elgato: A Guide to Monitor Connection
You may want to see also

Acoustic treatment
When you’re listening back to a recording, you’ll hear the direct sound of the monitors, as well as the sound of the room. This means it's difficult to hear your mix accurately, and if you can’t hear accurately, your mixes will be off when you play them back on another system.
The ideal sound of a room should aim for acoustic treatment that eliminates most of the reflections but doesn’t leave the room sounding completely dry. This is done by strategically placing sound-absorbing objects in the room. Medium and high frequencies are quite easy to eliminate, but low frequencies are more problematic.
Before you begin acoustic treatment, consider the layout of the room. Place your speakers symmetrically along the narrowest wall. This will direct the sound along the length of the room. They should be at head height, with the tweeter (smallest cone) level with your ears. The two monitors should form an equilateral triangle with the listener.
Place an acoustic panel at the reflection points on either side of the listener, and at the reflection point above your head on the ceiling. Place an acoustic panel or bass trap (if in a corner) behind each monitor. Bass traps are extra-deep acoustic panels that help absorb the longer sound waves of low frequencies, which build up in the corners of rooms.
Different forms of acoustic treatment absorb different frequencies. It’s important to get a balance for a natural-sounding room. The denser and heavier the treatment, the lower the frequency absorbed. Don’t make the mistake of only using lightweight solutions such as foam or carpet. This will only absorb the highest frequencies, resulting in a worse-sounding room.
Most acoustic treatments use a combination of the following:
- Acoustic foam: This is similar to the foam found in furniture. It’s lightweight and great for absorbing high frequencies. If thick enough, it can also be effective for medium frequencies. Acoustic foam comes in tiles of various sizes and thicknesses. The thicker they are, the lower the frequency they can absorb.
- Acoustic panels: These are soft rectangular panels used for absorbing medium and high frequencies. They’re usually made from fibreglass or mineral wool slab, which are denser than foam. You’ll also find them made with foam, but these work more like acoustic foam tiles. The thicker the panel, the lower the frequency that can be absorbed.
- Bass traps: These are a priority for your home recording studio. They should be placed in the corners of your room, where low frequencies collect.
HP Envy Monitor Sizes: What Options Are Available?
You may want to see also

Speaker calibration software
There are several speaker calibration software options available, both free and paid, each with its own unique features. Here are some of the most popular ones:
- Sonarworks SoundID Reference (formerly Reference 4): Includes a plugin for DAW use and a standalone app for system-wide use, along with a room calibration app and a measurement mic. It allows users to fine-tune the target curve and limit the calibration frequency range.
- IK Multimedia ARC System 3: One of the more affordable options, ARC System 3 offers precision within half a dB and works with any RTA microphone.
- Dirac Live Room Correction Suite: Features include customizable target curves, surround sound support, and impulse response correction for maximising the performance of your sound system.
- Waves TRACT calibration system: Uses Smaart audio analysis software to auto-correct EQ issues and time-align any sound system.
- Room EQ Wizard: A free room acoustic and loudspeaker measurement tool that helps dial in the perfect EQ curve using any RTA microphone. It works on Mac, Windows, and Linux.
- Trinnov: A series of hardware devices designed for calibrating multi-channel systems, often used in pro studios and post-production facilities.
- Genelec GLM Correction System: A powerful calibration software and monitor controller that only works with Genelec Smart active monitors and subwoofers. It can be downloaded for free.
While speaker calibration software can be a valuable tool, it's important to note that it should be used in conjunction with proper acoustic treatment and speaker placement. Even with calibration software, room modes and other acoustical problems can still affect your recordings and mixes. Additionally, using tools like REFERENCE and EXPOSE 2 to check your mix for technical issues is essential to ensure your tracks are radio-ready.
Calibrating Your LCD Monitor: Achieving Color Accuracy
You may want to see also
Frequently asked questions
Studio monitors are speakers designed for use in a studio. They have a neutral, flat response, whereas consumer speakers introduce variations in frequency response designed to be more acoustically appealing.
A flat response means there is a minimal shift in DB along the frequency spectrum from very low to high frequencies.
If you mix on a set of speakers that have a flat frequency response, your mix will translate well on other speakers because you are not compensating for bumps and dips in the frequency spectrum of the particular speaker you are working on.
The most important thing to consider is height and angle. The high-frequency drivers of your monitors should be at ear height relative to you. This helps your ears receive more direct sound from your monitors, resulting in a richer and more detailed listening experience. You should also make sure your monitors are placed around 8 to 12 inches away from any walls and corners.
You may be hearing rattling, or from a tweeter, you may hear a humming/buzzing sound. This is a good indication that your speakers are damaged.


