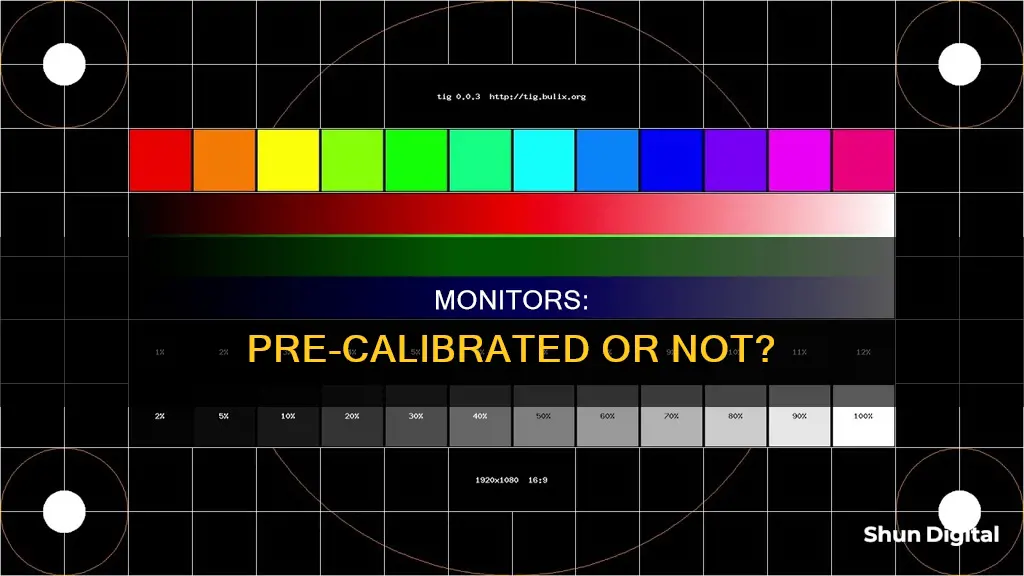
Monitor calibration is an important process for anyone who takes their screen colours seriously. While some modern monitors may come pre-calibrated, it is often necessary to Calibration is the process of fine-tuning your monitor so that colours and shading are displayed accurately and consistently. There are two main types of calibration methods: hardware calibration and software calibration. Software Calibration Software calibration is a relatively quick and simple process that is cost-effective and can be carried out by most users. It involves optimising the settings on the graphics card, which is connected to the display source. A look-up table (LUT) is used to make any adjustments to the colour display, and this is stored on the source itself (e.g. your computer). Software calibration is limited to fine-tuning the settings of the computer's graphics card and is therefore less precise than hardware calibration. It also relies on the user's colour perception, which may vary from person to person. Additionally, software calibration may not be easily adapted to different colour spaces, and it needs to be recalibrated if the monitor is connected to a different source. Hardware Calibration Hardware calibration is a more advanced and elaborate form of monitor calibration, often used by professionals in fields such as photography, graphic design, and online content creation. It involves adjusting the display characteristics inside the monitor itself, rather than relying on the graphics card. The LUT is stored on a chip within the monitor, removing the software processing layer. This allows for superior colour depth and flexibility, as the calibration settings will remain intact even if the monitor is connected to a different source. However, hardware calibration can only be performed on certain monitors, and the process may be too advanced for casual users. Built-in Calibration Tools Both Windows and macOS have built-in calibration tools that are free and easy to use. These tools guide users through the calibration process, allowing them to adjust settings such as gamma, brightness, contrast, and colour balance. While these built-in tools are convenient and accessible, they have limited functionality and rely on the user's colour perception. You may want to see also Calibration is an important process to ensure your monitor displays images accurately. While some monitors may come with factory calibration, it is often necessary to calibrate your monitor to suit your specific needs and working environment. Here are the key calibration settings to consider: Brightness: The brightness setting on your monitor controls the black level and the number of different shades of dark grey displayed. If set too high, blacks will appear grey and the image will have less contrast. Conversely, if set too low, the blacks will be "crushed", causing multiple shades of dark grey to appear as pure black, resulting in a loss of detail. The ideal brightness setting should allow you to distinguish between different shades of grey while maintaining a deep black level. Contrast: The contrast setting affects the number of different shades of bright grey or near-white displayed by your monitor. A high contrast setting can cause brighter images to "clip", resulting in a loss of detail in highlights. On the other hand, a low contrast setting will darken the image and reduce overall contrast. The ideal contrast setting will provide a balance between bright highlights and shadow details, ensuring you can see the full range of shades in an image. Colour Temperature: The colour temperature setting adjusts the overall tone of the picture, with cooler temperatures giving a blue tint and warmer temperatures producing a yellow or orange tint. A recommended setting for most screens is 6500K, which is equivalent to midday light and provides a neutral starting point. However, some people may prefer a slightly warmer or cooler temperature depending on their personal preference and the lighting conditions of their workspace. Gamma: Gamma refers to how contrast changes at different levels of brightness. The ideal gamma setting will depend on the ambient light in the room. Too low of a gamma setting can make the image appear too dark, while too high of a setting can wash out details in bright areas. Adjusting the gamma setting in conjunction with brightness and contrast is crucial for achieving accurate image reproduction. Sharpness: Sharpness is a setting that affects the clarity and definition of an image. A low sharpness setting can result in a blurry image, while an excessively high setting can introduce strange artefacts and a moiré effect. The ideal sharpness setting will provide a clear and detailed image without any noticeable distortion or abnormalities. White Balance: White balance refers to the balance of colours across different shades of grey, ensuring that absolute white or grey is free from any colour tint. Accurately adjusting white balance typically requires specialised equipment, and it is recommended to leave these settings at their default values for most users. You may want to see also Calibration frequency depends on the type of monitor you have, how it behaves over time, and the kind of colour accuracy your work demands. Manufacturers' recommendations Datacolor recommends users perform a monthly recalibration, while X-Rite suggests a range that goes from once or twice a month for hobbyists to weekly or even daily for professionals. How often you should calibrate Computer monitors are not perfectly stable devices, and colour accuracy varies with time as components age, especially the backlight that illuminates the LCD layer. The rate of change varies from monitor to monitor and depends on display quality. Older monitors with CCFL fluorescent lamp backlights drift much more than newer LED monitors. Higher-end displays are manufactured within stricter tolerances and often have better hardware mechanisms to compensate for drift over time. If your work demands colour accuracy, it's a good idea to recalibrate more often. Calibrating weekly is a good starting point for these cases. For less demanding work, calibrating a modern good-quality IPS monitor twice a year is acceptable. Monitor changes over time Monitor changes over time can be supported by testing three different monitors. A 10-year-old Dell 3008WFP monitor with a CCLF backlight type showed an average variation of around 1 dE for all colour patches, which is a pretty good result. Delta E – also written dE or ∆E – is a measure of colour difference, and a result under 1 is excellent and virtually invisible to the human eye. There was no discernible difference between a one-month-old profile and a fresh one. The one-year-old profile showed a worst-case variance of 1.62 dE, which is still a good result. The biggest difference was in the whitepoint colour temperature, which shifted from 6500K to just over 6600K, which is hardly noticeable. A 13-inch MacBook Pro Retina 2015 model showed an overall shift to 0.93 average dE across all patches after one year, while the worst result remained stable at 2.92 dE for the same problematic blue patch. The white point shifted about 250K down during that time, which is a noticeable difference in skin tones and portrait images. A brand-new Philips 276E8VJSB 4K IPS 27" monitor showed a big shift in colour with an average dE of 2.2 and a maximum dE of 3.39 on a particular neutral patch after one month. This is a visible shift and enough to mess up your work. Takeaways You may want to see also Calibration tools are essential for ensuring that your monitor displays colours accurately and that you get the best image quality. While basic monitor calibration can be done using test patterns, investing in a calibration tool can provide more accurate and consistent results. Here are some of the best calibration tools available: When choosing a calibration tool, consider your specific needs and budget. If you require highly accurate colour calibration for professional work, investing in a higher-end colourimeter or calibration kit is recommended. For casual users or hobbyists, the built-in calibration tools in Windows and macOS, or affordable colourimeters like the X-Rite i1Display Pro or X-Rite ColorMunki Smile, may be sufficient. You may want to see also Calibration is essential for producing a neutral white with no colour shift and ensuring other colours are as accurate as possible under the ambient light conditions you're working under. It is especially important for photographers who want to get the most out of each image. All monitors need to be calibrated, even Apple monitors. However, calibration is not always necessary. If you upload your images directly to Instagram or Facebook from your capture device and then move on, you don't need to calibrate your monitor. There are four tiers of calibration. The first, which everyone should do, is to set brightness, contrast, and gamma. Windows and macOS both offer built-in features for this minimal calibration. Before calibrating, there are three preliminary steps to take: Calibration can be done for free using built-in Windows and Mac tools, or online tools. However, these rely on your specific colour perception, so for greater accuracy, it is recommended to purchase a calibrating device. You may want to see also No, monitors do not come already calibrated. However, some monitors may be partially calibrated, and some may be more easily calibrated than others. It is recommended to calibrate your monitor at least once every six months, though once a month is a good habit. If you've never calibrated a monitor before, it will take about 20 minutes the first time. After the first calibration, it will take five minutes or less to recalibrate your monitor once a month. There are several methods for calibrating a monitor, including using built-in Windows and Mac tools, online tools, and colorimeter hardware.
Characteristics
Values
Need for calibration
Depends on the monitor and its usage. Monitors for professional photography or photo editing should be calibrated.
Calibration time
10-15 minutes
Calibration frequency
Once a month or once every six months
Calibration cost
Hundreds of dollars for professional calibration or a calibrating device
Calibration difficulty
Requires technical knowledge
What You'll Learn

Calibration methods: hardware vs. built-in tools
Best Retailers to Buy HP VH240a Monitor

Calibration settings: brightness, contrast, colour temperature, etc
Finding the Elusive X and Y on Your Monitor

Calibration frequency: how often should you calibrate your monitor?
Get Rid of Yellow Lines on Your Monitor

Calibration tools: what are the best tools for calibrating your monitor?
Asus ROG Monitors: Worth the Hype and Price?

Calibration and display type: do all monitors need calibrating?
Removing AOpen Monitor Stands: A Step-by-Step Guide
Frequently asked questions


