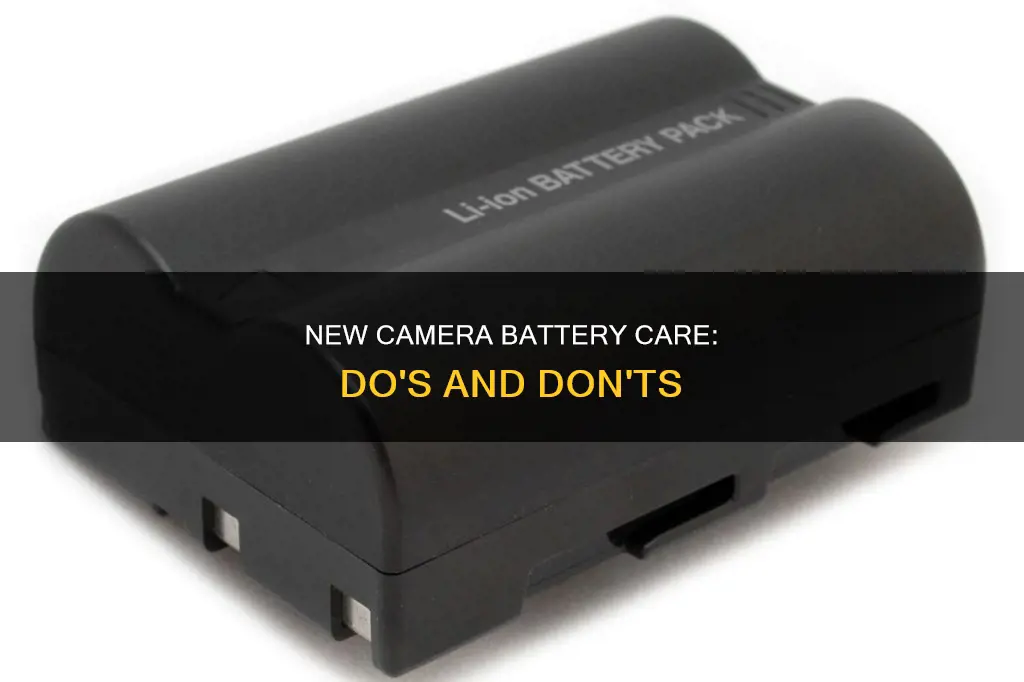
A new camera battery is a small but important investment for any photographer. When you get a new camera, the battery is unlikely to be fully charged, so it's a good idea to charge it fully before your first shoot. It's also recommended to have a second battery on hand as backup. When it comes to choosing a new battery, you may opt for the original battery from the camera brand, or go for a replacement from a trusted manufacturer. It's important to avoid fake batteries, which can be unsafe and cause equipment failure. When selecting a replacement battery, match the model symbol to your camera, and ensure the voltage and capacity are similar to the original. To extend the life of your camera battery, remember to turn off your camera and remove the battery when not in use, use the viewfinder instead of the LCD screen, avoid the flash, and store your batteries in a cool, dry place.
What You'll Learn

Charge the battery
Charging your camera battery is simple, but there are a few things to keep in mind to ensure you're doing it right and maintaining good battery health.
Firstly, it's important to note that your new camera's battery is unlikely to be fully charged out of the box, so it's recommended to give it a full charge cycle before using it for the first time. Check your camera manual for specific instructions, but usually, you'll need to connect your camera to a power source using the supplied cable. Some cameras will have a micro USB port, while others may have a USB-C port.
To charge via a USB-C port, simply connect the appropriate cable to the port and then to a power source, such as a power bank or a wall socket. Charging via USB-C is just as convenient as using a traditional charger, and you'll know your battery is fully charged when the small LED next to the port turns green.
If your camera uses a micro USB cable, connect the cable to your camera and to the AC Adaptor, then plug the adaptor into a wall outlet. The charge lamp on your camera will light up to indicate that it's charging. When the lamp turns off, your battery is fully charged.
It's important to note that charging time may vary depending on factors such as the remaining battery capacity, charging conditions, ambient temperature, and battery health. On average, a full charge will take around 2 hours, but it can take longer in certain conditions.
Remember to always use the original cable and adaptor that came with your camera, or a recommended alternative. This will ensure optimal charging and prevent any damage to your equipment.
Additionally, it's worth investing in a second battery as a backup, so you don't miss any shooting opportunities due to a dead battery.
How Long Do Camera Battery Chargers Last?
You may want to see also

Read the manual
Reading the manual is an important step in setting up your new camera. While it may be tempting to skip this step, the manual will contain important information about your camera's features and functions.
Firstly, the manual will provide you with safety information. This will include information on how to charge your battery safely, as well as any precautions you should take when handling and storing your battery. For example, some manufacturers recommend that you fully charge your battery before using it for the first time. The manual will also include information on how to properly insert the battery into your camera, and how to remove it when it's not in use.
Secondly, the manual will help you familiarise yourself with the camera's controls and settings. Modern cameras have a wide range of buttons, dials, and modes, which can be overwhelming for new users. The manual will explain what each button, dial, and mode does, and how to use them effectively. It will also provide guidance on how to adjust settings such as the aperture, shutter speed, and ISO to get the best results for different types of photography.
Additionally, the manual will include information on how to care for and maintain your camera. This will include guidance on how to clean your camera, as well as any recommended servicing or maintenance that should be carried out. The manual may also include information on how to protect your camera when travelling, and how to store it safely when not in use.
Finally, the manual will often contain troubleshooting information, which can be helpful if you encounter any problems or issues with your camera. This may include information on how to resolve common issues, as well as contact details for the manufacturer's customer support or technical team, who can provide further assistance if needed.
While it may seem tedious, taking the time to read through the manual will ultimately help you get the most out of your new camera and improve your photography skills.
Charging Your Lumix Camera Battery: No Charger Required
You may want to see also

Update the firmware
Updating your camera's firmware is essential to ensure you have a reliable device with the latest features and fixes. Here is a detailed, step-by-step guide on how to update your camera's firmware:
Step 1: Identify Your Camera's Current Firmware Version
First, check if your camera needs an update by navigating to its settings and locating the "firmware version". Compare this version with the latest one available from the camera manufacturer. This information can usually be found on the manufacturer's website under the support or product information section.
Step 2: Download the Firmware Update to Your Computer
Once you've confirmed that an update is available, download the install file from the manufacturer's website. The file will typically be in ".exe" format for Windows and ".dmg" for Mac. Save the file to a location on your computer that is easily accessible, such as your desktop.
Step 3: Charge Your Camera Battery
Before proceeding with the update, ensure that your camera battery is fully charged. The update process can take a while, and if your battery dies during the update, it could cause issues with your camera.
Step 4: Format a Memory Card
Prepare a memory card by formatting it or erasing its contents. Insert the card into your camera, then find the format option in your camera's menu system. Select "Format" or a similar option, and wait for the camera to complete the formatting process.
Step 5: Transfer the Firmware to the Memory Card
Take the formatted memory card and insert it into a memory card reader connected to your computer. Once your computer detects the memory card, move the firmware update file from your computer to the root folder of the memory card.
Step 6: Install the Firmware Update on Your Camera
Turn on your camera, insert the memory card, and go back to the menu where you viewed the firmware version. You should now see an option to "Update" or "Install Update". Select this option to initiate the installation process.
It is important to leave the camera undisturbed during the update. Do not turn it off or interrupt the process, as this could cause issues. Once the update is complete, a message will inform you, and you'll need to restart your camera for the new firmware to take effect.
Troubleshooting:
If something goes wrong during the firmware update, don't panic. Consult your camera manufacturer's support page for advice and instructions on how to remedy the problem. You can also search online for insights from other users who may have experienced similar issues.
A Note for Nikon Users:
Nikon cameras may offer several separate pieces of firmware, such as A, B, C, or L versions. Each of these may need to be updated separately, following a similar process to the one outlined above.
By following these steps, you can ensure your camera's firmware is up to date, providing you with the latest features and improvements while also fixing any known bugs or issues.
Kodak Camera Not Charging: Troubleshooting Guide
You may want to see also

Format your memory card
Formatting your memory card is an important step in setting up your new camera. It ensures that your memory card is compatible with your camera and helps prevent file corruption. Here are some detailed instructions on how to format your memory card:
First, make sure that you have backed up all important files on your memory card to your computer or cloud storage. Formatting will delete all data on the card. Next, check that your camera battery is fully charged to avoid any disruptions during the formatting process. Then, turn off your camera and insert the memory card into the proper slot.
Now, turn on your camera and navigate to the menu. From here, you should be able to find the setup menu. Within this menu, look for an option that says "Format", "Format Memory Card", or something similar. Select this option and confirm that you want to format the card. Your camera will then begin formatting the memory card, which may take a few minutes. Once it's done, turn off your camera, and your memory card will be ready to use!
It's worth noting that the steps to format a memory card may vary slightly depending on your camera brand. If you're having trouble finding the format option or need more specific instructions, refer to your camera's instruction manual or the manufacturer's website.
Formatting your memory card in your camera is generally recommended over formatting it on a computer. This is because in-camera formatting minimizes the chance of errors and optimizes the file system for your specific camera. However, if you need to reformat your memory card to change the file system type or fix a corrupted card, you can use a computer.
To format your memory card on a Windows PC, insert the card into the SD card slot and open Windows File Explorer. Select "This PC" or "My Computer", then right-click on the SD card and choose "Format". Select "FAT32" under "File System" and make sure "Quick Format" is checked before clicking "Start". Once the format is complete, click "Close".
For a Mac, insert the SD card into the SD card reader and open Disk Utility, which can be found in the "Applications" > "Utilities" folder. Select the SD card from the list of devices, click on the "Erase" tab, and then click the "Erase" button to format the card.
Remember to always format a new memory card before using it with your camera. Regularly formatting your memory card will help keep it running smoothly, prevent file corruption, and ensure your camera performs at its best.
Troubleshooting Lytro Camera Charging Issues
You may want to see also

Do an initial inspection
Once you've charged your new camera battery, it's time to do an initial inspection. This is an important step to ensure that your new equipment is functioning properly and to take advantage of any return policies if there are any manufacturing issues. Here are some detailed steps to guide you through the initial inspection process:
Firstly, take some quick sample photos to test the basic functionality of your camera. Capture a variety of shots, including different lighting conditions, subjects at varying distances, and test out the different settings and features your camera offers. This will help you familiarise yourself with the camera while also ensuring that all the essential functions are working as expected.
Next, check the physical condition of the battery and camera. Inspect the battery for any signs of damage or swelling. Look for any scratches, dents, or other abnormalities that could indicate potential issues. Similarly, examine the camera body and ensure that there are no loose parts, cracks, or other signs of damage.
Additionally, pay attention to the battery's voltage and compare it to the rating on the battery itself. A significant difference in voltage may indicate poor battery health. You can use a multimeter to measure the voltage accurately. Also, consider the age of the battery; while it may be new to you, if it's been sitting on a shelf for a long time, its performance may have degraded.
Another aspect to consider is the battery's charge capacity. Fully charge the battery and then conduct a simple test by turning on your camera and letting it sit on a shelf or table without using it. Observe how long it takes for the battery to drain completely. Compare these results with those of a new, fully charged battery, tested under the same conditions. If there is a significant discrepancy, it may indicate an issue with the battery's capacity.
Finally, if your camera has a viewfinder, adjust the diopter to suit your eye. The diopter is an optical adjustment that allows people with different visual acuity to see a clear image through the viewfinder. If the viewfinder appears blurry, adjusting the diopter will ensure a sharp image.
By following these steps, you can perform a comprehensive initial inspection of your new camera battery, ensuring optimal performance and identifying any potential issues early on.
The Ultimate Guide to TAC Camera Battery Options
You may want to see also
Frequently asked questions
It is recommended to fully charge your new camera battery before using it for the first time. Manufacturers usually suggest a full charge cycle before you start shooting.
The camera will usually indicate when the battery is fully charged. You can also refer to the user manual for specific instructions on charging the battery.
To extend the life of your camera battery, it is advisable to turn off your camera and remove the battery when not in use. Additionally, try to avoid using the flash, tone down the LCD brightness, and store your batteries in a cool and dry place.


