Selective focus is a photography technique that allows the photographer to choose which parts of an image are in focus and which parts are blurred. It is a useful way to simplify an image and bring attention to a particular area of the photograph. The technique is particularly effective in portrait photography, where the subject is usually the person's face or eyes, and in close-up photography, where a small section of the photo is in focus. To achieve this effect, photographers use a shallow depth of field, which means only a small range of the image is in focus.
| Characteristics | Values |
|---|---|
| Purpose | Bring attention to the subject, Simplify an image, Enhance the image, Remove distracting elements |
| Subject | A single person, A flower, A shell on the beach, A single object or person |
| Focus | Choose a specific focus point, Focus on the eyes, Focus on the foreground, Focus on the background |
| Aperture | f/1.4, f/2.8, f/3.5, f/4.0, f/5.6, f/8.0, f/11, f/16 |
| Shutter Speed | 1/100th of a second, 1/1250th of a second, 1/80th of a second, 1/60th of a second, 1/320th of a second, 1/40th of a second, 1/160th of a second, 1/200th of a second |
| ISO | 800, 100, 1000, 1250, 400 |
| Lens | 35mm, 50mm, 55mm, 70mm, 200mm, Lensbaby Composer Pro II, Lensbaby Composer |
What You'll Learn
![]()
Choosing a focal point
Selective focus is a photography technique that highlights certain elements in a composition by blurring out other parts of the image. It is important to choose the right focal point to enhance the composition of the image and strengthen the message you want to convey. Here are some tips for choosing a focal point:
- Positioning: Place your focal point in a prominent position. You can use the rule of thirds, which suggests placing your subject on the four intersecting points of a 3 x 3 grid instead of at the centre of the frame.
- Depth of Field: Use depth of field to create selective focus by blurring out the background or foreground while keeping your subject in focus. A narrow depth of field can be achieved by using a wide aperture and adjusting the shutter speed and ISO accordingly.
- Leading Lines: Compose the image so that lines within the frame lead to the focal point. This can include natural lines, such as a street or a railway, or artificial lines, such as a wall.
- Light and Colour Contrast: Our eyes are naturally drawn to bright areas and contrasting colours. Placing your focal point in a well-lit area or using colours that contrast with the background can help draw attention to your subject.
- Visual Weight: Certain elements in an image will naturally attract more attention. These include human figures, large objects, and objects with text. You can use this to your advantage by making these elements your focal point or avoiding them if they are not your main subject.
- Portraits: When shooting portraits, it is generally recommended to focus on the eyes as they are expressive and naturally draw the viewer's attention. However, if you want to emphasise another part of the body, make sure that this focal point stands out.
Remember, the key to choosing a focal point is to direct the viewer's attention to the main subject of your image and convey the intended message or theme effectively.
Quickly Copy Adjustments: Camera Raw Secrets
You may want to see also
![]()
Using shallow depth of field
Selective focus is a technique used in photography to choose which parts of an image will be in focus and which parts will not. This is done by creating a shallow depth of field, where only a small portion of the image is in focus while the rest is blurred out. This technique is particularly useful in portrait, nature, and travel photography as it helps to simplify busy scenes, create clean backdrops, and draw attention to the main subject.
- Simplify the Background: Use a shallow depth of field to blur out a busy or uninspiring background, allowing the subject to stand out.
- Draw the Eye: Guide the viewer's eye to the most important part of the image by keeping that area in focus while blurring the surroundings.
- Create an Effect: A shallow depth of field can soften the scene and create a romantic, nostalgic, mysterious, or abstract mood.
- Layer and Frame: Blur both the foreground and background to create a frame around the subject, adding dimension and separating layers.
To achieve a shallow depth of field, try the following:
- Widen the Aperture: Set your f-stop to a small number to increase the size of the opening in the lens, resulting in more blur.
- Use a Long Lens: Opt for a longer lens, such as an 85mm or 70-200mm lens, as they make it easier to get close to the subject and decrease the depth of field.
- Increase Subject-Background Distance: Position your subject farther away from background objects to give the background more room to blur.
- Use Portrait Mode: If you're a beginner, use the Portrait mode on your camera to automatically set a large aperture and decrease the depth of field.
- Get a Wide-Aperture Lens: Invest in a lens with a wide aperture (also known as a fast lens) to achieve a shallower depth of field.
RAW vs JPEG: Understanding Camera Image Formats
You may want to see also
![]()
Creating a bokeh effect
Selective focus in photography is the process of choosing which parts of an image will be in focus and which parts will not. This technique simplifies an image and brings attention to a particular spot in the photo. It can also be used to remove distracting elements in the frame.
One way to create selective focus is by creating a bokeh effect. Bokeh is the Japanese word for 'blur' and refers to the out-of-focus areas of an image, especially areas that are heavily blurred. The bokeh effect is created by using a wide aperture to blur the background, turning small points of light into soft circles.
Use the right lens
Choose a lens with a wide maximum aperture (ideally, f/2.8 or wider). A lower f-number will give you a wider aperture. Additionally, select a lens with a high number of aperture blades as this will create a more circular aperture shape, resulting in smoother bokeh. Go for a standard or telephoto focal length rather than a wide-angle lens.
Select a large aperture
Bokeh is mainly affected by the aperture setting on your camera. For the strongest bokeh effect, dial in the lowest f-number your lens offers. This will give you a wider aperture and a stronger background blur.
Get close to your subject
The closer you are to your subject, the better the bokeh effect will be. You can achieve this by either moving physically closer to your subject or by using a telephoto lens to zoom in.
Position your subject for the best background
Place your subject in front of a uniform, non-distracting background, and ensure there is a good distance between them. This will help create a more pronounced bokeh effect. If you can't move your subject, try adjusting your perspective by getting down low or moving to the side to increase the distance between the subject and the background.
Dial in your remaining settings
After you've set your aperture and positioned your subject, adjust your other camera settings to ensure a good exposure. Focus on your subject and check again to ensure that the background doesn't include any distractions.
Troubleshooting:
- If the bokeh effect is not strong enough, try using an even wider aperture setting or use a different lens with a wider aperture.
- Move closer to your subject or move your subject further from the background.
- Find brighter pinpoint lights to create more prominent bokeh.
Speeding Tickets and Points: What You Need to Know
You may want to see also
![]()
Using selective focus for portraits
Selective focus is a technique in photography where you choose which parts of your image will be in focus, and which parts will not be in focus. It is a very important concept for photographers to understand as it can be used to simplify an image and bring attention to a particular spot in the photo.
- Choosing a Focal Point: When shooting portraits, the focal point is usually the subject's eyes as this is the most visually appealing option. Most cameras nowadays have automatic eye autofocus, but if yours doesn't, you can try using a selective autofocus point that you can move around manually.
- Creating Depth: Adding depth to a 2D image can be challenging but can be done in two ways. Firstly, you can increase the distance between the foreground, background, and subject. Secondly, you can use aperture to create a bokeh effect.
- Using Shallow Depth of Field: Using a shallow depth of field can help achieve that professional look where the subject is in focus and the background has a pleasing blur. You can control the depth of field by changing the aperture setting on your camera. A larger number or f-stop means a smaller aperture, while a smaller f-stop number means a larger aperture.
- Camera to Subject Distance: The closer you are to the subject, the easier it is to blur the background. This is because, as you get closer to the subject, your depth of field gets smaller.
- Using a Tripod: When shooting portraits with a very shallow depth of field, using a tripod can help eliminate camera movement and ensure that your subject remains in focus.
- Changing Your Shooting Angle: Changing the angle from which you are shooting can also help you achieve the desired background blur. Try moving up or down in addition to left or right to find a better background.
Charging Cameras on 'Alone': Powering the Ultimate Survival Show
You may want to see also
![]()
Using selective focus for landscapes
Selective focus is a photography technique that involves choosing which parts of your image will be in focus and which parts will not. This technique is particularly useful for bringing attention to a specific subject in your photo, such as a person's face or eyes in a portrait.
When it comes to landscape photography, the use of selective focus can be a bit more complicated. Landscape photos typically aim to capture the entire scene in sharp focus, from the foreground to the distant horizon. However, there are situations where selective focus can be effectively applied to landscape images.
- Understanding Depth of Field: Depth of field refers to the range of distance in your image that appears sharp and in focus. In landscape photography, you usually want a deep depth of field to ensure that both the foreground and background elements are in focus. However, when using selective focus, you will be creating a shallow depth of field, where only a small portion of the image is in focus while the rest is blurred.
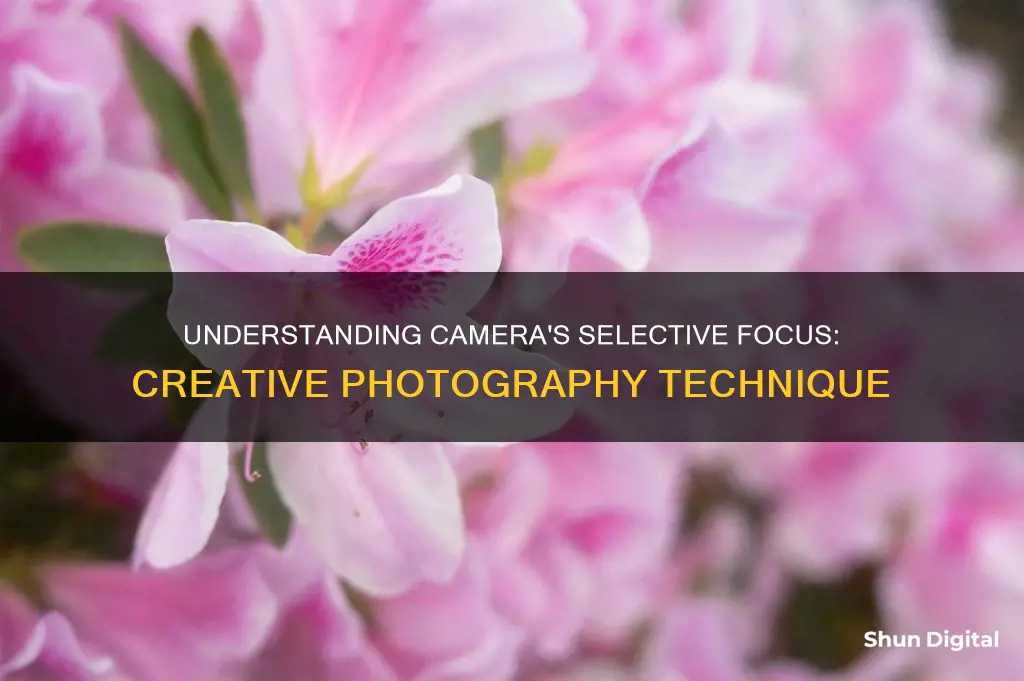
- Choosing a Focal Point: When using selective focus in landscapes, you need to carefully select your focal point. This could be a small but compelling subject, such as a flower, a shell on the beach, or an interesting rock formation. By using selective focus, you ensure that this subject stands out and doesn't get lost in the larger landscape.
- Aperture Settings: The primary way to control depth of field in your images is by adjusting the aperture setting on your camera. A larger f-stop number (smaller aperture) will result in a larger depth of field, while a smaller f-stop number (larger aperture) will create a shallower depth of field. For selective focus, you generally want to use a wider aperture to blur the background and draw attention to your chosen focal point.
- Lens Choice: Different lenses will offer varying maximum apertures, which can affect your ability to achieve a shallow depth of field. "Fast lenses" with wide maximum apertures, such as those ranging from f/1.4 to f/2.8, are ideal for selective focus as they allow for a very shallow depth of field. Prime lenses often offer apertures between f/1.4 and f/1.8, while fast zoom lenses may have maximum apertures of f/2.8.
- Camera-to-Subject Distance: The distance between your camera and the subject also plays a role in achieving selective focus. As you get closer to your subject, it becomes easier to blur the background and create a shallow depth of field. This is because your depth of field decreases as you move closer to the subject.
- Shooting Multiple Photos: When using selective focus in landscapes, it is always a good idea to capture multiple shots with and without this technique. This gives you more options to choose from and allows you to compare the impact of selective focus on your final image.
By understanding these techniques and applying them to your landscape photography, you can effectively use selective focus to draw attention to specific elements within the larger scene, creating visually appealing and intentional images.
Charging Your SQ11 Camera: How Long Does It Take?
You may want to see also
Frequently asked questions
Selective focus is a photography technique where you choose which parts of your image will be in focus, and which parts will be blurred out. This technique helps bring attention to the subject of the photo and can make your images look more professional and intentional.
To create selective focus, you need to choose a specific focus point in your image, usually the subject's eyes in portraits, and then adjust your camera settings to blur the background and/or foreground. This can be done by using a wide aperture setting, such as f/1.4 or f/2.8, and by zooming in on your subject.
Selective focus is a powerful tool that gives you creative freedom and control over your images. It helps simplify your image, bring attention to a particular spot, and remove distracting elements in the background.
While some smartphone cameras have a "Portrait" mode that can simulate selective focus, you will need a camera and lens that give you more control over focus and aperture settings to fully utilise this technique. A 50mm f/1.8 prime lens is a great starting point for beginners.