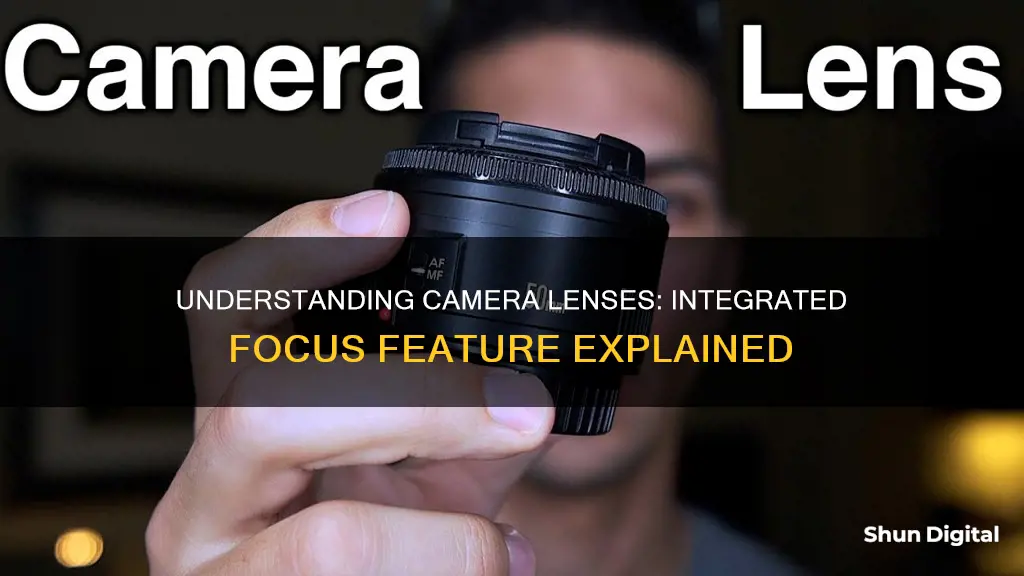
The Minolta 7000, released in 1985, was the first SLR camera with an integrated autofocus system. This meant that both the autofocus sensors and the drive motor were housed within the camera body, as well as an integrated film advance winder. This configuration became the standard for SLR cameras, with Nikon also abandoning their F3AF system and integrating the autofocus motor and sensors into the camera body.
| Characteristics | Values |
|---|---|
| Definition | A point where light rays originating from a point on the object converge |
| Image in focus | Light from object points is converged almost as much as possible in the image |
| Image out of focus | Light is not well converged |
| Focal point | For a lens, or a spherical or parabolic mirror, it is a point onto which collimated light parallel to the axis is focused |
| Focal length | The distance in air from the lens or mirror's principal plane to the focus |
| Autofocus | A system that uses a sensor, a control system and a motor to focus on a manually or automatically selected point or area |
| Manual focus | A mechanism on the lens that needs to be turned to focus the image |
| Autofocus motors | Tiny, extremely precise motors built into the lens |
What You'll Learn

Autofocus vs Manual Focus
Autofocus and manual focus are two different methods of achieving a clear shot on a camera. Autofocus (AF) is a function of a camera to automatically focus on a subject, while manual focus (MF) allows the photographer to adjust the focus themselves.
Autofocus
Autofocus systems use a combination of sensors, control systems and motors to focus on a selected point or area. Most modern SLR cameras use through-the-lens optical sensors, with a separate sensor array providing light metering. The speed of AF systems depends on the widest aperture offered by the lens at the current focal length. Most consumer camera systems will only autofocus with lenses that have a widest aperture of at least f/5.6, while professional models can cope with a widest aperture of f/8.
There are two main types of AF methods: AF-S (Single-shot AF) and AF-C (Continuous AF). AF-S operates when the shutter button is pressed halfway down and locks the focus once the subject is in focus. This is suitable for shooting motionless subjects such as landscapes. AF-C, on the other hand, continues to operate and adjust the focus while the shutter button is pressed halfway down, making it ideal for capturing moving subjects like in sports photography.
Autofocus has seen advancements such as tracking, which enables the camera to lock focus on a subject and track it through the frame. This is particularly useful for capturing moving subjects. Another innovation is Eye AF, which detects the eyes of subjects and focuses on them.
Manual Focus
Manual focus gives the photographer greater creative control as they can determine the focus point themselves. This method is ideal for situations where autofocus may struggle, such as low light conditions, shooting through glass or fences, or when there are many objects in the scene that may confuse the autofocus system. It is also useful for macro photography, as it allows for precise focus on a small area.
The choice between autofocus and manual focus depends on the photographer's needs and shooting conditions. Autofocus is generally faster and more convenient, especially for action photography, while manual focus offers more precision and control over the image. Autofocus may struggle in certain situations, such as low light, low-contrast scenes, or scenes with many objects, where manual focus can perform better.
Focusing Your Camera in Unity: A Step-by-Step Guide
You may want to see also

Phase Detection vs Contrast Detection
The integrated focus on camera lenses refers to the autofocus (AF) system, which automatically focuses a camera lens on a selected point or area. There are two main types of autofocus systems: phase detection and contrast detection. Both methods have their advantages and disadvantages, and some cameras use a combination of both, known as a hybrid autofocus system.
Phase Detection Autofocus
Phase detection autofocus (PDAF) uses two sensors located on each side of the camera lens to detect the phase difference of the light entering the lens. This allows the camera to determine if the subject is in focus and adjust the lens accordingly. This system is typically found in digital single-lens reflex (DSLR) cameras and some mirrorless cameras.
PDAF is generally faster and more accurate than contrast detection when tracking moving subjects. It also performs better in low-light conditions as the phase detection sensors can detect light directly from the lens. Additionally, PDAF is highly customisable, allowing photographers to change the focus points and sensitivity according to their preferences.
Contrast Detection Autofocus
Contrast detection autofocus (CDAF) uses the camera's sensor to detect the contrast between light and dark areas in the scene. The camera's processor then analyses the information from the image sensor and aligns the lens to bring the subject into focus. CDAF is most commonly used in mirrorless cameras and some point-and-shoot cameras.
CDAF is slower than PDAF but has the advantage of being more accurate when focusing on stationary subjects, making it ideal for portrait and landscape photography. It is also quieter than PDAF, which is preferable when photographing skittish animals or in quiet environments.
Hybrid Autofocus
Some mirrorless cameras now come with hybrid autofocus systems that combine both PDAF and CDAF. This provides greater control and flexibility, allowing photographers to track moving subjects with phase detection and focus on stationary subjects with contrast detection.
Choosing the Right Autofocus System
The best autofocus system depends on the type of photography, the camera being used, and budget constraints. For example, PDAF is generally better suited for sports and action photography, while CDAF is more suitable for portrait and landscape shots.
Camera Tickets: Are They Legal in Texas?
You may want to see also

Continuous-Servo vs Single-Servo Autofocus
Most professional cameras have two or three main autofocus “drive” modes: single-servo autofocus, continuous-servo autofocus, and sometimes a hybrid or automatic AF mode that decides for itself which of the previous two modes to use.
Single-servo autofocus is any autofocus system that focuses on a subject once and then stops focusing. The camera will make a beeping sound to indicate that it has achieved focus lock. The photographer is then able to capture images and/or recompose their framing. The autofocus system will stay locked until the photographer removes their finger from the shutter release and presses it again. This autofocus mode is useful for photographing static scenes or subjects that are not moving.
In continuous-servo autofocus, whenever you press or half-press the shutter, the autofocus will continually change to keep the subject sharp, even if the subject or the photographer are moving. This autofocus mode is useful for tracking moving subjects and for focusing at very shallow depths when shooting handheld in very close-up situations. Some of the latest cameras, when focusing in continuous-servo mode, can also automatically move the focus point around the viewfinder to track a subject that is moving around the camera’s viewfinder.
While single-servo autofocus is useful for static scenes, photographers may choose to use continuous-servo autofocus for a still, motionless subject if they are shooting with an extremely shallow depth of field. Conversely, photographers may opt for single-servo autofocus for action shots if they are shooting with a great depth of field.
Cleaning Camera Battery Corrosion: DIY Guide
You may want to see also

Autofocus Area Modes
There are several different autofocus area modes available, each suitable for different situations. Here is an overview of some of the most common autofocus area modes:
Single-Point AF Area Mode
Single-point AF area mode allows the photographer to select a single focus point, which is typically the most accurate option for stationary subjects. This mode is often used for landscape photography, portrait photography, or any situation where precise focus on a specific area is required. The centre focus point is generally the fastest and most reliable, but any of the available focus points can be used.
Dynamic AF Area Mode
Dynamic AF area mode is ideal for photographing moving subjects. With this mode, the photographer selects an initial focus point, and if the subject moves, the camera will use the surrounding focus points to maintain focus. The number of surrounding points used can usually be adjusted, with options such as 9, 21, or 51 points available. Dynamic AF area mode is often used for wildlife photography, sports photography, or any situation where the subject is moving erratically.
3D Tracking AF Area Mode
3D tracking AF area mode is another option for photographing moving subjects. This mode uses an algorithm to track the subject and adjust the focus point accordingly. It works best when there is a strong contrast between the subject and the background, such as a dark bird against a clear sky. However, it can struggle when the background is too busy or cluttered.
Auto-Area AF Mode
Auto-area AF mode is a fully automatic mode where the camera selects the focus points based on factors such as subject distance, motion, and the presence of detectable eyes. This mode is useful for novice photographers or situations where quick focusing is required, but it gives the photographer less control over the focus point.
Group AF Area Mode
Group AF area mode allows the photographer to select a specific autofocus area with multiple autofocus points, rather than just a single point. This mode is useful for photographing groups of subjects, such as wildlife or sports teams, where all the subjects are equally important. It can also be used for group shots in portrait photography.
Different camera manufacturers may use different names for these autofocus area modes, so it is important to refer to the camera's instruction manual to fully understand the options available on a particular model.
Lumina Cameras: Where Are They Manufactured?
You may want to see also

Focus Stacking
To achieve focus stacking, you take multiple images of a scene, focusing on different parts, such as the foreground, middleground, and background. These images are then blended to create a final image with a sharp foreground, middleground, and background.
Step-by-Step Process
- Set up your equipment: Mount your camera on a tripod to ensure stability and consistent composition. While not necessary, a tripod is recommended for the best results.
- Choose your subject and composition: Pick a scene that will remain steady, as focus stacking requires multiple images to be taken.
- Set your camera settings: Set your camera to Manual mode and dial in your exposure and white balance. These settings should remain fixed across all focus-stacked shots.
- Switch to manual focus: Set your lens to manual focus and focus on the nearest part of the scene.
- Take your first shot: Capture the first image, ensuring your composition and exposure remain locked.
- Take remaining images: Slowly move the focus away from the foreground, adjusting the focus and taking shots along the way. The number of images required will depend on your scene, with landscapes typically needing 2-3 shots and macro photography needing 8 or more.
- Blend the images: Use software to blend the images and create the final stacked image. Adobe Photoshop and Lightroom offer tools like Auto-Blend Layers to automate this process.
Tips and Tricks
- Watch out for moving subjects: Focus stacking works best with minimal movement in the scene. If there is movement, consider using manual masking techniques to overlay the moving subject.
- Use a remote release in low light: When shooting in low light, use a remote release to avoid blur caused by pressing the shutter button.
- Try handheld stacking: While a tripod is recommended, handheld focus stacking can also produce impressive results. Keep your framing consistent and minimise camera movement between shots.
- Combine with HDR photography: Focus stacking can be combined with HDR techniques to capture scenes with a high dynamic range, resulting in exceptional detail and clarity.
- Use a focusing rail for macro stacking: When working with ultra-high magnifications, a focusing rail attached to your tripod can help make precise adjustments to the focus point.
Software
Various software options are available for focus stacking, including:
- Adobe Photoshop and Lightroom
- Helicon Focus
- Zerene Stacker
- Affinity Photo 'Focus Merge'
- Amira / Avizo 'Image Stack Projection'
Marco Mode: Panasonic Camera's Secret Superpower
You may want to see also
Frequently asked questions
Integrated focus is when the camera system drives a motor to move elements in your lens to change focus.
Integrated focus works either automatically or manually. Automatic focus, or autofocus, is when the camera system drives a motor to move elements in your lens to change focus. To focus manually, you need to turn a ring or similar mechanism on the lens instead.
Autofocus is more convenient, faster, and more accurate than manual focus. However, it can struggle in low-light conditions and may not always be as precise as manual focus.


