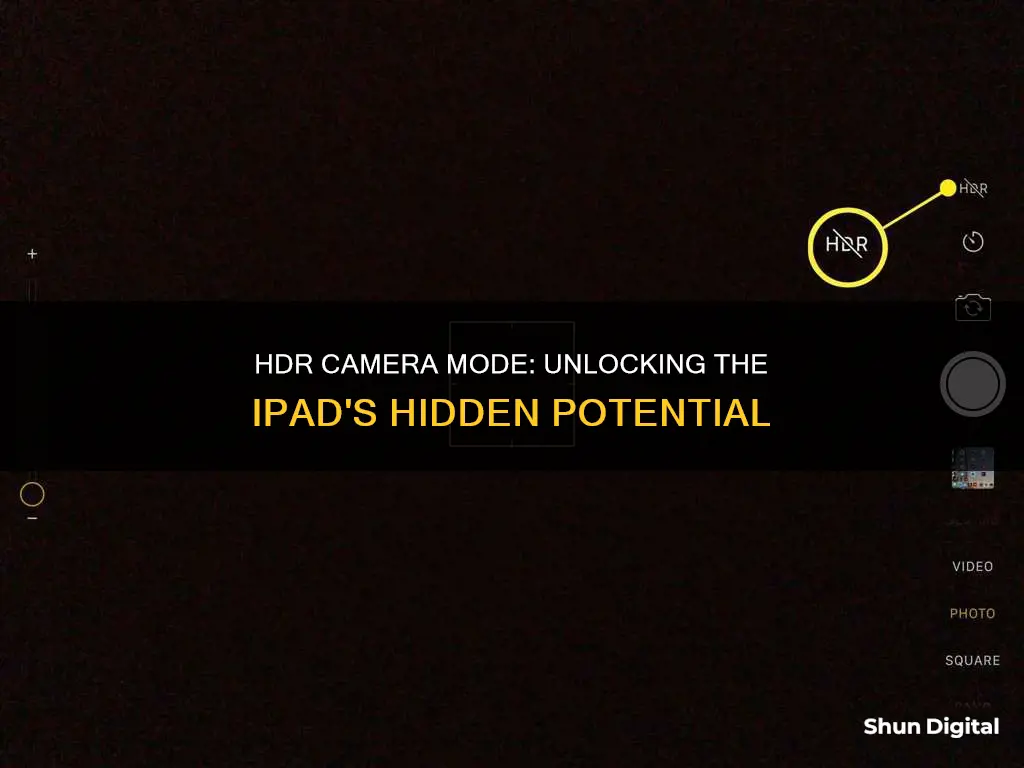
HDR stands for High Dynamic Range and is a setting on the iPad Camera app. It helps to create perfectly lit photos with more colour and detail in both bright and dark areas. The dynamic range refers to the difference between the lightest and darkest tones in a photo. When you use HDR, the camera captures several different exposures at different brightness levels. The camera then blends the best parts of these exposures to create a single well-lit image. This results in an image with more colour and detail in both the shadows and highlights.
| Characteristics | Values |
|---|---|
| Full Form | High Dynamic Range |
| Aim | Make photos realistic |
| Working | Multiple photos taken in quick succession at different exposures and combined to form the final image |
| Control | Can be set to Auto or Manual |
| Result | Better colour accuracy and detail |
| Comparison | Can be compared with the normal image |
| Camera Models | Compatible with iPadOS 17 |
What You'll Learn

How does HDR work?
HDR stands for High Dynamic Range. It is an imaging technique that aims to make the photos you capture as realistic as possible. Dynamic range refers to the difference between the lightest and darkest tones in a photo.
The human eye can see a much greater dynamic range than any camera. You can easily see the details of a dark subject against a bright sky. However, when you take a photo of a scene like that, your camera isn't capable of capturing detail in the very dark and very bright areas at the same time. This results in exposure problems in your photo.
The HDR feature solves these exposure problems by capturing several different exposures at different brightnesses and blending the best parts of these exposures to create a single well-lit image. The dynamic range of the photo increases, resulting in more colour and detail in both the shadows and highlights.
When using HDR on an iPhone or iPad camera, multiple photos are taken in quick succession at different exposures. These photos are then combined to form the final HDR image with better colour accuracy and detail. This all happens automatically in the background on the device itself with no user involvement.
By default, the iPad automatically uses HDR when it's most effective. However, you can manually control HDR by going to Settings > Camera, then turning off Smart HDR. On the camera screen, tap HDR to manually turn it on or off.
Charging Your Fuji X-S1: A Quick Guide
You may want to see also

When to use HDR
HDR, or High Dynamic Range imaging, is a method that adds more dynamic range to photographs, referring to the ratio of light to dark in the image. When you take a photo with HDR mode on, your iPad will take several photos in quick succession at different exposures and blend them together to create a single well-lit image with better colour accuracy and detail.
So, when should you use HDR? Here are some scenarios where HDR can help you capture the best shots:
- Low-light and backlit scenes: HDR can be very useful when your photo is looking too dark, especially if your scene has too much backlight. It can brighten up the foreground without washing out the well-lit portions of your photo.
- Landscapes: Landscape photos often have a lot of contrast between the sky and land, which is challenging for your camera to capture in a single image. With HDR, you can capture the sky's detail without making the land look too dark, and vice versa.
- Portraits in sunlight: Strong lighting, like harsh sunlight, can cause dark shadows, bright glare, and other unflattering characteristics in photos. HDR can even out the lighting and make your subject look better.
- High-contrast scenes: If you are struggling to get a good, balanced exposure, HDR can help. It will brighten up dark shadows and ensure highlights are not over-exposed, giving you more detail in both bright and dark areas.
However, there are also times when you may want to keep HDR turned off:
- Photos with movement: If your subject is moving, HDR increases the chance of a blurry photo. Remember, HDR takes multiple pictures, so if your subject moves between shots, your final image may have a "ghosting" effect.
- Silhouette photos: If you want to create a silhouette with a dark subject against a bright background, keep HDR switched off. If you turn it on, the shadows will brighten, and you won't get the silhouette effect.
- Vivid colours: While HDR can bring colour to dark or light scenes, it may wash out colours that are already very vivid.
To summarise, HDR is a great tool to enhance your photos in certain situations, especially when you need to balance lighting and detail in high-contrast scenes. However, it's important to know when to turn it off to capture the desired effect.
The Ultimate Camera Mode for Photography Enthusiasts
You may want to see also

When not to use HDR
HDR, or High Dynamic Range imaging, is a feature on iPad cameras that helps you take better-looking photos by adding more "dynamic range", or the ratio of light to dark, to your photographs. However, there are times when you shouldn't use HDR.
If you want to capture the high-contrast nature of a scene, such as when shooting in harsh sunlight, it is best to keep HDR switched off. This is because HDR will reduce the contrast between light and dark, resulting in a less interesting photo.
Similarly, if you are trying to create a silhouette photo, where the subject appears as a dark figure against a bright background, HDR is not recommended. The feature will brighten the shadows, taking away the silhouette effect.
If you are shooting photos with movement, such as with a moving subject or if your iPhone is not kept steady, it is best to avoid using HDR. This is because HDR takes multiple shots, so any movement between captures will result in a blurry or "ghosting" effect in the final image.
Finally, if you are working with vivid colours, HDR can wash them out. In this case, it is better to capture the true colours without the use of HDR.
Charging Your PowerShot S110: A Step-by-Step Guide
You may want to see also

How to turn HDR on and off
HDR, or High Dynamic Range, is an imaging technique that helps you take better photos in high-contrast situations. It does this by taking several photos in rapid succession at different exposures and blending them together. The resulting photo has better detail in the bright and mid-tone areas.
By default, your iPad will automatically use HDR when it's most effective. However, you can manually control HDR by following these steps:
- Go to Settings on your iPad.
- Scroll down and tap on "Camera".
- Under the HDR section, turn off "Smart HDR" or "Auto HDR".
- Now, open the Camera app.
- Tap on the "HDR" option to manually turn it on or off.
On earlier iPad models, you can manually turn HDR on or off by tapping on the camera screen.
Saving HDR Photos
By default, the HDR version of a photo is saved in Photos. On some iPad models, you can also save the non-HDR version by going to Settings > Camera and turning on "Keep Normal Photo".
Finding Camera Raw in Lightroom: A Quick Guide
You may want to see also

How to view HDR photos on your iPhone
HDR, or High Dynamic Range, is an imaging technique that combines multiple photos, each taken at a different exposure level, to create a single image with improved colour accuracy and detail. This feature is automatically enabled on newer iPhones, but it can also be manually controlled.
- Go to Settings on your iPhone and scroll down to "Camera".
- Under the HDR section, turn off "Auto HDR". This gives you full control over when to capture HDR photos.
- Open the Camera app and tap on the "HDR" option at the top to manually enable it.
- Take a photo by tapping the shutter button.
- Open the Photos app to view the captured HDR image, which will be indicated by an HDR icon.
- Swipe right on the photo to view the non-HDR version for comparison.
By default, the HDR version of the photo will be saved in your Photos app. However, if you want to save the non-HDR version as well, go to Settings, then Camera, and turn on "Keep Normal Photo".
It is worth noting that the "View Full HDR" option in iOS enhances the dynamic range of your display, making the screen brighter in highlight areas to simulate real-life lighting differences. This option does not modify the photo itself, but rather enhances its display on your device.
Why 18650 Batteries Are Popular in Cameras
You may want to see also
Frequently asked questions
HDR stands for High Dynamic Range.
HDR helps you get great shots in high-contrast situations. It takes several photos in rapid succession at different exposures and blends them together to bring more highlight and shadow detail to your photos.
HDR is perfect for landscape photography or any scene with dark shadows and bright highlights. It is also useful for low-light and backlit scenes, and portraits in sunlight.
If you want to capture the high-contrast nature of a scene, such as a silhouette, or if you are photographing moving subjects, it is better to keep HDR switched off.
By default, HDR is automatically used when it is most effective. To manually control HDR, go to "Settings", scroll down and tap on "Camera", then turn off Smart HDR. On the camera screen, tap HDR to manually turn it on or off.


