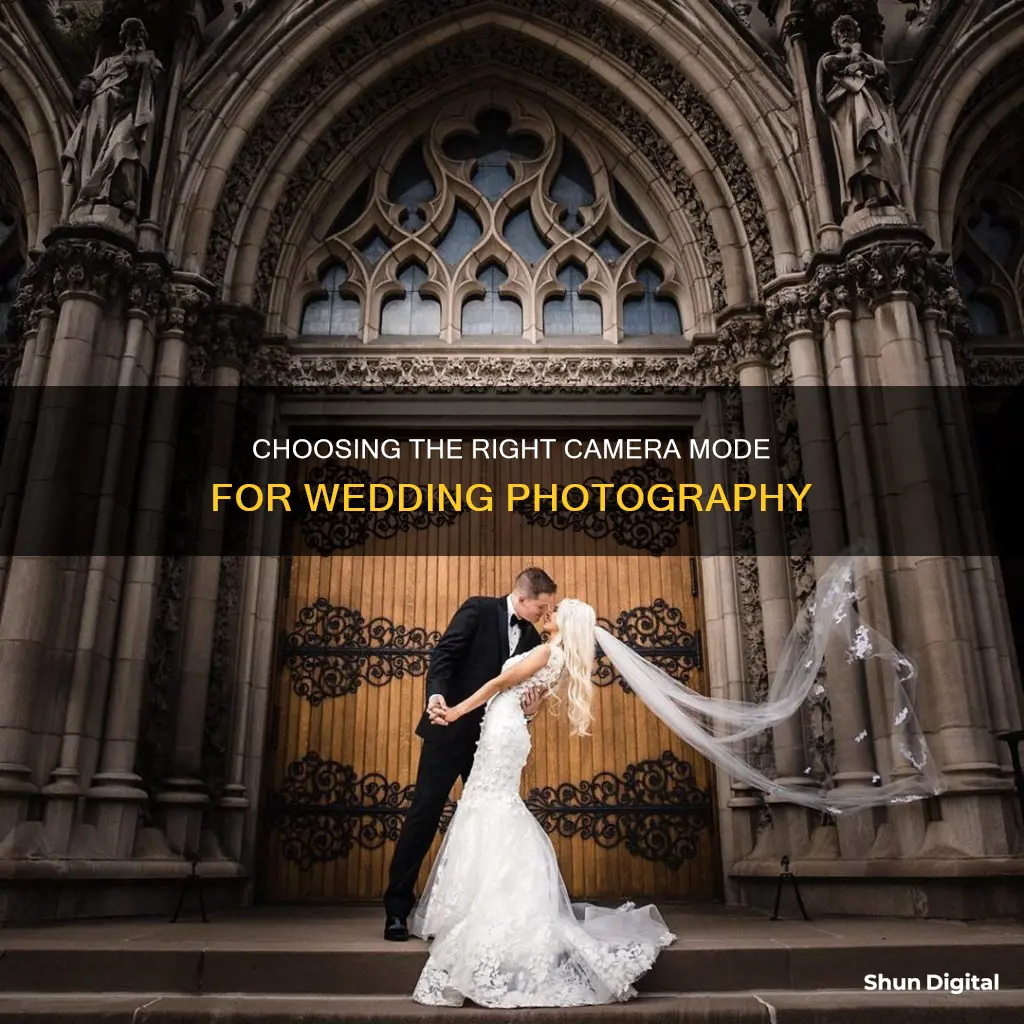
Capturing the perfect shot at a wedding can be exhilarating and nerve-wracking. Wedding photography requires a great deal of responsibility and expertise. There is no room for error as there are no second chances.
Wedding photography brings together many different elements and styles, such as glamour, landscape, and documentary photography. Some photographers organise surreal photo shoots to add a fairy-tale touch, while others rely on unique post-processing techniques.
Wedding photographers need to be well-organised and punctual, and it is important to know the schedule so that no important moments are missed. A second shooter can also be beneficial.
The right camera settings can make all the difference in creating stunning, memorable photographs. While automatic mode is convenient, manual mode gives photographers complete control over their camera settings, allowing them to capture amazing shots.
Shutter priority mode and aperture priority mode are also useful, but manual mode is best as it leaves nothing to chance. It is important to understand the relationship between shutter speed, aperture, and ISO, and how to adjust these settings on your camera.
Aperture affects the exposure and depth of field in your images. A wider aperture creates a shallow depth of field, allowing you to isolate your subject and create a bokeh effect in the background. A Narrower aperture provides more depth of field, which is great for capturing larger groups or landscapes.
Shutter speed determines how long the camera's sensor is exposed to light. A faster shutter speed freezes movement, while a slower shutter speed creates a sense of motion blur.
ISO refers to the camera's sensitivity to light. A higher ISO allows you to shoot in low-light conditions without a flash but may introduce more digital noise. A lower ISO produces cleaner images but requires more light.
When shooting weddings, it is also important to consider factors such as white balance, focus mode, image quality, drive mode, and flash settings.
In addition to camera settings, choosing the right lens is crucial. Prime and zoom lenses offer different creative options, and lenses with wide apertures are ideal for low-light conditions.
With the right gear and a good understanding of camera settings, photographers can capture the magic of a wedding and create stunning images that the couple will cherish forever.
| Characteristics | Values |
|---|---|
| Camera Mode | Manual Mode (M), Aperture Priority Mode (A), Shutter Priority Mode (S) |
| Aperture | f/1.8 to f/2.8 for portraits, f/5.6 for group shots, f/4 for a balance |
| Shutter Speed | 1/60th of a second for posed portraits, 1/500th of a second for fast-paced shots |
| ISO | 100-400 for portraits, 400-1600 for ceremonies, 1600-3200 for receptions |
| Lens | 50mm or 85mm prime lens for portraits, 24-70mm zoom lens for ceremonies, 24-70mm or 70-200mm zoom lens for receptions |
What You'll Learn
- Aperture Priority Mode: This mode lets you set the aperture, while the camera chooses the shutter speed
- Manual Mode: Full control over aperture, shutter speed, and ISO
- Shutter Priority Mode: You set the shutter speed, and the camera adjusts the aperture
- ISO: Adjusting the camera's sensitivity to light
- Exposure Triangle: Aperture, shutter speed, and ISO work together to control exposure
![]()
Aperture Priority Mode: This mode lets you set the aperture, while the camera chooses the shutter speed
Aperture Priority mode is a semi-automatic mode that allows you to set the aperture while the camera chooses the shutter speed. It is denoted by "A" or "Av" on most cameras. This mode is particularly useful in situations where you need to control the depth of field in your images, such as portrait photography.
In Aperture Priority mode, you manually select the aperture (f-stop) you plan to use, and the camera will never change this setting. Therefore, it is essential to choose the right aperture for your desired depth of field and other factors. The aperture setting also affects the ISO value and shutter speed that the camera selects. By widening the aperture, the camera will increase the shutter speed and decrease the ISO to compensate for the brighter exposure. Conversely, narrowing the aperture will lead to a slower shutter speed and higher ISO to compensate for the darker exposure.
Aperture Priority mode is valuable because it gives you control over the most important setting in photography – the aperture. It is also faster to use than Manual mode, which requires more time to set up when the lighting conditions are changing. This mode is ideal for situations where you need to react quickly to lighting changes, such as during a wedding ceremony or when shooting action and sports photography.
However, Aperture Priority mode does have some limitations. It does not allow you to set your preferred shutter speed, so if you require a specific shutter speed, Manual mode may be a better choice. Additionally, Aperture Priority mode restricts you to shutter speeds of 30 seconds or shorter.
Overall, Aperture Priority mode is a powerful tool that offers both flexibility and speed. It is a great mode for beginners to learn about camera settings and for professionals who want to focus on their subjects and composition without being distracted by constant camera adjustments.
Activeon Action Camera: Swappable Batteries?
You may want to see also
![]()
Manual Mode: Full control over aperture, shutter speed, and ISO
Manual mode gives you full control over your camera's settings, including aperture, shutter speed, and ISO. This means you can make precise adjustments to these settings based on lighting conditions and your desired creative effect.
Aperture refers to the opening in your lens that lets in light. A wider aperture, denoted by a lower f-number, creates a shallow depth of field, allowing you to isolate your subject and create a "bokeh" effect. A narrower aperture, denoted by a higher f-number, provides a deeper depth of field, keeping both the foreground and background in focus.
Shutter speed determines how long your camera's sensor is exposed to light. A faster shutter speed freezes movement, while a slower shutter speed creates a sense of motion blur.
ISO refers to your camera's sensitivity to light. A higher ISO allows you to shoot in low-light conditions without a flash but may introduce more digital noise. A lower ISO produces cleaner images but requires more light.
When shooting in manual mode, you have the flexibility to adjust these settings independently to achieve the desired exposure and creative effect. For example, if you want to capture motion blur to convey a sense of movement in your wedding photos, you can use a slower shutter speed. If you want to isolate the subjects and create a shallow depth of field, you can use a wider aperture.
Manual mode is particularly useful when lighting conditions are constantly changing, as it allows you to make immediate adjustments to your camera settings. It also ensures consistent exposure across all your photos, which is crucial for creating a cohesive wedding photo album.
While manual mode offers full control, it can be intimidating for beginners. It requires practice and a good understanding of the basic concepts of photography. Additionally, it may not be the best choice for fast-paced or rapidly changing lighting conditions, as it takes time to adjust the settings manually. In such cases, semi-automatic modes like Aperture Priority or Shutter Priority can be more practical.
Charging Your Coolpix S51: A Step-by-Step Guide
You may want to see also
![]()
Shutter Priority Mode: You set the shutter speed, and the camera adjusts the aperture
Shutter Priority Mode is a great setting to use when shooting weddings, especially during the procession and the ceremony. This mode allows you to set a fast shutter speed to freeze motion and ensure sharp images, while the camera automatically adjusts the aperture to maintain the correct exposure. Here are some tips and techniques for using Shutter Priority Mode when shooting weddings:
- Set a fast shutter speed: For weddings, it is recommended to use a shutter speed of at least 1/250th of a second to capture slow-moving subjects. 1/500 to 1/1000 is even better if your ISO allows. This will help you capture those quick moments like the first dance or the couple's first kiss without motion blur.
- Be mindful of low-light situations: In low-light conditions, such as indoor weddings or ceremonies in dimly lit churches, you may need to increase your ISO to maintain a fast shutter speed. Keep in mind that higher ISO settings can introduce more digital noise, so finding a balance between shutter speed and ISO is crucial.
- Use a flash: In low-light situations, consider using a flash to add more light to the scene. This will help you achieve sharper images and freeze motion. You can use a flash bracket to minimize shadows when shooting in spaces with walls or other obstacles nearby.
- Adjust your aperture: While Shutter Priority Mode automatically adjusts the aperture, you can still set a minimum aperture to ensure a certain depth of field. For group photos or landscapes, a narrower aperture like f/5.6 or f/8 will provide more depth of field, keeping everyone in focus. For portraits, a wider aperture like f/1.8 or f/2.8 will create a shallow depth of field, blurring the background and emphasizing the subject.
- Practice and experiment: Shutter Priority Mode gives you flexibility and allows you to capture fast-moving moments. Practice using this mode in different lighting conditions and during different parts of the wedding to get a feel for how it works and when it is most useful.
Replacing JVC Camera Batteries: A Step-by-Step Guide
You may want to see also
![]()
ISO: Adjusting the camera's sensitivity to light
ISO stands for the International Standards Organisation, and the settings adjust your camera's sensitivity to light. A higher ISO means a greater sensitivity and a greater ability to capture light. This means that you can shoot with a faster shutter speed or a narrower aperture value. This is useful for capturing moving subjects or for deepening the depth of field.
The ISO setting is the third element of the exposure triangle, alongside aperture and shutter speed. When shooting in Aperture Priority, Shutter Priority, or Manual Mode, you will need to select the ISO setting. On most DSLRs, there is an ISO button that you hold down while rotating the main control dial. The current setting will be visible on the main control panel.
The ISO settings usually start from 100 and then double each time—200, 400, 800, 1600, 3200—but many cameras now offer settings in between. Each time you double the number, you double the sensitivity and the brightness of the exposure.
When shooting in low-light conditions, you can increase the ISO to make the shutter speed faster, minimising blur. However, the trade-off is that higher ISO settings can introduce more digital noise into your photos in the form of randomly spaced bright pixels, fog, or lines. This is similar to the 'grain' that was present in traditional film photography.
To prevent excessive noise, you can enable high ISO noise reduction. Additionally, it is recommended to use the lowest ISO setting on your camera to get the best dynamic range, which is important for capturing detail in highlights and shadows in high-contrast scenes.
The Best Camera Grip Battery Options and Their Lifespans
You may want to see also
![]()
Exposure Triangle: Aperture, shutter speed, and ISO work together to control exposure
Exposure Triangle: Aperture, Shutter Speed and ISO Work Together to Control Exposure
The aperture, shutter speed, and ISO form the exposure triangle, which helps photographers understand how these three settings work together to determine the exposure of a photograph.
Aperture
The aperture is the opening in the camera's lens through which light passes and reaches the camera's sensor, creating an image. A wider aperture, such as f/1.8, creates a shallow depth of field, allowing you to isolate your subject and create a "bokeh" effect in the background. On the other hand, a narrower aperture, such as f/5.6 or f/8, provides a greater depth of field, which is ideal for capturing larger groups or landscapes.
Shutter Speed
Shutter speed refers to how long the camera's sensor is exposed to light when capturing an image. A faster shutter speed, such as 1/1000th of a second, will freeze movement, making it perfect for capturing quick moments. Conversely, a slower shutter speed, like 1/20th of a second, will create a sense of motion blur, which can be used creatively to capture the flow of a wedding dress, for example.
ISO
ISO refers to the camera's sensitivity to light. A higher ISO, such as 3200 or 6400, allows you to shoot in low-light conditions without a flash, but it may introduce more digital noise into your photos. On the other hand, a lower ISO, such as 100 or 200, will produce cleaner images, but you'll need more light to achieve the correct exposure.
Working Together for Perfect Exposure
The key to creating perfectly exposed images is to balance these three settings: aperture, shutter speed, and ISO. When you increase one of these settings, you will need to decrease one or both of the others to maintain the same exposure. This balance ensures that your images are not too dark or too bright, preserving detail in both the shadows and highlights.
Camera Modes
Different camera modes allow you to control these settings manually or automatically. In Aperture Priority mode, you set the aperture to control the depth of field, and the camera automatically adjusts the shutter speed to maintain proper exposure. In Shutter Priority mode, you set the shutter speed to control motion blur, and the camera adjusts the aperture. Finally, in Manual mode, you have full control over all three settings, allowing for precise adjustments to achieve your desired creative vision.
Troubleshooting Camera Raw: Why It Reads Wrong
You may want to see also
Frequently asked questions
While there is no one-size-fits-all answer, many professional photographers recommend shooting in Aperture Priority (Av) or Shutter Priority (Tv) mode for weddings. These modes offer more flexibility and control over your images than full Manual Mode, while still allowing you to capture the fast-paced action of a wedding.
Aperture Priority mode allows you to set a specific aperture (f-stop), while the camera automatically selects the appropriate shutter speed to achieve a perfect exposure. This mode is ideal for wedding couple portraits, where a wide aperture (e.g., f/1.4 to f/2.8) can create a beautiful, blurred background with sharp subject focus.
Shutter Priority mode lets you set a specific shutter speed, with the camera automatically adjusting the aperture to maintain proper exposure. This mode is useful for freezing fast action at receptions or capturing slow-moving subjects like posed portraits before the ceremony.
Manual Mode gives you full control over all camera parameters (shutter speed, aperture, ISO), which is essential for achieving consistent results in varying lighting conditions. It's particularly useful for indoor weddings or low-light situations, where you need to carefully manage your camera settings to avoid blurry or underexposed images.
When using Aperture Priority, consider enabling Auto ISO with a maximum limit (e.g., ISO 3200) to prevent excessive noise. Set a minimum shutter speed (e.g., 1/125s) to reduce motion blur. Choose your aperture based on the desired creative effect and depth of field: wider apertures (e.g., f/1.8) for shallow depth of field and narrower apertures (e.g., f/5.6) for greater depth of field.