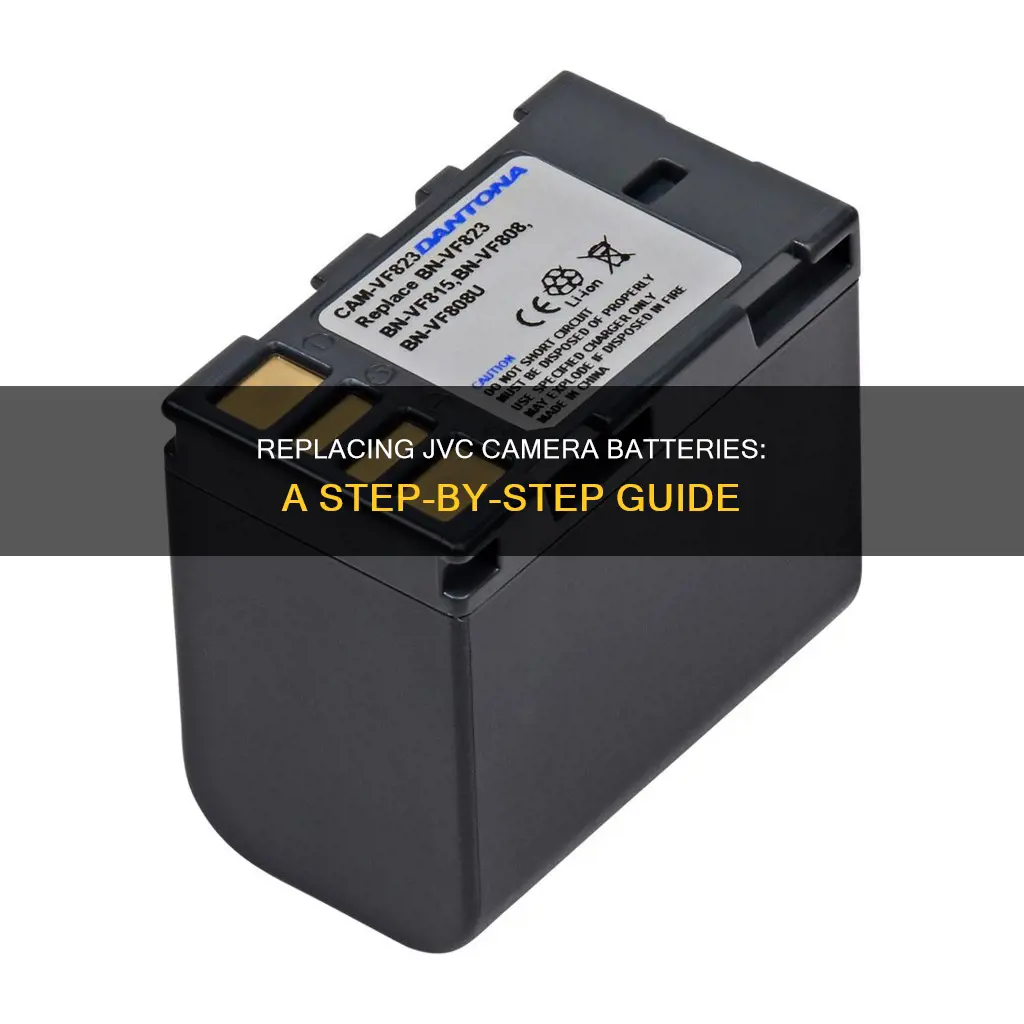
Replacing a JVC camera battery is a simple process. First, locate the button at the bottom of the camera and slide it to the right. Next, pull the battery out towards the bottom of the camera while lifting it. To put a new battery in, align the top of the battery with the mark on the unit and slide it in until it clicks into place. It is important to note that only JVC battery packs should be used to ensure safety and performance.
| Characteristics | Values |
|---|---|
| Ease of replacement | Straightforward |
| Steps | Locate button on bottom of camera, slide button to the right, pull the battery towards the bottom of the camcorder while lifting it |
| Reassembly instructions | Follow disassembly instructions in reverse order |
| Charging time | Approx. 2 h 20 m (using supplied battery pack) at 25°C |
| Charging lamp | Blinks when charging, turns off when complete |
| Battery storage | Store in a dry place between 15°C to 25°C |
| Battery maintenance | Keep a 30% battery level when not in use for long periods; fully charge and discharge every 6 months |
What You'll Learn

Locating the button on the bottom of the camera
To replace the battery in your JVC camera, you will first need to locate the button on the bottom of the device. This button is usually located on the underside of the camera, near the battery compartment. It may be a small, round button or a switch, depending on your camera model. Sometimes it is labelled with a battery symbol or an arrow indicating the direction in which to slide it. Once you have found the button, you can proceed to the next step of replacing the battery.
If you are having trouble locating the button, try looking for a small indentation or groove on the bottom of the camera. This is often an indication that the button is located in this area. It may be necessary to gently feel around the bottom of the camera with your finger to locate the button, as it can sometimes be difficult to see.
In some cases, the button may be located inside a small compartment on the bottom of the camera. If you see a small door or flap that can be opened, try opening it to see if the button is located inside. This compartment may also contain the battery release switch, which you will need to access in order to remove the old battery.
Once you have located the button on the bottom of the camera, you are ready to begin the process of replacing the battery. The next step will involve sliding this button to the right, which will unlock the battery and allow it to be removed from the camera. This is a standard safety feature on many JVC camera models, designed to prevent accidental removal of the battery during use.
By following these steps and locating the button on the bottom of your JVC camera, you can ensure a smooth and safe battery replacement process. Remember to refer to your specific camera model's instructions for further details, as the exact steps may vary slightly between different models.
Charging Your Spy Pen Camera: How Long Does It Take?
You may want to see also

Sliding the button to the right
To replace the battery of your JVC camera, start by locating the button on the bottom of the camera. This button will be used to release the battery. Once you have found it, slide it to the right. This action will unlock the battery, allowing you to remove it and insert a new one.
When sliding the button, use a gentle and smooth motion. Do not force the button if it does not slide easily. If you encounter resistance, check that you have located the correct button and that it is designed to slide. Additionally, ensure that you are sliding the button in the right direction. It should slide easily to the right when unlocked.
After sliding the button, you will be able to remove the battery. To do this, pull the battery towards the bottom of the camera while lifting it upwards. This will dislodge the battery from its housing. Be careful not to drop or damage the battery during removal. Once the battery is removed, you can insert a new one by aligning the battery's connectors with the corresponding slots in the camera and gently pushing it into place until it clicks.
Smart Tips for Flying with Camera Batteries
You may want to see also

Pulling the battery out from the bottom
To replace a JVC camera battery, start by locating the button on the bottom of the camera. Slide the button to the right. Next, pull the battery out from the bottom of the camcorder while lifting it out. To put in a new battery, align the top of the battery with the mark on the unit and slide it in until it clicks into place.
If you are having trouble removing the battery, try cleaning the cassette mech. If the issue persists, it may be that the battery is not charged. Try charging the battery and see if that helps. If not, you may need to purchase a new battery.
When replacing the battery, be sure to use an official JVC battery pack. If you use any other battery pack, safety and performance cannot be guaranteed.
To reassemble your device, simply follow these instructions in reverse order. Holding down the battery release switch is not necessary.
Tasco Trail Camera: Loading Batteries for Optimum Performance
You may want to see also

Charging the new battery
To begin charging, attach the battery pack by aligning the top of the battery with the mark on the unit and sliding it in until it clicks into place. Next, connect the AC adapter to the DC connector. The charging lamp will blink while charging and turn off when it is finished.
It is important to use only JVC battery packs and the supplied AC adapter to ensure safety and optimal performance. Using other battery packs or adapters may lead to malfunctions or void warranties.
If you are charging the battery in a low-temperature environment (10°C or below), the operating time may be shortened, or the battery may not function properly. In such cases, it is recommended to warm the battery before attaching it to the unit, such as by keeping it in your pocket. However, be sure to avoid direct contact with a warm pack and do not expose the battery to excessive heat, such as direct sunlight or fire.
Additionally, if you plan to store the battery for a long period without use, it is recommended to maintain a 30% battery level. Every six months, fully charge and then discharge the battery before returning it to 30% charge for storage.
Smart Alarm Clock: All-in-One Solution for Your Bedroom?
You may want to see also

Reassembling the device
To reassemble your JVC camera, reverse the steps you took to disassemble it.
First, slide the new battery into the base of the camera, ensuring it is aligned correctly and clicks into place. Next, release the battery door by sliding the button to the left. Close the battery door.
Then, reattach the base of the camera to the main body, ensuring that all screws are tightened securely. Reattach the viewfinder by sliding it back into place until it clicks, and then reattach the flash by aligning it with the grooves on the camera body and sliding it back into place.
Finally, power on your camera to ensure it is working as expected.
Charging Your Bloggie Camera: A Step-by-Step Guide
You may want to see also
Frequently asked questions
To replace the battery in your JVC GR-D72U camera, locate the button on the bottom of the camera. Slide the button to the right, then pull the battery towards the bottom of the camcorder while lifting it out.
When the battery life is reached, the recording time will become shorter even if the battery pack is fully charged. This is a good indication that it's time to replace your battery.
Attach the battery pack by aligning the top of the battery with the mark on the unit and sliding it in until it clicks into place. Connect the AC adapter to the DC connector and allow it to charge until the charging lamp goes out.
Yes, it is important to only use JVC battery packs and the supplied AC adapter to ensure safety and performance. Do not expose the battery to excessive heat, such as direct sunlight or fire. When storing the battery for a long period of time, keep it at a 30% battery level.


