The Sony Bloggie camera is a digital camera designed for bloggers. It is small, lightweight, and easy to carry around. The Bloggie camera uses a lithium-ion battery, which can be charged via a USB cable or an AC adapter. To charge the camera using a USB cable, simply plug the cable into the camera and a USB port on your computer. A red light on the back of the camera will indicate that it is charging. Alternatively, you can use an AC adapter to charge the camera by plugging it into an outlet. It is important to ensure that the camera is turned off before beginning the charging process and to allow the battery to charge fully before unplugging it and turning the camera back on.
| Characteristics | Values |
|---|---|
| Charging method | USB cable, AC adapter, battery charger |
| USB cable connection | Plug into the camera and an available USB port on your computer |
| Charging indicator | Red light on the back of the camera |
| Battery type | Lithium-ion |
| Battery size | Varies, ensure it is the correct size and type for your camera |
| Charging time | A few minutes |
| Charging status LED indicator | Red when charging, green when fully charged |
What You'll Learn
![]()
Charging via USB cable
Charging your Sony Bloggie camera via a USB cable is a straightforward process that only takes a few minutes. First, ensure your camera is turned off. Then, connect the USB cable to your computer or laptop. The USB cable that comes with your camera should be used. Plug one end of the USB cable into the camera and the other end into an available USB port on your computer.
Once the cable is connected, the charging process will begin automatically. You will know that your camera is charging when the red light on the back of the camera turns on. If your camera has a charge lamp, it will light up in orange to indicate that charging has started. When charging is complete, the red light will turn off, or the charge lamp will turn off.
It is important to note that you should only use the USB cable to charge your camera when it is connected to a computer or laptop that is turned on. If you are having trouble connecting the cable, ensure that it is properly inserted into both devices.
Charging Camera Batteries: Alone Contestants' Strategies
You may want to see also
![]()
Charging with an AC adapter
To charge your Bloggie camera using an AC adapter, follow these steps:
Firstly, ensure that your camera is turned off before you begin the charging process. This is important to avoid damaging the battery.
Then, simply plug the AC adapter into your camera and connect the other end to a power outlet. The camera should now be charging.
You can identify when the camera is fully charged by the LED indicator on the charging cable. When charging, the LED indicator will be red, and when the battery is fully charged, it will turn green.
Once the battery is fully charged, unplug the AC adapter from both the camera and the power outlet. You can now turn on your camera and start using it as usual.
It is worth noting that you can also charge your Bloggie camera by connecting it to your computer or laptop using a USB cable. This provides an alternative method if you do not have access to a power outlet or if your AC adapter is not functioning.
Always ensure that you use the correct charger and cable for your camera to avoid any damage.
Is Your Eufy Camera Charging? Check This Way
You may want to see also
![]()
Charging in a car
Charging your Bloggie camera in your car is a straightforward process. You can use the car charger cable that comes with your camera. This cable can be plugged into your car's 12V DC charger port, and you can identify when your battery is fully charged when the LED indicator turns green.
If you don't have the car charger cable, you can also use a USB cable to charge your Bloggie camera in your car. Here's how:
- Ensure your car is running.
- Press the ON/OFF (Power) button on your camera to turn it off.
- Slide the slide lever at the side of the camera. The USB jack will now be exposed.
- Connect the USB cable to the USB jack on your camera.
- Plug the other end of the USB cable into a USB port in your car.
- The charge lamp on your camera will light up in orange, indicating that charging has started.
- When the charge lamp turns off, your camera is fully charged and ready to use.
Please note that it is important to ensure your camera is turned off during the charging process to avoid damaging the battery.
Charging Cameras: A Solo Participant's Guide
You may want to see also
![]()
Using a battery charger
To use a battery charger, first ensure that you have the correct battery charger for your camera model. Then, follow these steps:
- Plug the wall charger into a power outlet.
- Place your battery into the charger, ensuring that the polarity (positive and negative ends) is correctly aligned.
- The LED indicator on the charger will turn red while charging and turn green when the battery is fully charged.
- Once charging is complete, unplug the charger from the power outlet, and remove the battery.
- Insert the charged battery back into your Bloggie camera, and you're ready to start capturing moments again!
It is important to note that when using a battery charger, you should only charge the battery and not the entire camera. Additionally, always make sure to follow the safety instructions provided with your charger and refer to your camera's manual for any model-specific considerations.
By following these steps and staying mindful of safety precautions, you can effectively use a battery charger to power up your Bloggie camera's battery and stay ready for your next adventure.
ZS50: In-Camera Charging Supported?
You may want to see also
![]()
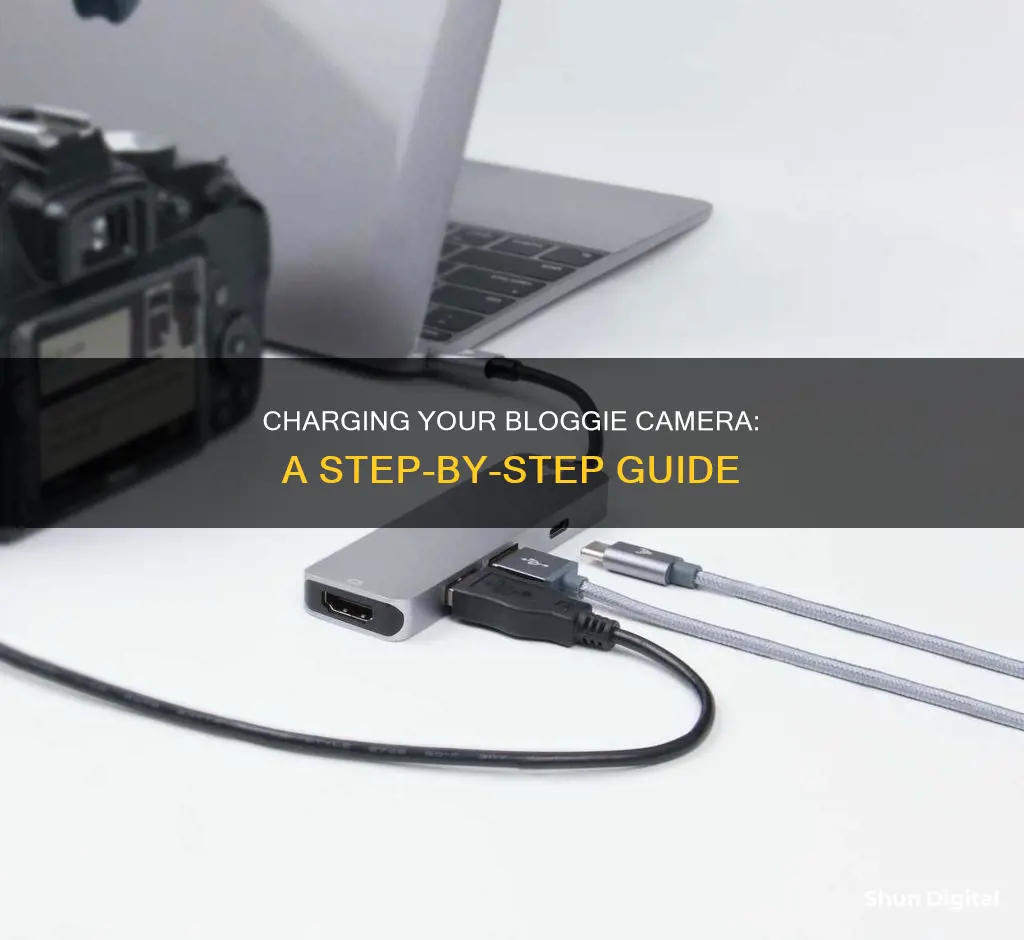
Charging with a laptop
Charging your Sony Bloggie camera using a laptop is simple and convenient. Here's a detailed guide on how to do it:
Step 1: Power Off Your Camera
Before you begin charging, make sure to turn off your Sony Bloggie camera. This is important to ensure the charging process is safe and doesn't interfere with any camera functions. Press the ON/OFF (Power) button to turn off the camera completely.
Step 2: Prepare the USB Cable
The Sony Bloggie camera typically comes with a USB support cable. Locate this cable and have it ready for the next steps. It's important to use the supplied cable to ensure compatibility and safe charging.
Step 3: Connect the Camera to Your Laptop
Take the USB cable and connect one end to your Sony Bloggie camera. The USB port on the camera is usually located on the side or bottom. Once connected, the camera's USB jack should extend outward. Now, take the other end of the USB cable and plug it into an available USB port on your laptop.
Step 4: Initiate Charging
Once the connections are made, the charging process should begin automatically. You will know that your camera is charging when the Power light on the camera turns orange. This indicates that the camera is receiving power from your laptop and is in the process of charging.
Step 5: Monitor the Charging Progress
Keep an eye on the Power light during the charging process. The orange light will remain lit as long as the camera is charging. When the battery is fully charged, the light will turn off or change color, depending on your camera model. Refer to your camera's user manual if you're unsure about the specific indicator.
Step 6: Disconnect and Power On
Once the battery is fully charged, safely disconnect the USB cable from both your laptop and the camera. Now, you can power on your Sony Bloggie camera and start using it. Your camera should now be fully charged and ready to capture all your special moments.
It's important to note that charging times may vary, but on average, it takes around 200 minutes to fully charge a Sony Bloggie camera. Always ensure that your laptop is turned on and functioning properly during the charging process.
Dash Cam Power: Staying Charged and Ready
You may want to see also
Frequently asked questions
You can charge your Sony Bloggie camera by plugging the USB cable into the camera and connecting the other end to a USB port on your computer. The camera must be turned off during the charging process.
The Bloggie camera has a charging lamp that lights up in orange when charging. When the lamp turns off, the battery is fully charged.
Yes, you can use an AC adapter to charge your Bloggie camera by plugging it into a power outlet. You can also use a battery charger to charge the battery separately.