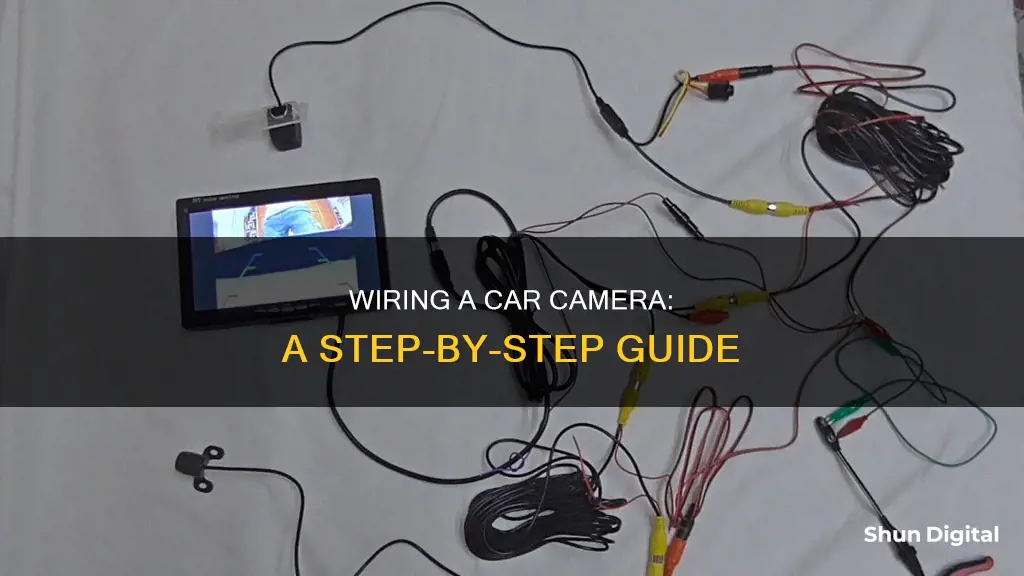
Wiring a camera in your car, also known as hardwiring, is a great way to keep your dash cam constantly powered and ready to record. It also provides a cleaner setup by eliminating cable clutter. To wire a camera in your car, you will need to follow these general steps:
- Locate the fuse box in your car, usually found under the dashboard or steering wheel.
- Identify a suitable fuse to serve as the power source for your dash cam, ensuring it provides constant power or switched power based on your needs.
- Remove the existing fuse and insert a fuse tap to connect the dash cam wires.
- Find a proper grounding spot and connect the ground wire.
- Test your installation by turning on the ignition to ensure the dash cam turns on and begins recording.
- Tidy up any remaining wires and secure them with cable ties.
While the exact steps may vary depending on your car model and dash cam, following these general guidelines will help you successfully wire a camera in your car.
| Characteristics | Values |
|---|---|
| Step 1 | Gather everything you need |
| Step 2 | Locate the fuse box |
| Step 3 | Determine which fuse slot to use |
| Step 4 | Connect the Add-a-Fuses to the Hardwire Kit |
| Step 5 | Test your dash cam |
What You'll Learn

Locating the fuse box
There are two fuse panels in most cars. One is usually found under the dashboard, to the left of the steering wheel, and the other is located under the hood of the car in the engine compartment. The fuse box under the hood is usually found on the driver's side of the car. It is often a black box labelled with the word "FUSES" and is colour-coded with an AMP rating. The other fuse box is located under the dashboard, and it may be well hidden, but it will also be labelled. The fuses in this fuse box will be smaller than those under the hood.
If you are unsure where your fuse box is located, you can always refer to your vehicle owner's manual, which should include a fuse box diagram. You can also check online by specifying the make and model of your car. In some car models, the fuse box is located in the glove box or in either front footwell. If your car has multiple fuse boxes, you should select the one closest to where you will be installing your camera.
Mirrorless Camera Focusing: How Does It Work?
You may want to see also

Choosing a fuse with the right amperage
When wiring a camera in your car, choosing a fuse with the right amperage is crucial to ensure the safety of your vehicle and the proper functioning of your camera. Here are some detailed instructions and considerations to help you select the appropriate fuse:
Understanding Fuse Amperage:
- The fuse amperage should match the electrical current flowing through the circuit. It is a safety device that interrupts the circuit if the current exceeds the fuse's rating, preventing overheating and potential fires.
- Fuses are designed to protect the wiring and are typically sized at around 125% of the maximum continuous load. For example, 16 AWG wire can handle at least 10A, so a 2A or 3A fuse is appropriate.
Identifying Constant and Switched Fuses:
- Modern vehicles have constant and switched circuits. Constant circuits are always live and receive power even when the engine is off. Switched circuits are only live when the engine is running.
- To identify these circuits, use a circuit tester (test light) or a multimeter. Ground the tester to an unpainted metal point, such as the negative terminal of the car battery.
- Probe the fuses with the engine off. Constant fuses will light up the tester. Then, turn the ignition on without starting the engine. Fuses that now light up are switched fuses.
Selecting the Right Fuse:
- When wiring a dashcam, it is recommended to select fuse slots rated between 10A and 30A to provide sufficient power.
- Choose a non-essential circuit as your constant power source. Circuits marked as "accessory" in the owner's manual or fuse box diagram are ideal. Avoid circuits related to safety features or critical electronics.
- For a hardwire installation, the red wire typically goes to a constant fuse, the yellow to a switched fuse, and the C-shaped wire is the ground.
- The fuse included with the add-a-fuse kit does not need to match the amperage rating of the selected fuse from the fuse box.
- Ensure the fuse tap is inserted correctly. The powered side of the fuse tap should match the side receiving power from the fuse box.
- If using a fuse tap, a fuse of 7.5 amps or lower is generally recommended for the top of the tap, while the original fuse from the fuse box goes to the bottom.
Additional Considerations:
- Some vehicles use a switched fuse delay system, keeping switched circuits live for up to 30 minutes after turning off the engine. Consult your owner's manual for such cases.
- Always refer to your vehicle's owner's manual to understand the function of each fuse and avoid those related to safety features.
- When in doubt, consult a professional installer or refer to online forums and resources for specific vehicle models.
How to Keep Your WiFi Camera Charged and Ready
You may want to see also

Removing the fuse box cover
Step 1: Disconnect the Battery Cable
First, locate the negative terminal connected to the battery. Disconnect this terminal to ensure no electricity is running through the system during the process. Place the negative cable in a safe place where it won't come into contact with any metallic objects.
Step 2: Locate and Open the Fuse Panel
The fuse panel is usually located under the hood, near the engine bay. Open the hood and find the fuse panel, which will have a cover that needs to be removed to access the fuses. The diagram of fuse functions is typically found inside the panel's lid.
Step 3: Disconnect the Fuse Box Power Supply
After removing the cover, locate and disconnect the power supply to the fuses. This is usually a single or set of red wires with a terminal connected to a bolt, similar to the battery connection. Unbolt these connections and set them aside, labelling them for convenience during reinstallation.
Step 4: Remove the Fuse Panel Housing
The fuse panel is held in place by retaining bolts around its perimeter. Remove these bolts, paying attention to their different lengths and locations. Keep the bolts in a safe place, such as a magnetic tray or plastic bag, so they don't get lost.
Step 5: Remove and Label Wiring Harnesses
With the housing removed, you will see various wires connected to the fuse box, each routed to different systems and sensors. Start removing these wires one by one, labelling them properly using the fuse diagram for reference. This labelling ensures a correct and straightforward reassembly.
Step 6: Confirm Replacement and Transfer Fuses
Before proceeding with the installation of your camera, confirm that the replacement fuse box is rated and designed for your vehicle. Compare the old and new fuse boxes to ensure they are an exact match. If you're reusing the old fuses, inspect them for any discoloration or breakage in the filament, as this indicates a bad fuse that needs replacement.
Uber Cars: Cameras, Privacy, and You
You may want to see also

Connecting the power cable
Step 1: Locate the Fuse Box
First, you need to find the fuse box in your car. It is usually located under the dashboard or steering wheel. You can refer to your car's user manual for detailed information on its location. The fuse box is important because it will provide a clean and reliable power source for your dash cam.
Step 2: Select a Fuse Slot
After locating the fuse box, remove its cover by gently pulling it down. Place the cover somewhere safe, like the glove box, as it won't fit back on after installing the cables. With the cover removed, you'll have clear access to the fuse box and can choose a suitable fuse to power your dash cam.
Look for a fuse that provides constant power (also known as "always hot" or "permanent feed"). This will allow your dash cam to operate in parking mode, monitoring your car even when it's turned off. Fuses for the car's security system or interior lights are often suitable choices.
Additionally, select a fuse that is only active when the ignition is on ("hot in start" or "switched feed"). This ensures that the dash cam powers up and starts recording when you start the car. Fuses for accessories like the radio or cigarette lighter are commonly used for this.
Refer to your car's manual to identify the function of each fuse. Some vehicles also provide labels or diagrams inside the fuse box cover. Alternatively, you can use a multimeter to test and identify the type of fuse.
Step 3: Remove the Existing Fuse
Using a fuse puller or a pair of pliers, gently remove the selected fuse from the fuse box. Avoid using your bare hands, as it can be difficult to pull out the fuse, and you may damage its plastic housing.
Step 4: Insert the Fuse Tap
The fuse tap will have two slots and a wire (or wires) attached to it. Insert the fuse tap into the same slot where the original fuse was removed. This step ensures that the fuse tap taps into the same circuit as the original fuse.
Place the original fuse into the slot on the fuse tap labelled 'Original' or 'Fuse'. Then, insert a new fuse with the same rating as recommended for your device into the slot marked 'Add-a-Circuit' or 'Add'. This new fuse will power your dash cam.
Step 5: Connect the Wires
If you're using an advanced hardwire kit, it will typically include a yellow wire for the permanent power supply and a red wire for the ignition power supply. Connect these wires to the corresponding fuses in the fuse box.
Additionally, find a proper grounding spot for the black wire (negative). Look for a solid metal piece around the fuse box, such as a bolt or screw. Loosen it, connect the black wire, and then tighten it with a wrench or screwdriver to complete the grounding.
Step 6: Test and Secure the Installation
Reinsert the fuse box cover and turn on your car to test if the dash cam powers up correctly. You may need to make minor adjustments or modifications to ensure a proper fit for the wires and the fuse box cover. Finally, double-check that everything is functioning as expected.
Use zip ties or cable clips to secure any excess wire and hide it neatly behind the surrounding panels or carpet. This ensures that the installation looks tidy and the wires are safely tucked away.
The Evolution of Smartphone Cameras: How Are They Made?
You may want to see also

Testing the dash cam
Make sure to get the best angle, even before you tidy up the wires, as it will help the adhesive if it doesn't need to be moved later, and help with a reference on how far the wire needs to reach. If the dash cam powers on, it means you did everything right. If it works, you can go ahead and tidy up the cables—you don’t want any cables to be dangling from the dash cam or around the fuse box.
The best way is to tuck the loose cables inside the fuse box's loose area and along the A-pillar of your car. Zip ties and electric tape are your friends, as they help keep things tight and out of the way. We recommend you not wait until after you've tucked away all your wiring to plug in and test your camera, as it will typically be easier to troubleshoot when the wires are readily accessible.
Mounting an Action Camera on Your Car: Best Techniques
You may want to see also
Frequently asked questions
It's best to place the dashcam within arm's reach of your seat, but not in a location that obstructs your view of the road ahead. The camera should be as close to the centre line of the car as possible for maximum coverage to both sides.
The fuse box is usually located under the dashboard or under the steering wheel. If you're struggling to find it, check your car's manual for the relevant information.
A "hot in start" fuse has power only when the vehicle is running. Connecting your dashcam to this type of fuse will ensure that the dashcam turns on and off automatically with the vehicle.
A permanent feed fuse provides constant power, allowing the dashcam to operate in parking mode and monitor your car even when it's turned off.
Simply follow the wiring instructions that came with your device to ensure everything is connected correctly.


