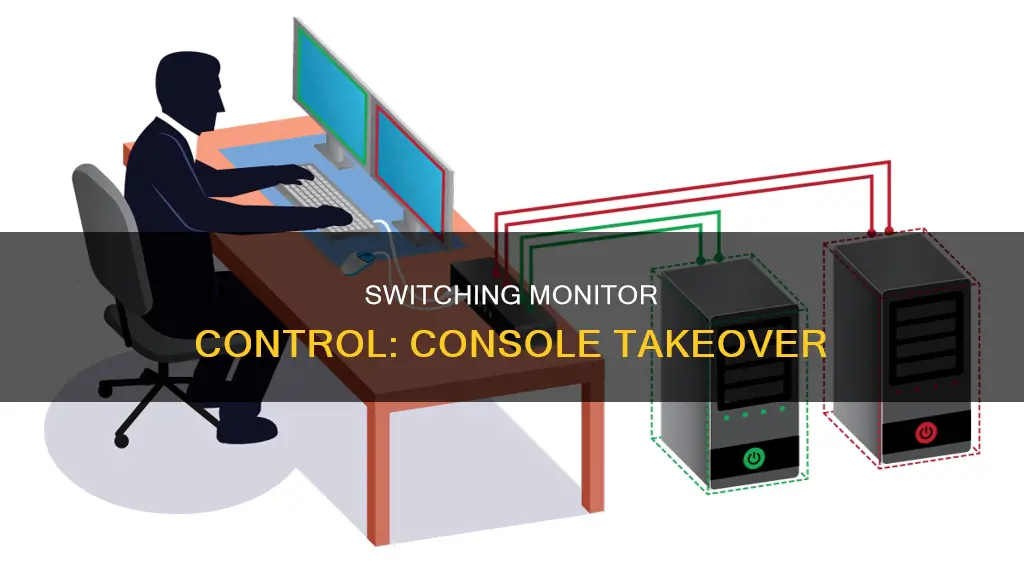
If you want to switch control of a monitor to a console, you have a few options. If you're using a desktop PC with two monitors connected, you can change the monitor numbers by editing your registry. If you're using a laptop, your laptop's built-in monitor will always be Monitor 1, and you won't be able to change this in the registry. Alternatively, you can use an HDMI switch, which is a device that takes multiple HDMI inputs and lets you choose which one to display on your monitor.
| Characteristics | Values |
|---|---|
| Number of inputs | 2-5 |
| Remote control | Wireless or manual |
| Connection ports | HDMI, DVI, VGA, RCA |
| Connection types | HDMI, component, composite, optical, RF |
| Audio | Speakers, headphones, audio converter |
What You'll Learn

Using an HDMI switch
An HDMI switch is a device that allows you to connect multiple HDMI inputs (such as a computer, gaming console, etc.) and choose which one to display on your monitor. This is especially useful if you want to switch between different devices without having to manually change HDMI cables.
- Choose the Right HDMI Switch: Consider the number of inputs you need. The most common number of inputs supported by consumer-grade HDMI switches is between 2 and 5. If you need more inputs, you may need to pay a higher price. Also, decide whether you prefer a wireless remote or manual switching for your HDMI switch. While a wireless remote offers more convenience, a manual switch may be sufficient if the switch is within arm's reach.
- Gather the Necessary Items: You will need one HDMI cable per input device, including your console, and one HDMI cable for the output monitor.
- Mount the HDMI Switch (Optional): Most HDMI switches don't come with mounting hardware, but you can use strong double-sided tape to mount it in a convenient location, such as under your desk.
- Plug in the HDMI Switch: Connect your HDMI switch to a power outlet. Not all HDMI switches require power, but higher-quality ones usually do, and they often come with remote controls and active device indicators.
- Connect Input Devices: Plug the HDMI cables from your devices, including your console, into the input ports of the HDMI switch. You can choose whichever ports you prefer and arrange them in a logical order.
- Connect the Output Monitor: Run an HDMI cable from the output port of the HDMI switch to your monitor. Depending on your setup, you may see a signal automatically. Otherwise, power on your devices to test the connection.
- Test and Troubleshoot: Cycle through the different input devices to ensure they are all functioning correctly. If you encounter any issues, check if your input devices and HDMI cables are working properly. Ensure that all cables are securely connected and try turning the switch off and on again.
By following these steps, you can easily set up an HDMI switch to connect your console to a monitor and seamlessly switch between different input devices.
Watching Antenna TV: Studio Monitor Setup Guide
You may want to see also

Connecting a console to a PC monitor
To connect a console to a PC monitor, you'll need to consider the following:
Get the Right Monitor
The first step is to ensure you have the right monitor for your console. Different consoles have different display needs. Newer consoles like the PS4 or Xbox One will provide the best image on a full High Definition (HD) 1080p monitor. Connecting these consoles to a CRT monitor will result in a blurry image. Conversely, older consoles that don't output in HD will look better on older CRT monitors due to the high refresh rate of CRT monitors.
Check Your Monitor's Connection Ports
Before connecting your console, check your monitor's connection ports. Most modern monitors support HDMI and DVI connections, while some have VGA support. Older monitors may only have VGA and DVI, or VGA-only connections. Very few monitors will have composite (RCA) support, which is used by many older consoles.
Check Your Console's Output Ports
Different consoles have different output ports for connecting to a display. Here are some common consoles and their supported connections:
- PS4, Xbox One, PS3, Xbox 360, Wii U: These consoles support HDMI connections. They also support component cables, although few monitors do.
- Wii, PS2, Xbox, GameCube, Nintendo 64, PS1, Super Nintendo, Genesis: These consoles support composite cables. The Wii, PS2, and Xbox also support component and S-Video connections, but monitors with these connections are rare.
Get Speakers or Headphones
Most monitors don't have built-in speakers, so you'll need speakers or headphones to hear the audio from your console. You may also need an audio converter to connect your console's audio cable to your speakers or headphones. If you're connecting via HDMI, you'll need a separate audio cable since HDMI cannot connect directly to speakers.
Obtain a Video Converter Box for Non-HDMI Consoles
If you're connecting an older console to a new monitor, you'll need a video converter box to convert the signal to HDMI or DVI. Many converter boxes also support audio connections.
Obtain the Correct Cable
Most consoles only come with one video cable, so you may need to purchase an additional cable for the easiest and best-quality connection to your monitor. HDMI cables work with all devices that support HDMI. For older connection types, you'll need a cable specific to your console.
Connect the Console to the Monitor
If you're using HDMI, simply connect an HDMI cable to both the console and the monitor. If you're using an older console with a converter box, connect your console's video cable to the converter box, ensuring the plugs match and are in the INPUT group. Then, connect the converter box to your monitor using an HDMI, DVI, or VGA cable.
Select the Correct Input
Finally, select the correct input on your monitor to see your console's display. If you only have one input, your console should appear as long as the monitor and console are turned on.
Tracking Techniques: Monitor Size Surveillance
You may want to see also

Using a monitor controller
Monitor controllers are a great way to improve your workflow and give you more control over your audio setup. They are perfect for anyone looking to expand their monitoring ability and gain more control over their monitoring path.
A monitor controller allows you to easily switch between multiple sets of speakers, such as near-field and far-field monitors, and even a subwoofer. This is especially useful if you want to reference your mixes through different sets of speakers to get the best-sounding mix possible. Without a monitor controller, you would have to manually reconfigure your output connections, which can be time-consuming and inconvenient.
Monitor controllers also allow you to control what you hear. You can independently engage or disengage a subwoofer and control which frequencies are sent to the subs and the mains. Additionally, they enable you to switch between mono and stereo output with the push of a button, which is useful for testing how your tracks will translate to different systems.
Some monitor controllers also include a talkback mic, which is useful for communicating with artists in the live room without having to shout or use hand signals. They may also feature additional inputs, allowing you to connect and monitor external playback devices such as a CD player, tape machine, or your phone.
When choosing a monitor controller, consider the number of inputs and outputs you need, as well as any additional features that may be useful for your specific setup.
Choosing the Right Desktop Monitor: Understanding Size and Dimensions
You may want to see also

Changing your primary monitor
Step 1: Identify Your Monitors
If you have multiple monitors connected to your computer, you need to identify which one you want to set as the primary display. Let's assume you have two monitors: Monitor 1 (current primary) and Monitor 2 (which you want to set as the new primary).
Step 2: Access Display Settings
Right-click on your desktop and select "Display Settings" or "Screen Resolution" from the context menu. This will open the display settings for your system.
Step 3: Select the Desired Monitor
In the display settings window, you will see your available monitors represented as numbered boxes. Click on the numbered box corresponding to the monitor you want to set as the primary display (in this case, Monitor 2).
Step 4: Set as Main Display
Scroll down to the bottom of the display settings window and look for an option like "Make this my main display" or "Set as primary display." Check this box or select this option to designate Monitor 2 as your primary monitor.
Step 5: Confirm and Adjust Settings
Once you've selected the new primary monitor, confirm your choice by clicking "Keep Changes", "Apply", or "OK." Depending on your operating system, you may need to log off and log back in for the changes to take effect.
Step 6: Adjust Display Style (Optional)
If you want to adjust how your displays work together, you can do so in the display settings. For example, you can choose to "Duplicate these displays" to mirror the content on both monitors, or "Extend these displays" to expand your desktop across both screens.
By following these steps, you can easily change your primary monitor and customize your display settings to suit your preferences.
Monitor Stoves: Where to Buy Them
You may want to see also

Editing the registry to switch monitors
Editing the registry is a way to switch the numbers of Monitor 1 and Monitor 2 on a Windows PC. This method will not work to make a laptop screen Monitor 2 and a secondary monitor Monitor 1. The built-in monitor on your laptop will always be Monitor 1.
Step 1: Disconnect all monitors except the primary monitor
To begin, disconnect all monitors except the one that is currently set as the primary monitor. This monitor must remain connected to your PC's primary video port.
Step 2: Open the Registry Editor
Open the Registry Editor by typing "regedit" into the Windows search bar and selecting the Registry Editor from the search results.
Step 3: Navigate to the GraphicsDrivers folder
In the Registry Editor, navigate to the following path: HKEY_LOCAL_MACHINE\System\CurrentControlSet\Control\GraphicsDrivers. You can copy and paste this address into the address bar at the top of the Registry Editor and press Enter.
Step 4: Rename the "Configuration" and "Connectivity" keys
In the GraphicsDrivers folder, locate the "Configuration" and "Connectivity" keys. Right-click on each key and select "Rename." Rename them to "Configuration.old" and "Connectivity.old," respectively. This will allow you to restore these keys if anything goes wrong during the process.
Step 5: Shut down your PC
After making the above changes, shut down your PC completely. Do not restart it, as you want to ensure that all changes take effect.
Step 6: Connect only the monitor you want to set as Monitor 1
Power off the monitor you want to set as Monitor 1, and connect it to the primary video port on your PC. If you have a multiple-port video card, plug it into the first port. If you have a built-in monitor port on your motherboard, that is usually the primary port.
Step 7: Power on your PC and open Display Settings
Turn on your PC and the monitor, and right-click on the desktop. Select "Display Settings" from the menu.
Step 8: Plug in the second monitor
With your primary monitor connected and displaying the Display Settings window, plug in the second monitor. Windows will automatically detect the monitor and install any necessary drivers.
Step 9: Verify the monitor numbers
In the Display Settings window, you should now see two monitors listed under "Multiple displays." The monitor labeled "Monitor 1" is the one connected to the primary port, and the other is "Monitor 2." If you connected the monitors in the desired order, you have successfully edited the registry to switch the monitor numbers.
It is important to note that editing the registry can be risky, and it is recommended to create a system restore point before making any changes. Additionally, always back up your data and important files before attempting any significant changes to your system.
Latest ASUS Monitors: Top Picks for 2023
You may want to see also


