Live streaming from a surveillance camera can be a useful tool for many applications, from security to broadcasting live events. The process of setting up a live stream has been simplified by the advent of widely popular platforms like YouTube and Facebook, which support direct video streams. These platforms offer cost-free streaming services to an audience of any size without the need for complex infrastructure or IT expertise.
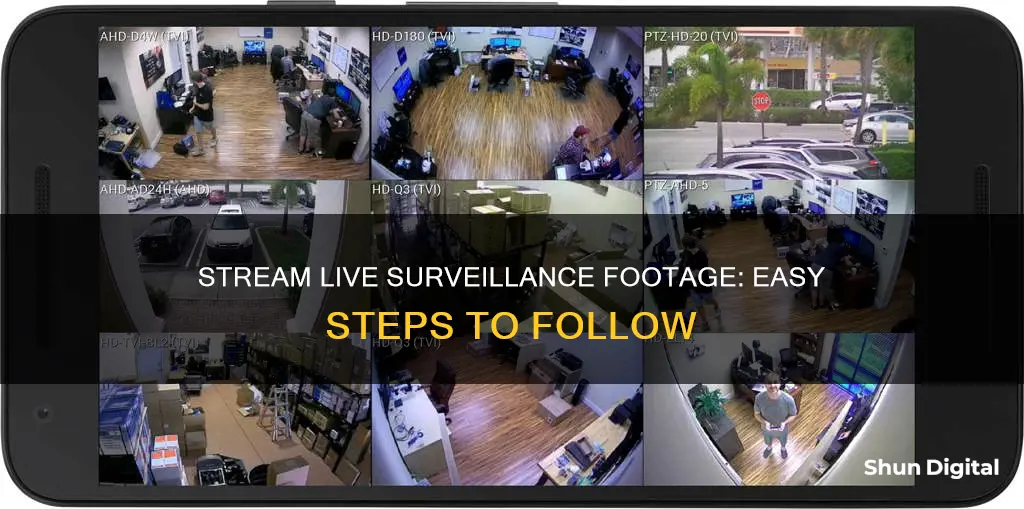
There are a few simple ways to watch live security camera feeds right on your phone, tablet, or computer. Most security camera vendors offer PC client software and mobile apps that you can use to access security camera live video feeds. Additionally, you can also live stream via a web browser or without an internet connection.
If you want to live stream on platforms like YouTube or Facebook, you will need a verified account and a computer with software like Open Broadcaster Software (OBS) to capture and transmit the video stream.
| Characteristics | Values |
|---|---|
| Number of cameras | Up to 16 |
| Camera type | IP camera, CCTV camera, 4G LTE camera, AHD camera, HD-TVI camera, HD-CVI camera |
| Camera features | PTZ (pan, tilt, zoom), infrared night vision, audio, high resolution |
| Camera system | NVR, DVR, multiplexer |
| Internet connection | Broadband, 3G/4G, high-speed |
| Computer/laptop | Windows, Mac, Linux |
| Computer/laptop specifications | Intel Core i5 or i7 processor, 4GB RAM, Visual C++ 2017 Redistributable |
| Software | PC client software, mobile app, web browser, Open Broadcaster Software (OBS), Streamlabs, CamStreamer suite, CamSwitcher App, CamOverlay App, CamScripter App |
| Streaming platform | YouTube, Facebook, Vimeo, Twitch, Zoom |
| Streaming frequency | Live, recorded |
| Streaming purpose | Surveillance, promotion, marketing, remote viewing, online events |
What You'll Learn
![]()
Live streaming from surveillance cameras to YouTube
Streaming from surveillance cameras to YouTube is a great way to broadcast events in real-time. This could include anything from animal cams at a zoo to live events such as sports or a First Robotics Competition.
What You Need to Live Stream from a Surveillance Camera to YouTube
- A surveillance camera with live streaming capabilities
- A computer (Windows, Mac, or Linux)
- A stable internet connection with a minimum upload speed of 3-5 Mbps
- A verified YouTube account
- Streaming software such as Open Broadcasting Software (OBS) or Streamlabs
Step-by-Step Guide to Live Streaming from a Surveillance Camera to YouTube
Step 1: Set Up Your Surveillance Camera
Ensure your surveillance camera is connected to a stable network and configured to work on your local network. This will allow your computer to access the video stream.
Step 2: Find Your Camera's Stream URL
Locate your camera's stream URL, which can usually be found in your camera settings under streaming/video/h.264/RTSP sections. If you are unable to locate it, search for your camera model and 'RTSP' or 'video stream' online.
Step 3: Set Up YouTube Live Streaming
Go to YouTube's Creator Studio by clicking on your profile icon in the upper right corner. Then, navigate to Streaming -> Stream Now in the left navigation bar. Here, you will find the Server URL and Stream Key, which you will need for the next step.
Step 4: Set Up Streaming Software and Start Streaming
Download and install streaming software such as OBS. In OBS, add a new source and paste your camera's stream URL. Then, paste the YouTube Stream target URL from Step 3 into the output. Ensure H.264 encoding is selected. Save the settings and start streaming.
Step 5: Monitor Your Live Stream
Check your YouTube channel to ensure your live stream is active and functioning properly. You may need to wait a few minutes for the stream to initialize.
Tips for Improving Your Live Streaming Experience
- Choose a camera with a high resolution and sharp night vision for the best image quality.
- Ensure your internet upload speed meets the recommended minimum of 3-5 Mbps to avoid poor image quality and jittery videos.
- Record on-site while live streaming to save the footage for future reference or in case of any issues with the live stream.
- Protect your privacy by not sharing your stream key and limiting access to your live stream through privacy settings.
Charging Camera Battery Packs: A Step-by-Step Guide
You may want to see also
![]()
Live streaming from surveillance cameras to Facebook
Streaming live from a surveillance camera to Facebook is a simple and effective way to broadcast moments and events to your Facebook audience. Facebook Live is the second most popular live streaming platform in the US and can be used to build authentic relationships with your followers.
Step 1: Get the Camera Stream URL
The video stream URL is usually found in your camera settings in the streaming/video/h.264/RTSP sections. If you can't find it there, a quick Google search of your camera model/vendor and 'RTSP' or 'video stream' should help.
Step 2: Set Up Your Facebook Page
Add a post of type 'Live Video' to your Facebook page. Select 'Connect' instead of the internal webcam, then press 'Schedule' in the lower right. After the new post appears in your timeline, click the 'Broadcaster Only: Edit Your Details' link to go to the stream settings. Activate 'Continuous Live Video' in Advanced, and then head to the Stream Key menu.
Step 3: Set Up Webcam.io
Create a webcam entry in webcam.io of type 'Live Stream'. Fill in the URL from Step 1 into the Input section. Facebook requires an H.264-encoded video stream for input. Depending on your camera stream, you might need to activate the Transcode options. For H.264 transcoding, this can stay turned off (default). Then enter the Stream Key URL in the Output section as Server URL + Stream Key (from the Facebook Stream Key page).
Step 4: Start Streaming
By saving the webcam entry (webcam.io), streaming will start within 30-60 seconds. Then, head back to Facebook. After a few minutes, the live stream video feed will be visible in the still-open settings (Basic menu).
Tips:
- To embed the livestream later, click on the small wheel in the upper right of the Facebook settings and copy the iframe code from the embed menu to a text file. This cannot be accessed after the stream has gone live.
- If there are multiple restarting entries in the webcam.io dashboard for your camera, it is likely that Facebook ended the live stream and webcam.io cannot stream to the output URL anymore. Create a new Live video post and update the output URL (key part) in webcam.io.
- If you click 'Edit Post' on Facebook, do not press 'Finish' as this will stop your stream.
Alternative Methods:
If you are using a DSLR camera, you will need to connect it to a signal converter using an HDMI or SDI cord. Confirm that the signal is being passed from your DSLR to your PC, then open your live streaming software. Open the Facebook application and look for the Stream Key and Server URL, which need to be added to the live streaming software. Confirm the actions and start live streaming.
You can also use third-party applications such as OBS, XSplit, and Wirecast to live stream to Facebook.
Forester Rear Camera Diagnostics: How to Access?
You may want to see also
![]()
Live streaming from surveillance cameras to Vimeo
Streaming live from a surveillance camera to Vimeo is a straightforward process. Firstly, you will need to ensure you have the correct equipment. This includes a camera, microphone, and a Vimeo Advanced or Vimeo Enterprise membership.
Vimeo offers a range of plans, with the Advanced and Enterprise options providing access to live streaming tools for videos and events. Vimeo's browser-based production studio allows you to go live from your browser, with the option to bring your own RTMP encoder or use their advanced tools for sound mixing, multi-camera inputs, colour correction, and more.
If you are using a surveillance camera, you may need to connect it to your computer or laptop via an Ethernet cable or another wired connection. You can then select this camera as your video source when setting up your live stream on Vimeo.
To begin live streaming on Vimeo, simply create a live event by entering a title, start date and time, and privacy settings. You can then choose your camera and audio source, ensuring your setup includes a clean and interesting background, good lighting, and minimal background noise.
Vimeo also offers a range of engagement tools to create interactive experiences for your audience, such as personalised GIFs, polls, and Q&As. With Vimeo, you can also simulcast your live stream to social media platforms like YouTube, Facebook, Instagram, and more, helping you reach a wider audience.
Dillard's Surveillance: Are Shoppers Being Watched?
You may want to see also
![]()
Live streaming from surveillance cameras to Twitch
This guide will take you through the process of live streaming from surveillance cameras to Twitch, covering the equipment you'll need, account and software setup, and the steps to start streaming.
Equipment
To live stream from a surveillance camera to Twitch, you will need the following equipment:
- A surveillance camera with built-in streaming capabilities or a separate streaming device (e.g., a computer or encoder).
- A reliable internet connection with a fast upload speed (a static external IP address is preferred).
- A Twitch account.
- A PoE injector or PoE switch to power your camera and connect it to your network.
- Ethernet cables to connect the camera to the PoE injector and your router.
- Optionally, a Windows PC for setup and to access the camera's web interface.
Account and Software Setup
Before you begin, ensure you have signed up for a Twitch account and enabled two-factor authentication.
If your camera does not have built-in streaming capabilities, you will need to install streaming software on your computer. Some popular options include:
- OBS Studio: A free, open-source streaming software with cross-platform compatibility but has a learning curve.
- Streamlabs: Offers features for monetization and is more user-friendly than OBS, but only available on Windows.
- Restream Studio: A free, browser-based solution with features like multi-platform streaming and picture-in-picture.
Streaming Steps
Step 1: Camera Setup and Connection
First, perform a "bench test" by powering up your camera and connecting it to your network in a controlled environment. This will help you familiarize yourself with the camera's features and ensure it connects successfully to your Twitch account.
For PoE cameras, use an Ethernet cable to connect the camera to the "Power/Data" or "P/D" port on the PoE injector. Then, connect the injector to your router or modem using another Ethernet cable.
Step 2: Accessing the Camera
Open a web browser and enter the camera's IP address in the address bar. Log in to the camera using the provided username and password.
Step 3: Twitch Stream Setup
Access the Creator Dashboard on Twitch and click on the "Stream Manager" option. Here, you can customize your stream's title, notification, category, tags, and language.
Next, create your Stream URL by going to Settings and selecting "Stream." Copy your stream key and paste it into a text editor.
Step 4: Select Ingest Server
Choose the 'ingest' server closest to your location to minimize delay. You can find the recommended server by visiting https://help.twitch.tv/s/twitch-ingest-recommendation.
Step 5: Start Streaming
Go back to your camera's web interface and navigate to the "Settings." From the left-hand menu, enter the "Network" submenu and click on "Access Platform."
Select the RTMP tab, enable the checkbox, and choose "Custom" for the Address Type. Paste the Stream URL you created earlier into the "Custom Address" text box and click "Save."
Your stream should now start broadcasting to Twitch!
By following these steps, you can successfully live stream from your surveillance camera to Twitch, allowing you to share your unique perspective with the world. Remember to promote your stream and engage with your viewers to build a following. Happy streaming!
Bus Camera Tickets: How Many Were Issued?
You may want to see also
![]()
Live streaming from surveillance cameras to a website
To set up a live stream from a surveillance camera to a website, you will need a few key components:
- A surveillance camera: This can be an IP camera or a CCTV camera. Consider the resolution, lens, and infrared distance needed for your specific use case.
- A computer or streaming device: You will need a device to run the streaming software and encode the video stream. Ensure your computer has a good processor and at least 4GB of RAM to handle the streaming.
- Internet connection: A stable and fast internet connection is crucial. For streaming at 1080p resolution, an upload speed of 3-5 Mbps is recommended.
- Streaming software: You can use free and open-source software like Open Broadcaster Software (OBS) to capture and stream your camera's video feed.
- A streaming platform: Choose an online video platform (OVP) that suits your needs. Some popular options include YouTube Live, Facebook Live, uStream, and Livestream.
- A website: You will need a website where you can embed the live stream. This can be your own website or a platform like YouTube or Facebook that allows live streaming.
- Set up your camera: Ensure your surveillance camera is configured to work on your network and has a stable internet connection.
- Choose a streaming platform: Select an OVP that suits your requirements, such as YouTube Live or Facebook Live. Sign up for an account and enable live streaming if necessary.
- Install streaming software: Download and install streaming software like OBS on your computer. This software will allow you to capture and encode your camera's video feed.
- Configure the streaming software: Set up OBS to capture your camera's video stream by creating a URL or link to your camera. This will involve using your camera's IP address and login credentials.
- Obtain streaming credentials: From your chosen streaming platform, obtain the necessary credentials, such as a stream key, to connect your streaming software to your account.
- Connect the streaming software to the platform: In OBS, enter the stream key and select the streaming platform you are using.
- Embed the live stream on your website: Use the embed code provided by your streaming platform to embed the live stream on your website. This will typically involve pasting the embed code into the HTML of your website.
- Promote your live stream: Share the link to your live stream on social media platforms, schedule your streams, and create engaging thumbnails to attract viewers.
- Test your setup: Before going live, conduct a test run to ensure that your camera, internet connection, and streaming software are all functioning correctly.
By following these steps, you should be able to successfully live stream from your surveillance camera to a website, allowing your audience to view your live feed.
Understanding ZSL Camera Mode: How It Works and Benefits
You may want to see also