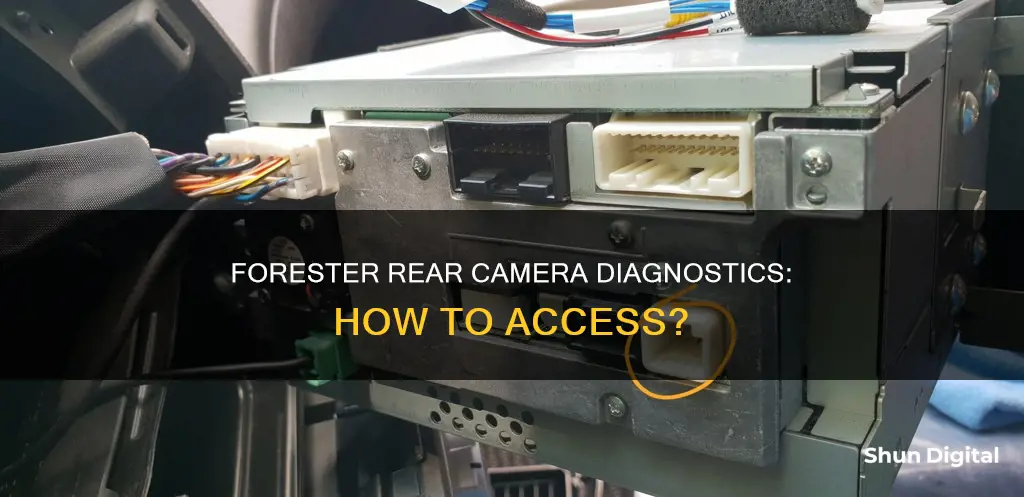
The rear-view camera on the Subaru Forester can be adjusted by accessing the Diagnostic Mode. This can be done by holding down the INFO button and pressing the Audio button twice. This will allow users to adjust the camera and view it while driving. There is also a Dealer Diag mode, where the guide lines can be turned off. Further, holding down the Audio button and pressing the HOME button five times will allow users to access the Service screen and turn off the reverse warning.
| Characteristics | Values |
|---|---|
| Diagnostic mode | Holding down the INFO button and pressing Audio twice |
| Adjusting reverse park guide lines | Holding down the Volume knob and touching the screen corners in order 1, 2, 3, 4 |
| Turning off the guide lines | Dealer Diag |
| Turning off the reverse warning | Holding down the Audio button and pressing HOME five times |
| Adjusting the camera | Pressing and holding the INFO button and then pressing the Audio Tune button |
What You'll Learn
![]()
Accessing the diagnostic mode
To access the diagnostic mode for a Subaru Forester rear camera, you will need to perform the following steps:
- Ensure that the ignition is on.
- Depending on your model, either hold down the Volume knob or the INFO button.
- If holding the Volume knob, touch the screen corners in order (1, 2, 3, 4).
- If holding the INFO button, press Audio twice.
- From the menu, select Camera Setting to adjust.
- You can also access the Dealer Diag menu by holding down the Audio button and pressing HOME five times.
It is important to note that the steps may vary depending on the version and model year of your Subaru Forester. The methods described above have been reported to work for model years 2014, 2015, 2016, and 2017.
Additionally, there is a modification that can be made to the rear camera to enable an on-demand rear-camera image. This modification involves splicing wires and adding a switch to trick the head unit into thinking the car is in reverse, allowing the rear camera image to be displayed at any time. This modification is not specific to accessing the diagnostic mode but provides an additional option for utilizing the rear camera.
The Cost of Capturing Moments: Camera Charging Explained
You may want to see also
![]()
Adjusting reverse park guide lines
Adjusting the reverse park guide lines on a Subaru Forester can be done by accessing the diagnostic mode. This can be achieved by following these steps:
- Turn the ignition ON.
- Hold down the Volume knob.
- Touch the screen corners in order: 1, 2, 3, 4.
- Alternatively, hold the INFO button and press Audio twice.
- Select Camera Setting to adjust the guide lines.
It is also possible to turn off the guide lines by accessing the Dealer Diag menu. Additionally, holding down the Audio button and pressing HOME five times will bring up the Service screen, where the reverse warning can be disabled.
For the 2018 Outback Limited with the 8" StarLink Nav screen, the procedure for adjusting the "target lines" is not the same as for the 2017 model. This may require taking the car to a dealer to resolve the issue.
It is worth noting that the rear view camera image is horizontally reversed, similar to a side view or rearview mirror. This is not a malfunction. Additionally, the image may be difficult to see in low light conditions, extreme temperatures, or if the lens is obstructed by dirt, raindrops, snow, etc.
Keep Your Camera Charged: Tips to Conserve Battery Power
You may want to see also
![]()
Turning off the reverse warning
To turn off the reverse warning on a Subaru Forester, you can try the following:
- Press and hold the RAB button on the bottom left corner of the display when in reverse.
- Toggle off the parking sensors/rear cross traffic alert by pressing the P button on the lower right of the display.
- Wipe off the rear sensors and camera lens if they are coated with road/snow/sleet grime.
- Back into your driveway so you don't have to reverse out.
- Toggle off the blind spot monitoring and cross-track angle warning to the left of the steering wheel.
Please note that these instructions may vary depending on the model year of your Subaru Forester. It is always recommended to refer to the owner's manual or consult a certified mechanic for specific instructions pertaining to your vehicle.
RAW Photography: What You See Is Not What You Get
You may want to see also
![]()
Fault codes and their meaning
The Subaru Forester has a range of fault codes that can be triggered by the On-Board Diagnostic (OBD) system. These codes can be used to identify issues with the vehicle and suggest potential fixes. Here are some of the most common fault codes for the Subaru Forester, along with their possible causes and solutions:
- P0420: This code indicates a problem with the catalytic converter, often related to oxygen sensors or exhaust leaks upstream of the converter.
- P0700: This code is related to the transmission control system and may require a higher-quality code scanner to pinpoint the exact issue. It could be triggered by something as simple as changing the automatic transmission fluid.
- P0028: This code is logged when there is a problem with the intake valve control solenoid for the second bank of the engine. A common cause is dirty or old engine oil, and adding engine cleaners can help resolve the issue.
- P0130: This code indicates a front oxygen sensor circuit malfunction (open circuit).
- P0136: This code indicates a rear oxygen sensor circuit malfunction.
- P0500: This code suggests a vehicle speed sensor malfunction.
- P1101, P1121, and P1540: These codes are related to vehicle speed sensor malfunctions.
- Catalyst System Efficiency Below Threshold (Bank 1): This fault code suggests that the catalytic converter is not performing efficiently. Possible causes include issues with oxygen sensors or leaks in the exhaust system.
- Transmission Control System Malfunction: This code indicates a problem with the transmission control system, which may require further diagnostics to identify the specific issue.
- Intake Valve Control Solenoid Circuit Range/Performance (Bank 2): This code is triggered when the intake valve control solenoid for the second bank of the engine is not functioning correctly. Potential causes include old or contaminated engine oil.
- Cylinder Misfire Detected: These codes (e.g., P0301, P0302, P0303) indicate that one or more cylinders are misfiring, which could be due to faulty spark plugs, ignition coils, or fuel injectors.
- System Too Lean or Rich (Bank 1 or 2): These codes suggest that the air-fuel mixture is too lean or too rich, which can be caused by various issues such as vacuum leaks, faulty sensors, or a malfunctioning fuel injector.
- Knock Sensor Circuit High or Low Input (Bank 2 or Single Sensor): These codes indicate an issue with the knock sensor circuit, which could be due to a faulty sensor, wiring problem, or other engine issues.
- Idle Control System RPM Lower Than Expected: This code suggests that the idle speed of the engine is lower than expected, which may be caused by a faulty idle air control valve or other engine issues.
- System Voltage Malfunction: This code indicates a problem with the vehicle's electrical system, such as a failing battery or alternator.
- Mass or Volume Air Flow Circuit Low Voltage Input: This code suggests a problem with the mass air flow sensor or its circuit, which could be caused by a faulty sensor, dirty air filter, or vacuum leaks.
- Camshaft Position Sensor Circuit Malfunction: This code indicates an issue with the camshaft position sensor or its circuit, which may require replacement or repair.
- Evaporative Emission Control System Leak Detected: These codes (e.g., P0440, P0442) suggest a leak in the evaporative emission control system, which could be due to a loose fuel cap, damaged carbon canister, or other issues.
- Random/Multiple Cylinder Misfire Detected: This code indicates that multiple cylinders are misfiring, suggesting more serious engine problems such as low compression, leaking head gaskets, or valve issues.
- O2 Sensor Circuit Malfunction (Bank 1 or 2): These codes suggest a problem with the oxygen sensors in the exhaust system, which may require replacement.
- Cooling Fan Rationality Check Malfunction: This code indicates that the cooling fan is not functioning correctly, possibly due to a faulty fan motor, temperature sensor, or relay.
- Heated Oxygen Sensor (HO2S) Heater Circuit Malfunction (Bank 1): These codes suggest an issue with the heated oxygen sensors, which may need to be replaced.
These fault codes can be retrieved using an OBD-II scanner, and the specific fixes may vary depending on the model year and other factors. It is recommended to refer to a certified Subaru technician for accurate diagnostics and repairs.
Syncing Camera Raw: A Step-by-Step Guide
You may want to see also
![]()
Activating the rear camera image
For the 2016 Subaru Forester, one method involves accessing the diagnostic mode. This can be done by performing the following steps:
- Turn the ignition ON.
- Hold down the Volume knob.
- Touch the screen corners in order from 1 to 4.
- Alternatively, hold the INFO button and press Audio twice, then select Camera Setting to adjust.
Another method for the 2016 model, as detailed by a Subaru Forester owner, involves a more technical process:
- Access the wiring for the rear camera and headunit through the tech manual.
- Identify the correct signals to back trace.
- Cut the +12V reverse signal wire after it exits connector i230.
- Splice in a switch to toggle to +12V Accessory, tricking the head-unit into thinking the car is in reverse.
- Remove the trim covering the fuse panel to access connectors i5 and i230.
- Confirm the identity of the connectors by checking the pin colours.
- Remove the connectors and add a second wire to Pin 17 (Yellow with Red) of connector i5.
- Re-insert the wire into the housing.
- Remove Pin 6 (Brown with Yellow) from connector i230 and cut the wire a few inches down.
- Solder new wires to each end and apply heat-shrink to the connections.
- Reassemble the connector.
- Remove the panel with the dimmer switch and drill a hole for the new switch.
- Install the switch and test the camera image.
For the 2019 Subaru Forester, a user on the Subaru Forester Owners Forum suggested the following:
- Hold the physical 'Home' button.
- Press the Tune button a varying number of times to access the Dealer menu (6 quick presses) or the Factory menu (2 presses).
Please note that activating the rear camera image while not in reverse may void your warranty and is done at your own risk. It is recommended to adjust your rear-view and side mirrors for optimal visibility.
Charging Your Nikon: A Quick Guide to Powering Up Your Camera 3700
You may want to see also
Frequently asked questions
Depending on the version of the model, you can either:
- Turn on the ignition, hold down the Volume knob, and touch the screen corners in order (1, 2, 3, 4).
- Hold the INFO button and press Audio twice.
- Hold the Audio button and press HOME five times.
The diagnostic mode can be used to test various components of the car, such as the AC compressor. It can also be used to pull codes from the ECU and clear error codes.
Yes, you can adjust the guidelines in the Dealer Diag menu.
Yes, you can turn off the reverse warning in the Service screen, which can be accessed by holding down the Audio button and pressing HOME five times.
Yes, it is possible to do so by accessing the system service menu (camera adjustment). However, this may void your warranty as it is a safety feature.