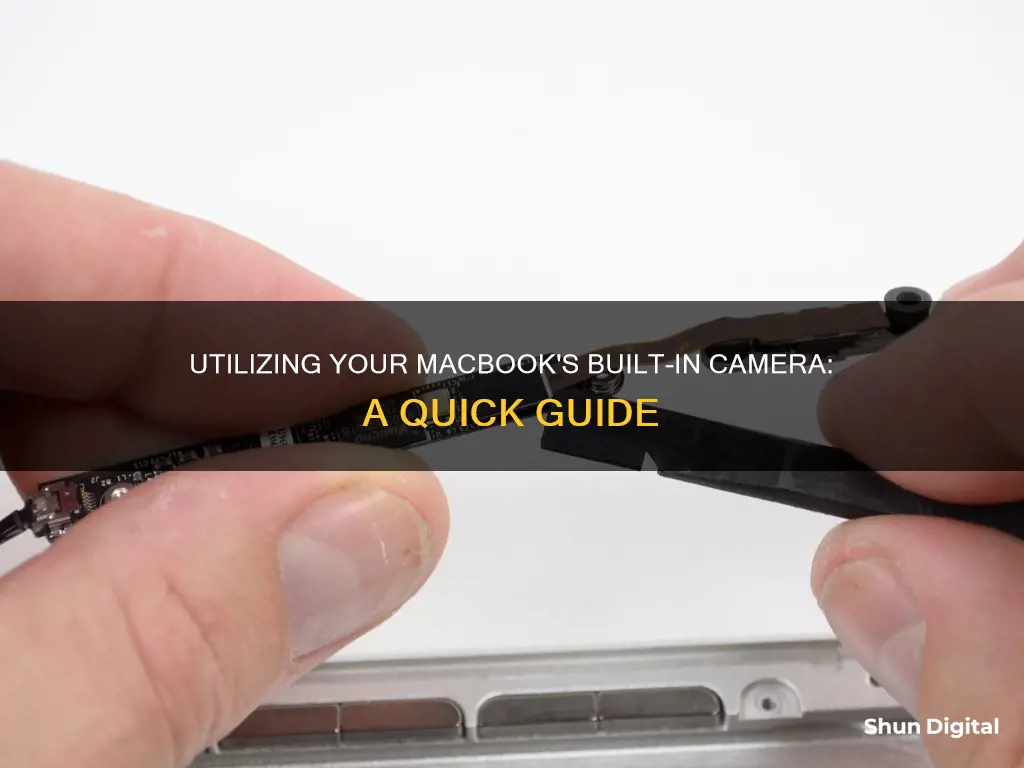
If you want to use your MacBook's built-in camera, you can do so by opening an app that uses it, such as Photo Booth or FaceTime. The camera will automatically turn on when you open the app, and a small green light will appear next to it, indicating that the camera is active. You can also use third-party apps like Oversight to notify you when the camera is being used by another app. It's important to note that you cannot manually turn on the camera without opening an app that uses it.
| Characteristics | Values |
|---|---|
| Camera location | At the top of the display |
| Camera name | iSight camera, FaceTime camera |
| Camera light | A small LED green light next to the camera |
| Camera activation | Open an app that uses the camera |
| Camera troubleshooting | Try a different app, check system preferences, restart the computer |
| Camera quality | 720p for MacBook Air and 13" MacBook Pro, 1080p for 14" and 16" MacBook Pro |
| Camera settings | No built-in apps to adjust settings, use third-party apps |
| Camera privacy | Go to Apple menu > System Preferences > Security & Privacy > Privacy > Camera |
What You'll Learn

Locating the camera and green light indicator
The built-in camera on a MacBook is located near the top edge of the screen. It is designed with privacy in mind, so you will find a small camera indicator light, which glows green when the camera is active. This light is usually located to the right of the camera.
The camera and indicator light are designed to work together, so the camera cannot be activated without the light also turning on. This is how you can tell if your camera is on. The light doesn't necessarily mean the camera is recording, but it is active and ready to be used. When you close or quit all apps that use the camera, the light will turn off.
The camera and indicator light are tiny, so you may have to lean in a bit to see them. The camera is also known as an iSight camera, and it can be activated by opening an app that uses the camera, like Photo Booth or FaceTime.
If you are concerned about your privacy, you can control which apps have access to the camera in your System Preferences. You can also use third-party apps, like Oversight, to notify you when the camera is active and which applications are using it.
The Camera on Your TV: Should You Be Concerned?
You may want to see also

Opening the camera
To open the camera, all you need to do is open an app that uses the camera. Apple has pre-installed your MacBook with the Photo Booth app, but you can also test the camera using FaceTime, QuickTime, or third-party apps that use a camera.
Here's how to open the camera using Photo Booth:
- Open the Finder app, then click Applications.
- Double-click Photo Booth.
- Wait for a few seconds for the tiny green light to turn on, indicating the camera is active.
Alternatively, you can launch Spotlight Search (press Command + Spacebar) and type Photo Booth to open the app and the camera on your MacBook.
The process of turning on your MacBook camera is the same when you use FaceTime or any other third-party apps that use a camera.
In addition, you can also use QuickTime Player to open your MacBook's camera. However, because it's not a photo-taking or video conferencing app, you'll need to click File > New Movie Recording to enable the camera.
Finally, in Safari, you can also access your MacBook Air or MacBook Pro camera and allow websites to use it. However, this will allow these websites to collect information from you, so be sure to check their privacy policies first. To access the camera on Safari, simply click Safari > Settings > Websites > Camera.
Stream Cove Camera Footage Directly to Your PC
You may want to see also

Taking a photo
To take a photo on your MacBook, you'll need to use the Photo Booth app. Photo Booth is a built-in app on MacBooks that lets you take photos and record videos with the built-in FaceTime camera, previously known as the iSight camera.
Here's how to take a photo using Photo Booth:
- Open the Photo Booth app. You can find it in the Applications folder within Finder, in Launchpad, or by using Spotlight Search (simply type in "Photo Booth").
- Once you've opened the app, you'll see a green light turn on next to your webcam, and a window will pop up showing you the camera's view.
- To take a photo, click on the red camera icon at the bottom of the screen. You can also take a sequence of four photos by clicking the "Four Pictures" button.
- If you want to add special effects to your photo, click the "Effects" button at the bottom right of the screen and select an effect.
- To save your photo, right-click or double-click on the photo icon at the bottom of the screen and select "Export". Name your photo and choose where you want to save it.
Remember, the quality of photos taken with your MacBook's webcam may not be as high as those taken with a phone, as the webcam is primarily designed for video calls rather than photography.
Smart TV Features: Microphone and Camera Privacy Concerns
You may want to see also

Troubleshooting the camera
If you're having issues with your MacBook's built-in camera, there are several troubleshooting steps you can try. Here are some detailed instructions to help you fix the problem:
- Check your webcam permissions: Go to the Apple menu > System Preferences > Security & Privacy > Privacy. Make sure the app you want to use the camera with has a checkmark next to it in the "Camera" section.
- Restart your Mac or reset the SMC (System Management Controller): If you have a Mac with Apple silicon, a simple restart might fix the issue. For Intel-based Macs, try resetting the SMC.
- Check your Screen Time settings: If you're using macOS Catalina or later with Screen Time enabled, ensure that your camera is turned on and apps using the camera have time available. Go to Apple menu > System Settings > Screen Time > Content & Privacy > App Restrictions (or Apps) > Camera.
- Update your software: Make sure your macOS and the apps you're using are up to date. This can sometimes fix compatibility issues with the camera.
- Check the camera indicator light: If the camera indicator light is flashing green on your MacBook, contact Apple support as this could indicate a hardware issue.
- Try using the camera in Safe Mode: Boot your MacBook into Safe Mode by holding down the shift key during startup. Try using the camera in Safe Mode to see if the issue persists.
- Reinstall the macOS: If the above steps don't work, you may need to reinstall the macOS. This will replace any corrupt or missing system files that could be causing the issue. Be sure to back up your data before reinstalling.
- Check for apps using the camera simultaneously: Only one app can use the camera at a time. Quit all other apps that might be accessing the camera, such as Skype, FaceTime, or Photo Booth.
- Use Terminal to quit camera processes: Open Terminal (Finder > Applications > Utilities > Terminal) and type in the following commands: "sudo killall VDCAssistant" and "sudo killall AppleCameraAssistant". These commands will force quit any processes using the camera.
- Improve your Wi-Fi connection: Ensure that you have a strong and stable Wi-Fi connection, especially if you're using video calling apps that require a lot of bandwidth. Move closer to your router and minimise any obstructions between your device and the router.
- Contact Apple Support: If none of the above steps work, you may need to contact Apple Support for further assistance. They can help you diagnose and resolve the issue, or guide you through the next steps.
Uncover Hidden Spy Cameras: Tips to Spot Them
You may want to see also

Adjusting camera settings
However, there are still some ways to improve your camera quality and adjust settings. Here are some methods you can try:
Check Your Camera Quality
Before joining a video call, you can quickly preview your camera by using the Hand Mirror app. This app shows your camera in a pop-over window, allowing you to see how you look before joining a call.
Use Third-Party Apps
Third-party apps like Zoom, Google Meet, Microsoft Teams, and iGlasses offer various levels of video customization. For example, in Zoom, you can improve your appearance, adjust brightness, set HD quality, and reduce noise.
To adjust your camera settings in Zoom:
- Open Zoom.
- Go to Settings (Command + ,).
- Switch to the Video tab.
- Select your camera from the dropdown.
- Check "Touch up my appearance" and adjust the slider.
- Check "Adjust for low light" and use the slider to fine-tune.
Similarly, Google Meet also allows you to adjust the send resolution to High Definition (720p) for improved video quality.
Adjust Your Physical Environment
One of the most effective ways to improve your camera quality is to adjust your physical environment and lighting. Here are some tips:
- Ensure your camera is not facing any strong light sources, such as a window or desk lamp. Position your setup so that your camera and the light source are pointing in the same direction.
- Let in enough light to avoid a low-light environment, which can degrade camera performance.
- Organize the space behind you to make it neat, pleasant, and non-distracting. Consider using plain backgrounds as they tend to work best.
- If needed, consider replacing the default camera with a professional webcam or a DSLR on a tripod.
Use Your iPhone as a Webcam
Starting with macOS Ventura and iOS 16, you can use your iPhone as a webcam with your Mac. This gives you more freedom in positioning the camera, and you can also take advantage of the improved camera quality of the iPhone.
Manage App Permissions
You can control which apps have access to your camera in your System Settings. Go to Privacy & Security and then Camera. Here, you will see a list of all the apps that use your camera, and you can toggle the switch on or off to grant or revoke permission.
While there are limited built-in options for adjusting your MacBook camera settings, by using a combination of third-party apps, environmental adjustments, and permission management, you can significantly improve your video quality and customize your camera experience.
Roku TV Camera: Does Philips Have Built-In Webcams?
You may want to see also
Frequently asked questions
Open an app that uses the camera, such as Photo Booth or FaceTime. The camera will turn on automatically and a green light beside the camera will glow to indicate that it is on.
A small LED green light next to the camera will be illuminated when the camera is on.
Click on the "Photo Booth" icon on the dock to open the camera or click "Applications" and then click on the "Photo Booth" entry in the list.
Run Hand Mirror, a hand mirror icon will appear in your Mac’s menu bar. Click on it to turn on your webcam and a small window will pop up showing a live feed of yourself.
Ensure good lighting and placement, confirm the DPI your camera can capture, and adjust settings such as brightness and contrast using an app like Webcam Settings from the App Store.


