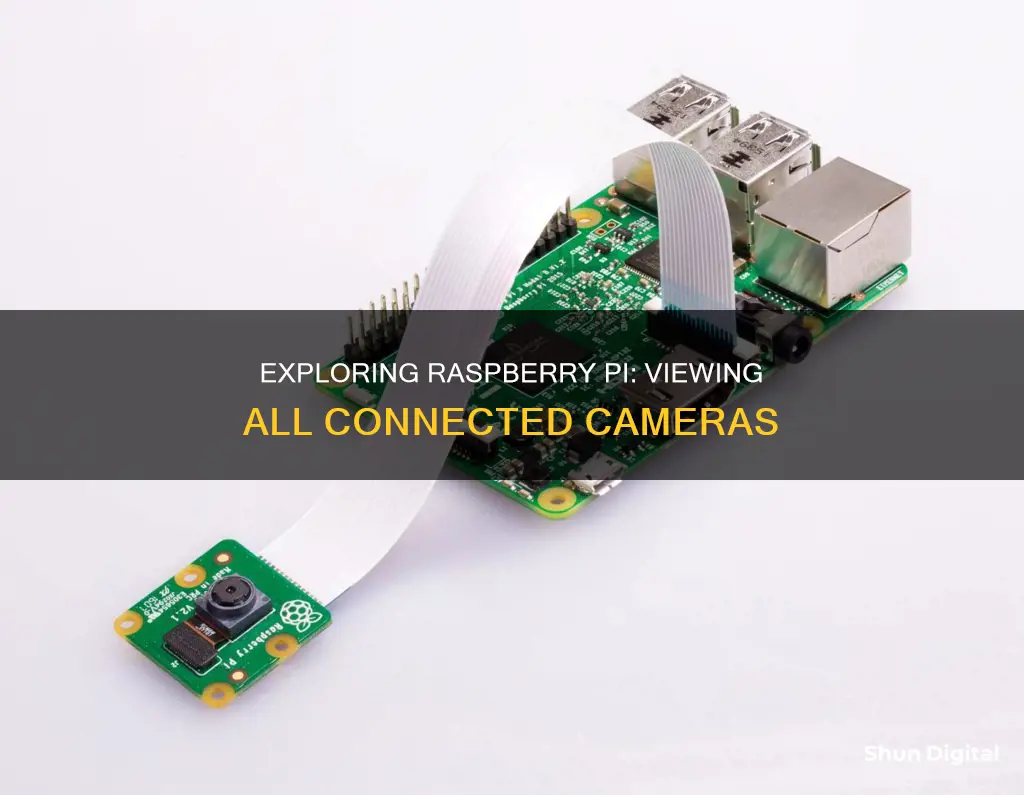
Raspberry Pi's own Pi camera or compatible generic versions, as well as generic webcams, can be used to capture images or videos. The first step is to enable the camera interface in the Raspberry Pi configuration file, followed by entering specific commands in the terminal to detect the camera and take test images. The libcamera-still --list-cameras command lists all available cameras, while vcgencmd get_camera checks if the camera is detected and supported by the operating system.
| Characteristics | Values |
|---|---|
| Command to list all available cameras | libcamera-still --list-cameras |
| Example of output | Available cameras, camera number, camera name, resolution, modes, fps, crop |
| Command to check if the camera is working | libcamera-still -o test.jpg |
| Command to check if the camera is detected and supported by the operating system | vcgencmd get_camera |
| Expected output for a working camera | supported=1, detected=1 |
| Camera port location | Between the HDMI ports and the jack port |
| How to enable the camera interface | Through the Raspberry Pi Configuration tool or the command line |
| Camera module focus | About 1 to 2 meters for the Raspberry Pi camera version 2.0 |
What You'll Learn
- Use the command 'libcamera-still --list-cameras' to list all available cameras
- Check if the camera is working by entering the command 'libcamera-still -o test.jpg'
- Make sure the camera interface is enabled in the Raspberry Pi configuration file
- Check if the camera is detected by the operating system with the command 'vcgencmd get_camera'
- Check the hardware installation by opening the plastic slide and releasing the cable

Use the command 'libcamera-still --list-cameras' to list all available cameras
To see a list of cameras on a Raspberry Pi, use the command `libcamera-still --list-cameras`. This command will display all the available cameras connected to your Raspberry Pi board, along with their specifications.
Available cameras
-
0 : imx477 [4056x3040] (/base/soc/i2c0mux/i2c@1/imx477@1a)
Modes: 'SRGGB10_CSI2P' : 1332x990 [120.05 fps - (696, 528)/2664x1980 crop]
'SRGGB12_CSI2P' : 2028x1080 [50.03 fps - (0, 440)/4056x2160 crop]
2028x1520 [40.01 fps - (0, 0)/4056x3040 crop]
4056x3040 [10.00 fps - (0, 0)/4056x3040 crop]
In this example, the Raspberry Pi detects an IMX477 camera with a resolution of 4056x3040 pixels. The camera is located at the path "/base/soc/i2c0mux/i2c@1/imx477@1a" on the board. Additionally, the camera supports multiple modes with different resolutions and frame rates, such as 1332x990 at 120.05 fps and 2028x1080 at 50.03 fps.
The `libcamera-still --list-cameras` command is part of the libcamera library, which is a new software library for controlling complex camera systems on Linux-based systems, including Raspberry Pi. It provides an open-source solution for camera support and can be used to access various camera functions programmatically.
To use the `libcamera-still --list-cameras` command, ensure that you have the necessary libcamera dependencies installed on your Raspberry Pi. You can refer to online resources for specific instructions on installing libcamera and its dependencies. Additionally, make sure that your camera module is properly installed and configured before running the command.
By utilizing the `libcamera-still --list-cameras` command, you can easily identify the cameras available on your Raspberry Pi and their respective specifications, making it a useful tool for managing and working with multiple camera setups.
Baseball Camera Break: Impact and Aftermath
You may want to see also

Check if the camera is working by entering the command 'libcamera-still -o test.jpg'
To check if the camera is working, enter the command `libcamera-still -o test.jpg` into the terminal. This command will display a preview window for about five seconds and then capture a full-resolution JPEG image, saving it as `test.jpg` in the current directory.
If the camera is functioning correctly, you should be able to open the image file and see the preview. This confirms that the camera is working as intended and that the connection between the camera and the Raspberry Pi is secure.
If the preview window does not appear, or if you encounter an error message, there may be an issue with the camera setup or hardware connection. In such cases, it is advisable to troubleshoot the camera installation and hardware connections.
To further verify the camera's functionality, you can also try adjusting the camera settings, such as resolution, shutter speed, and gain, using the various options available with the `libcamera-still` command. For example, you can capture a lower-resolution image by specifying the `--width` and `--height` options, like this: `libcamera-still -o test.jpg --width 640 --height 480`.
Additionally, you can check if the camera is detected by the operating system using the command `vcgencmd get_camera`. If the output shows `supported=1, detected=1`, it indicates that the camera is detected and supported.
By following these steps and commands, you can effectively test and confirm the proper functioning of your Raspberry Pi camera.
Displaying Surveillance Footage: Monitor and TV Setup
You may want to see also

Make sure the camera interface is enabled in the Raspberry Pi configuration file
To make sure the camera interface is enabled in the Raspberry Pi configuration file, you need to follow a few steps. First, type "sudo raspi-config" in the terminal. Then, select "Interfacing Options". You will then need to navigate to the "Interfaces" tab and click on "Enabled" for the camera. After that, hit "OK". The system will ask if you want to restart to allow the changes to take effect, which is a good opportunity to shut down and plug in the camera if you haven't done so already.
Once you've shut down, you can connect the camera by opening the camera ribbon connector on the Pi, sliding the ribbon in with the blue tape facing the black top piece, and then pushing down to connect. After restarting your device, the Pi camera will be ready to use.
It's important to note that before plugging in the camera, you may need to remove any plastic film and lightly pull the black plastic covering the connector. Additionally, make sure to align both connectors on the same side, with the cable connectors facing the HDMI port and the blue side of the ribbon towards the USB ports.
Master Splinter Cell Blacklist: Sticky Camera Viewing Techniques
You may want to see also

Check if the camera is detected by the operating system with the command 'vcgencmd get_camera'
To check if the camera is detected by the operating system, you can use the command `vcgencmd get_camera`. This will return either `supported=1, detected=1` or `supported=0, detected=0`. If you get the former, it means that the camera is detected and supported by the operating system. If you get the latter, it means that the camera is not being seen by the operating system.
This command is useful to run if you are having issues with your Raspberry Pi camera not working properly. For example, if you are getting an error message when trying to take a picture, you can run this command to check if the camera is detected by the operating system. If the camera is not detected, you can try re-seating the camera cable or enabling the camera interface in the Raspberry Pi configuration file.
However, it's important to note that the `vcgencmd get_camera` command may not always accurately detect a disconnected camera. In some cases, pulling the camera cable out and running the command may still return `supported=1, detected=1` even after a few minutes. So, while the command is a good first step in troubleshooting camera issues, it may not always provide a definitive answer.
In addition to checking the camera detection, you can also try other troubleshooting steps such as checking the hardware connections, enabling the I2C interface, or trying a different camera to see if that resolves the issue.
Magnetic Field Cameras: Capturing the Invisible with Innovation
You may want to see also

Check the hardware installation by opening the plastic slide and releasing the cable
To check the hardware installation of your Raspberry Pi camera, you'll first want to take a test image to ensure it works. If you need more details on getting the camera installed, consult a guide on camera basics.
To check that your camera is working, open a terminal window and make a note of the current directory so you know where to look for the image. Then, enter the command: "libcamera-still -o test.jpg". You should see a preview window pop up for about 5 seconds. If all goes well, you'll find the image in the current directory, and you'll be able to open it.
If that doesn't work, or if you get an error message, there may be a hardware issue. Most camera issues are related to not getting a good connection to the Pi.
To start checking the hardware, open the plastic slide and release the cable. Make sure that the metal connections at the end of the cable are facing the HDMI port on the Pi motherboard, or, in other words, make sure that the metal ends face away from the plastic slide lock.
While you have the cable loose, ensure there isn't plastic film on the metal tabs from shipping and that the contacts are clean. If you're unsure, you can use the eraser of a pencil to gently clean them, or a soft cloth (don't use anything that is wet).
The slide lock should go all the way back into position, the cable should be straight across, and the metal tabs should not be visible. You may need to use a screwdriver to gently push at each end of the slide locks to get them back into place. Be careful that the cable does not shift position during this process.
Once that's done, try the image capture command again to see if it works. If not, there are a few more things to try.
Smart TVs: Are They Watching You?
You may want to see also


