Computer monitors are one of the most important output devices as they allow us to see real-time visual output from our computers. The output we see on the monitor screen is controlled by a small piece of software called a driver. Over time, Windows will keep installing device drivers for all new hardware plugged into the PC, including monitors. While Windows keeps adding and installing new drivers, it does not delete the old ones, which can take up valuable hard drive space. If a monitor driver becomes corrupted, or an update is installed that doesn't communicate well with your monitor version, the result can be poor resolution, distorted images, or even no image at all. This is when you should consider removing old monitor drivers from your system to free up disk space and fix any issues.
| Characteristics | Values |
|---|---|
| When to remove old monitor drivers | When monitor drivers become corrupted, or when an update doesn't communicate well with your monitor version |
| How to remove old monitor drivers | Using the Windows built-in tools, such as the Device Manager, or third-party tools such as DDU (Display Driver Uninstaller) |
| Where are drivers stored | In a folder called DriverStore |
| How to access the Device Manager | Right-click on the Start button, then choose Device Manager |
| How to view hidden devices in Device Manager | Select the View menu and turn on Show Hidden Devices |
| How to uninstall a device in Device Manager | Expand the node representing the type of device, right-click on the device entry, and select Uninstall device |
| How to delete the driver package in addition to uninstalling the device | On the Confirm Device Removal dialog box, select Delete the driver software for this device, then select OK |
| How to ensure a driver package is permanently removed | Delete the driver package from the Driver Store using the pnputil command |
What You'll Learn

Using the Windows Start menu
To remove old monitor drivers using the Windows Start menu, follow these steps:
Firstly, launch the Windows Start menu by clicking the Windows icon in the bottom left corner of your screen. From the menu, search for and open the Control Panel. Within the Control Panel, select the Device Manager by clicking on the corresponding icon.
Next, select the 'View' menu within Device Manager and ensure that 'Show hidden devices' is turned on. This will allow you to see all devices, even those that are not currently connected. Expand the node that represents the type of device you want to uninstall by clicking on the right-arrow icon next to 'Display Adapters'.
Now, you should see a list of display adapters. Right-click on the one you want to uninstall and select 'Uninstall Device'. In the 'Uninstall Device' prompt, make sure to enable the 'Delete the driver software for this device' option, then click 'Uninstall'.
You may also need to restart your computer for the changes to take effect. Additionally, it is recommended to physically unplug the device before uninstalling it to prevent Windows from automatically reinstalling the drivers.
Is Your Monitor G-Sync? Here's How to Tell
You may want to see also

Using the Device Manager
If you're using Windows 10 or 11, you can use the Device Manager to uninstall old monitor drivers. Here's a step-by-step guide:
- Before you begin, it's recommended to physically unplug the monitor from your system. If you uninstall the device before unplugging it, Windows may automatically reinstall the drivers for it.
- Open Settings by using the Windows + I keyboard shortcut, then type "Remove". Select "Add or remove programs".
- If the old monitor driver appears in the list of programs, select "Uninstall". If not, proceed to the next step.
- Open the Device Manager by selecting the Start button, typing "Device Manager", and pressing Enter.
- In the Device Manager, select the "View" menu and turn on "Show Hidden Devices". This will allow you to see greyed-out or disconnected devices.
- Expand the "Monitors" or Display Adapters node to view the list of monitors connected to your system.
- Right-click on the old monitor entry that you want to uninstall and select "Uninstall device".
- On the "Confirm Device Removal" dialog box, select the "Delete the driver software for this device" option if you want to remove the driver package along with the device. Then, select "OK" to complete the uninstallation. Ensure that you have administrative privileges to perform this action.
- You may need to restart your computer for the changes to take effect.
By following these steps, you can effectively remove old monitor drivers using the Device Manager in Windows.
Uncover Hidden Internet Monitors: A Comprehensive Guide
You may want to see also

Using the Disk Cleanup utility
To remove old monitor drivers, you can use the Disk Cleanup utility in Windows. Here's a step-by-step guide on how to do it:
- Go to the "Run" window and type "cleanmgr". This will open the Disk Cleanup window for your main system drive, usually the C drive.
- Click on "Clean up system files". You will be asked to select the system drive again, so choose it.
- The Disk Cleanup tool will now calculate the free space available on your system drive.
- Once the calculation is complete, a Disk Cleanup window will pop up, listing all the files that can be deleted to free up space.
- Look for the "Device Driver Packages" option in the list, which represents old device drivers that are no longer in use.
- Check the box next to "Device Driver Packages" and click "OK".
- The Disk Cleanup utility will now remove all the old drivers from your system, including any old monitor drivers.
This process will help you get rid of outdated and unnecessary drivers, freeing up valuable space on your system drive. It is important to note that you should not manually delete any files from the Driver Store folder as it may cause issues with your system. Instead, rely on built-in tools like Disk Cleanup or third-party utilities designed for this purpose.
Monitoring iPad Battery Usage: Tips and Tricks
You may want to see also

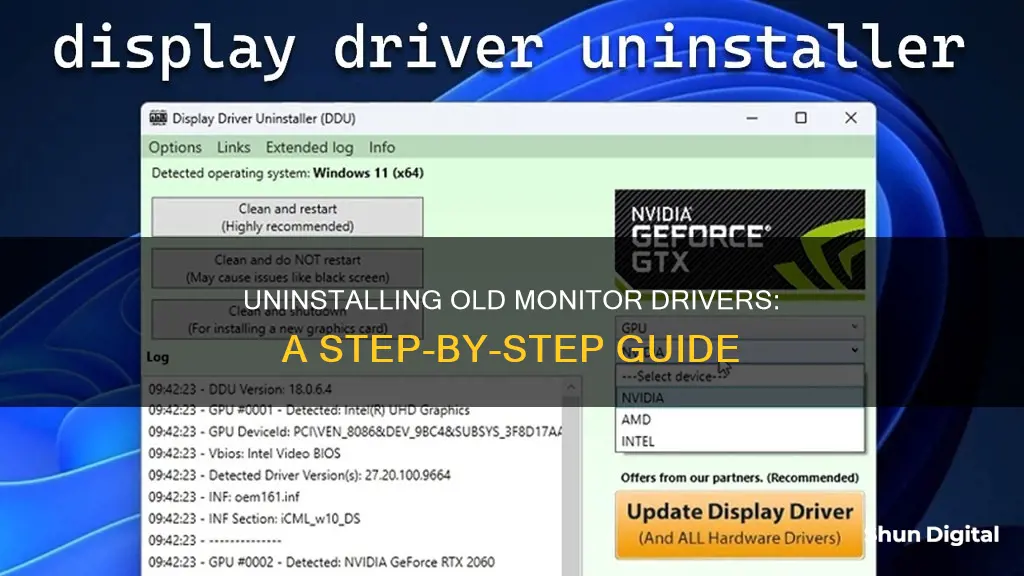
Using the DDU (Display Driver Uninstaller)
Display Driver Uninstaller (DDU) is a driver removal utility that can help you completely uninstall AMD/NVIDIA/INTEL graphics card drivers and packages from your system, trying to remove all leftovers (including registry keys, folders and files, and driver store). The AMD/NVIDIA/INTEL video drivers can normally be uninstalled from the Windows Control Panel, but the DDU was designed for cases where the standard driver uninstall fails, or when you need to thoroughly delete NVIDIA and ATI video card drivers.
- Download the DDU archive file and copy-paste it to a convenient PC location to easily extract the application.
- Click on the DDU application – you may need to extract it again. Click 'OK' to proceed.
- You should see an application file named 'Display Driver Uninstaller' that will remove the old drivers.
- Upon launching the DDU program, a warning message will appear, stating: "DDU has detected that you're not in Safe mode". This means the "Clean and restart" option will be greyed out. To operate the DDU utility, you'll need to open Windows in Safe Mode.
- To open Windows in Safe Mode, go to the Windows Start menu and find the System setting called "Change Advanced Startup Options". Click the "Restart" button from the inside menu.
- Your PC will restart with a blue screen. Using the arrow keys, navigate to the Startup Settings screen via "Troubleshoot -> Advanced options -> Startup Settings". Click the Restart button to log in to Windows Safe Mode.
- On the subsequent restart, you will find a few options with Safe Mode for Startup settings. Choose No. 4 for Safe mode access.
- Safe Mode will look the same as normal PC mode, except the desktop will have a black screen, and some functions will be disabled for security reasons.
- Navigate to the folder where you saved the DDU uninstaller.
- Open DDU and select your device type (GPU or Audio) from the drop-down menu.
- Click "Clean and restart" for your drivers to be completely uninstalled.
- Once you quit Safe Mode and return to normal mode, you can install new GPU or audio drivers without any conflicts or interference from the old ones.
Warning: While the DDU program is safe to use, make sure you keep a backup of all your old drivers, which can be accessed from Device Management.
Removing Arcade Monitors: A Step-by-Step Guide
You may want to see also

Using PowerShell script
Step 1: Identify the Display Drivers
Before removing any drivers, it's crucial to identify the display drivers installed on your system. You can use the following PowerShell command to list all the installed drivers:
Get-WmiObject Win32_PnPSignedDriver | select DeviceName, DeviceClass, Manufacturer, DriverVersion, DriverDate, InfName | Out-GridView
This command will display a table with columns for the device name, device class, manufacturer, driver version, installation date, and driver inf file name (oemXXX.inf).
Step 2: Create a Restore Point (Optional but Recommended)
Before making any significant changes to your system, it's always a good practice to create a restore point. This will allow you to revert your system to a previous state if any issues arise during the driver removal process. You can create a restore point by running the following PowerShell command:
Checkpoint-Computer -Description "BeforeDriversDelete"
Step 3: Remove the Display Drivers
Once you have identified the display drivers you want to remove, you can use the following PowerShell script to remove them:
$Name = "Display|Graphic"
$Drivers = GWmi 'Win32_PnPSignedDriver' | ? { $_.Description -Match $Name -and $_.InfName -like 'oem*.inf' } | Sort 'InfName'
$Drivers | % {
$Output = @"
Display -Graphics drivers -
#
Driver Provider : $($_.'DriverProviderName')
Description : $($_.'Description')
DriverVersion : $($_.'DriverVersion')
DeviceClass : $($_.'DeviceClass')
InfName : $($_.'InfName')
Manufacturer : $($_.'Manufacturer')
#"@
Write-Host $Output -ForegroundColor 'Yellow' -BackgroundColor 'Black'
}
$Choice = Read-Host
If ($Choice -in 'Y','y' ) {
$Drivers | % { Write-Host "Removing your $($_.'Description') Drivers..." -ForegroundColor 'Yellow' -BackgroundColor 'Black'
& PnPutil.exe '/Remove-Device', $_.'DeviceID' | % { Write-Host $_ -ForegroundColor 'Yellow' -BackgroundColor 'Black' }
& PnPutil.exe '/Delete-Driver', $_.'InfName', '/Uninstall', '/Force' | % { Write-Host $_ -ForegroundColor 'Yellow' -BackgroundColor 'Black' }
}
} else {
Write-Host 'No Action Performed. Aborting.' -ForegroundColor 'Yellow' -BackgroundColor 'Black'
Return
}
This script will
Step 4: Restart Your System
After removing the old monitor drivers, it's recommended to restart your system for the changes to take effect.
By following these steps, you can effectively use PowerShell scripts to remove old monitor drivers from your system. Remember to exercise caution when removing system drivers, as incorrect removal may cause system instability.
Monitoring Stroke Volume: Understanding Cardiac Output
You may want to see also
Frequently asked questions
Old drivers can slow down your computer and cause problems. Removing them frees up disk space.
You can use the built-in Windows Device Manager tool to uninstall old drivers.
First, open Device Manager by right-clicking the Start button and selecting it from the menu. Then, select "Show hidden devices" from the "View" menu. Find the old driver you want to remove, right-click and select "Uninstall".
Yes, there are several third-party tools available, such as Device Cleanup Tool, Driver Store Explorer, and Driver Magician.
A monitor driver is a small piece of software that allows your computer to communicate with your monitor, ensuring it displays an image.


