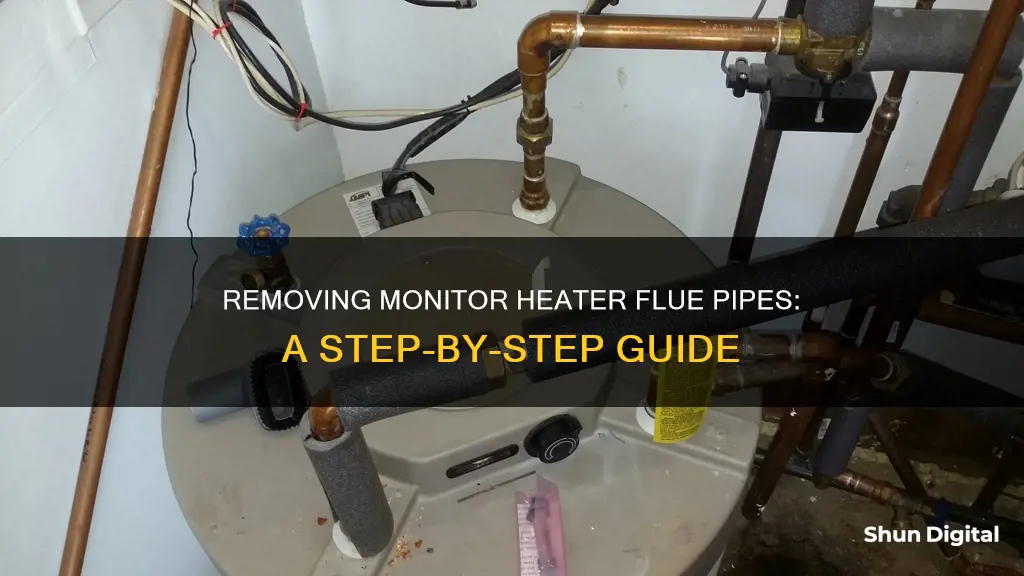
Monitor heaters are a safe indoor heating option that runs on clear kerosene. They are fitted with a flue pipe that leads to the chimney or outdoors. The flue pipe is an essential component of the heater, but sometimes it needs to be removed for cleaning, repair, or relocation. Removing the flue pipe from a monitor heater can be challenging, as it may have become tighter over the years due to metal expansion from the heat. It is important to consult the manual and seek professional help if needed.
| Characteristics | Values |
|---|---|
| Causes of Monitor heater failure | Airflow obstructions, power connection failure, loose flue pipe, air intake system barrier |
| Action to take if heater fails to come on | Press the "Auto" button, check if the timer is in "Auto" mode, check if the operation button is in the "On" position |
| Action to take if the heater overheats | Turn off the Monitor heater, wait for it to cool down, check the flue pipe, front of the heater and circulation fan for barriers blocking airflow |
| Action to take if there is soot inside exhaust ports or the burner window | Disconnect, clean with a brush, and reassemble |
| Action to take if there is soot behind the heater, low flames, and popping combustion-like sounds | Turn off the heater, wait for it to cool down, tighten all loose attachments |
| Action to take if there is water leaking from the flue pipe | Remove the flue pipe, clean it, and reconnect it |
| Action to take if the flue pipe is difficult to remove | Remove the locking ring, apply more force, check if the pipe has expanded |
| Action to take if the locking ring is absent | Check if you are using a "twist lock" style pipe |
What You'll Learn

Check for obstructions in the flue pipe
Checking for obstructions in the flue pipe is a crucial aspect of maintaining your monitor heater. Blockages can lead to hazardous situations, so it's important to inspect the flue pipe at least once a year. Here are some detailed steps to guide you through the process:
Remove the Flue Cap: Begin by removing the flue cap, which is usually located at the roof or end of the flue pipe. This cap helps prevent debris, birds' nests, and other items from blocking the flue. By taking it off, you can gain access to the interior of the pipe for inspection.
Check for Blockages: Once the flue cap is removed, carefully look inside the flue pipe for any obstructions. Common blockages include debris, birds' nests, soot, or even ice buildup, as seen in some cases. If you notice any blockages, try to remove them if possible. If the obstruction is severe or you're unsure, it's best to call a professional to clear the pipe safely.
Inspect the Pipe: After removing any blockages or if there are none, examine the pipe for signs of corrosion, holes, or loose joints. Look for water streaks, rust, or sooty deposits on the flue pipe, as these could indicate moisture backup or a blockage. Additionally, check for any signs of physical damage to the pipe, such as dents or cracks, which could restrict airflow and cause backdrafting.
Inspect the Roof and Chimney: From the ground, visually inspect the roof and chimney for any potential issues. Check if the flue cap is missing or damaged, as this can lead to debris or animal intrusion, causing blockages. Also, look for any visible signs of chimney damage, such as broken tiles or bricks, which could restrict airflow and cause blockages higher up in the flue.
Hire a Professional for a Thorough Inspection: While you can perform a basic inspection yourself, it's recommended to hire a professional HVAC technician for a more comprehensive assessment. They can use specialised cameras to inspect the flue vent and ensure that it is entirely free from blockages and in good condition. They can also provide guidance on maintaining proper airflow and preventing backdrafting.
Remember, your monitor heater's flue pipe plays a critical role in safely venting harmful gases, such as carbon monoxide, out of your home. By regularly checking for obstructions and maintaining the flue pipe, you can help ensure the safety and well-being of your household.
Freesync Monitor: Is the GeForce 1080 Still Worth Buying?
You may want to see also

Remove the locking ring
To remove the locking ring of a monitor heater flue pipe, you will need to identify its location. The locking ring could be connecting the flue pipe to the stove body, or it could be on a side pipe. Once you have located the locking ring, use a wrench or pliers to grip the ring and turn it counterclockwise to unscrew it. If the locking ring is difficult to turn, try using a penetrating lubricant to help loosen it.
If you are having trouble locating the locking ring, refer to the owner's manual for your specific model of the monitor heater. The manual should have a diagram or instructions that indicate the location of the locking ring. Additionally, if you are unable to find the locking ring, it may be that your model does not have one. In this case, you may need to use a different method to remove the flue pipe, such as twisting or pulling it out.
It is important to note that removing the locking ring and flue pipe can be a delicate process, and using excessive force may damage the parts. If you are unsure or uncomfortable with any part of the process, it is recommended to consult a professional for assistance.
Once you have successfully removed the locking ring, you can proceed to detach the flue pipe from the heater. This process may vary depending on the make and model of your heater, so refer to the owner's manual or seek advice from a qualified technician if needed.
Setting Up Monitor Audio: A Beginner's Guide
You may want to see also

Tighten the flue pipe
Soot behind the heater, low flames, and popping combustion-like sounds are all signs that your flue pipe is loose. To tighten the flue pipe, follow these steps:
Step 1: Turn off the heater and let it cool down completely
Before you begin any work on the flue pipe, it is important to turn off the heater and give it enough time to cool down. This step is crucial for your safety, as the heater can get extremely hot during operation. Wait for at least an hour to ensure that the heater has completely cooled down.
Step 2: Check for barriers blocking airflow
Once the heater has cooled down, start inspecting the components for any blockages or barriers that may be restricting airflow. Check the flue pipe, the front of the heater, and the circulation fan for any debris, soot, or other obstructions. Remove any blockages or built-up soot using a brush or vacuum.
Step 3: Tighten all loose attachments
After ensuring that the flue pipe and heater are free of obstructions, proceed to tighten all the connections and attachments. Use a wrench or the appropriate tool to securely fasten all the joints and fittings. Make sure that all the screws are tight and that there is no movement in the flue pipe.
Step 4: Reassemble and test the heater
After tightening the flue pipe, reassemble any parts that were removed for cleaning or inspection. Refer to the heater's manual for the correct reassembly procedure. Once everything is in place, turn on the heater and observe its operation. Check for any unusual noises, smells, or signs of soot accumulation. If the problem persists or if the flue pipe becomes loose again, consult a professional for further assistance.
Safety Precautions:
- Always refer to your heater's manual for specific instructions and safety guidelines.
- Ensure proper ventilation during the entire process to avoid inhaling harmful fumes.
- Wear protective gear, such as gloves and safety goggles, when handling the heater components.
- Keep flammable materials away from the heater and flue pipe during the tightening process.
Kia Soul: Blind Spot Monitoring Feature Explained
You may want to see also

Check the heater's power connection
To check the power connection of a monitor heater, you should first check the electrical power source and AC cord connections. Ensure that the power cable fits firmly into the three-pronged power-supply port on the rear of the computer case. Verify that the other end of the power cable is securely plugged into a wall outlet, surge protector, power strip, or battery backup. If your power cable is connected to a surge protector, power strip, or battery backup, ensure that this is securely plugged into the wall outlet.
If your monitor heater is not turning on, the power cable may have wiggled loose from the PC case. Check every point where electricity is delivered to the computer system. If the power supply unit (PSU) falls inward into the case when you press the power cable into it, then it is not properly secured to the case. To fix this, you will need to open the computer case, but make sure the power cable is unplugged first.
If your monitor heater is overheating, unplug it from the electrical outlet and check the flue pipe, front of the heater, and circulation fan for barriers blocking the airflow.
Finding the Perfect Monitor: A Comprehensive Guide
You may want to see also

Clean the flue pipe
To clean the flue pipe of a monitor heater, you must first turn off the heater and allow it to cool completely. This may take up to an hour. Once the heater is cool, check the flue pipe, the front of the heater, and the circulation fan for any barriers blocking airflow.
If there is soot inside the exhaust ports or burner window, this is a sign that either the combustion fan has stopped working or the air intake system is clogged. Disconnect these parts and clean them with a brush if they are soiled, then reassemble.
If there is soot behind the heater, low flames, or popping combustion-like sounds, this indicates that the flue pipe is loose. Tighten all loose attachments.
Monitor heaters should be cleaned once every three years. This includes cleaning the cabinet, grill, drip pan, and strainer.
Abbott Precision Xtra Glucose Ketone Monitor: Buying Guide
You may want to see also
Frequently asked questions
You may have to remove the locking ring. Years of use may have expanded the metal, so it may be tighter and may require more force. If there is no locking ring, the pipe may be a "twist lock" style.
Soot behind the heater, low flames, and popping combustion-like sounds are signs that the flue pipe is loose.
Turn off the heater and wait for it to cool down completely. Then, disconnect the flue pipe and clean it with a brush if it is soiled.


