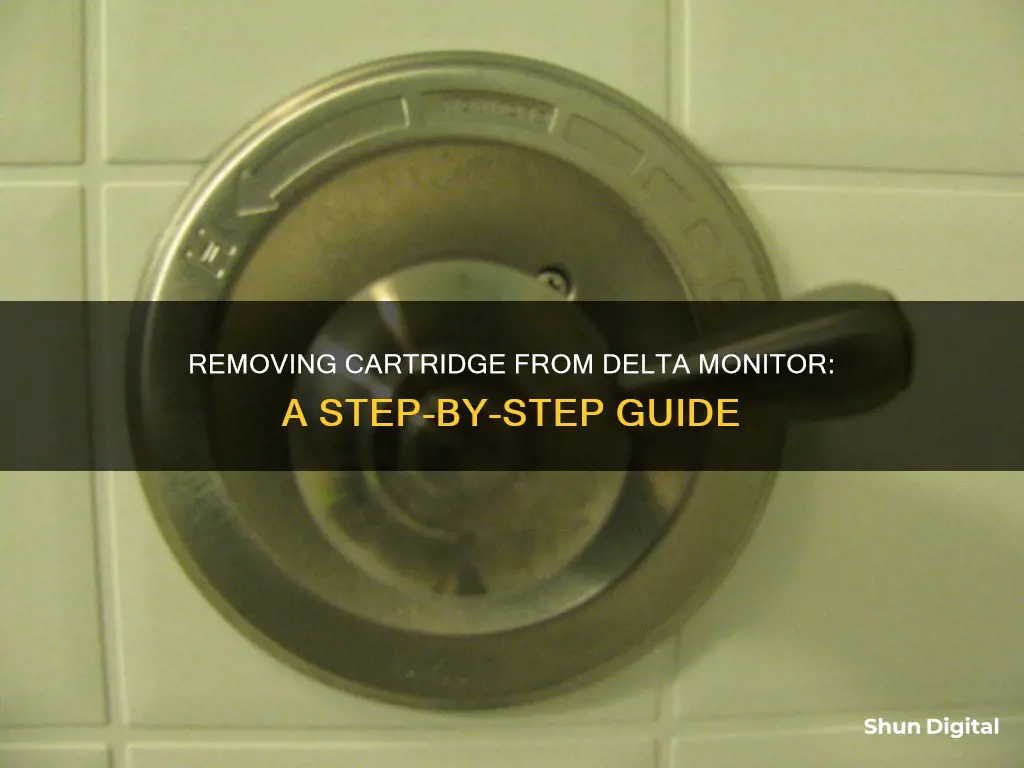
Removing the cartridge from a Delta Monitor shower faucet can be a tricky task. The cartridge is the internal working part of the shower valve, and if it is damaged, water will leak out of the spout or there will be a sudden loss of pressure. To remove the cartridge, first turn off the water supply and drain the system. Then, remove the trim from the valve by locating and loosening the set screw on the handle. Once the handle is removed, grip and pull off the chrome collar. Next, unscrew the bonnet by twisting it counter-clockwise, taking care not to apply excessive force. Finally, remove the old cartridge by gripping it and pulling it straight back while wiggling it up and down. If necessary, tongue and groove pliers or needle-nose pliers can be used to remove the cartridge.
Characteristics of removing a cartridge from a Delta Monitor
| Characteristics | Values |
|---|---|
| Tools required | Allen Wrenches, Tongue and Groove Pliers, Needle Nose Pliers, Faucet Grease, New Cartridge, Water Shut Off Key, Pliers, Flathead Screwdriver, Channel Lock Pliers |
| Steps | Turn off the water supply, drain the system, remove trim from the valve, unscrew the bonnet, remove the old cartridge, prepare and install the new cartridge, replace the bonnet, turn the water back on and check for leaks, replace the chrome collar and handle |
| Tips | Use faucet grease on the new cartridge, identify the 'H' on the cartridge to indicate the hot side, align the notches of the cartridge with the indents of the valve body, tighten the bonnet by hand, check for leaks after turning the water back on |
What You'll Learn

Identify the Delta Monitor model
Identifying the model of your Delta Monitor shower faucet can be a challenging task, especially if you don't have the necessary information or access to the right tools. Here are some detailed instructions to help you through the process:
Step 1: Gather Information
Firstly, make sure you have a Delta Faucet. Check the packaging or instruction manual for the model number. If your faucet was made before 2004, you'll need to search online. For newer models, use the product identifier tool on Delta's website. You can also try contacting Delta's customer support if you're unable to find the information you need.
Step 2: Visual Inspection
Take a close look at the overall design, shape, and style of the faucet. Pay attention to the faucet handle and trim plate (also known as the escutcheon). Note any distinctive features, such as the shape and size of the handle, and any engraved or embossed details like the Delta logo or model numbers. Inspect the showerhead and any other accessories as well.
Step 3: Check the Handle
The handle can provide valuable clues about the model. Look for any markings, engravings, or embossments on the handle, including model numbers or the Delta logo. Note the shape and design of the handle, as Delta offers a variety of styles. Check for any buttons or indicators on the handle and determine if it's a single handle or separate handles for hot and cold water. Finally, take note of the material and finish of the handle.
Step 4: Examine the Trim Plate
The trim plate is the decorative cover plate surrounding the base of the faucet. Check for any markings, engravings, or embossments on both sides of the plate, as they may provide model information. Observe the shape, design, size, material, and finish of the trim plate, as these details can help identify the model.
Step 5: Identify the Valve
Identifying the type of valve used in your faucet can be helpful. Look for markings or labels on the valve and identify if it's a single-handle cartridge valve or a dual-handle valve with separate hot and cold handles. Take note of any additional features, such as pressure-balancing valves or thermostatic valves. If necessary, you can carefully remove the handle and trim plate to get a better view of the valve.
Step 6: Research the Model
Use the information gathered to research the model. Visit the official Delta Faucet website and browse their product catalog. Utilize online resources and forums for additional help. If you have a model number, perform a specific search to find more details about your faucet.
Step 7: Seek Professional Help if Needed
If you're unable to identify the model, consider contacting a licensed plumber or visiting a local plumbing supply store. You can also reach out to Delta authorized service centers for assistance. These professionals can help ensure accurate identification and provide necessary repairs or replacement parts.
Connecting Your MacBook to an External Display
You may want to see also

Turn off the water supply
Turning off the water supply
Before you begin to remove the cartridge from your Delta Monitor, it is important to turn off the water supply to your house. This will ensure that you can safely remove the cartridge without the risk of water leakage or damage. Here is a step-by-step guide to turning off the water supply:
Step 1: Locate the Main Water Shut-Off Valve
The first step is to find the main water shut-off valve for your house or apartment. This valve is typically located in the basement of a house or duplex. There are two common types of valves: a ball valve and another style of valve. The ball valve will have a knob with two holes that line up when it is in the off position.
Step 2: Turn Off the Water
Once you have located the main water shut-off valve, it's time to turn off the water. If you have a ball valve, grip the handle and rotate it clockwise. Keep turning the handle until it has moved a full 90 degrees from its original position. For the other style of valve, grip the round handle and turn it in a clockwise direction until it is fully closed.
Step 3: Check if the Water is Off
To make sure the water is completely shut off, turn on a nearby faucet. The water should slow down and stop running after about 30 seconds. If the water does not shut off completely, return to the main shut-off valve and try again. Open the valve by turning it counter-clockwise, then shut it off again, this time applying slightly more pressure. If the water still does not shut off, do not proceed and call a professional to replace the valve.
Step 4: Leave a Faucet Open
If the water stops completely, leave the faucet open. This will help to drain the water that is left in the pipes once the shower cartridge is removed. This is an important step to ensure that you can safely remove the cartridge without any residual water causing issues.
By following these steps, you can confidently turn off the water supply to your house, ready for removing the cartridge from your Delta Monitor. Remember to always exercise caution when working with water systems, and if in doubt, consult a professional.
Asbestos Removal Monitor: Get Accredited and Start Working
You may want to see also

Remove the handle
To remove the handle of a Delta Monitor faucet, start by turning off the water supply to your house. This can be done by turning the knob to the off position, which will line up the two holes in the knob.
Next, you will need to remove the lever to access the set screw. Once the lever is removed, loosen the set screw with an Allen wrench. If you are unsure about the size of the Allen wrench, try to evaluate which size is needed by wiggling the wrench back and forth. If the wrench moves without resistance, select a different size. Choose the wrench that moves the least.
After the set screw has been loosened, remove the handle. Then, remove the chrome collar by pulling it straight back while twisting.
Now that the handle has been removed, you can proceed to remove the cartridge. Grip the old cartridge and pull it straight back towards you while applying steady pressure and slightly wiggling the cartridge up and down. If the cartridge does not come out, tongue and groove pliers or needle-nose pliers may be used.
LCD, LED, and TFT Displays: Understanding Differences
You may want to see also

Remove the chrome collar
To remove the chrome collar, start by locating the set screw on the handle. This will be in a recess somewhere on the handle. To disassemble the style in picture 1, the lever will need to be removed to access the screw. Once the lever is removed, the screw can be found. Try to evaluate what size Allen wrench is going to be needed. Insert the wrench into the hole and wiggle it back and forth. If the wrench does not move at all, you have selected the appropriate size. If the wrench moves without resistance, select a different size. For the other style of trim, the set screw can be found in the recess under the lever. Loosen the set screw and remove the handle. Now, remove the chrome collar by gripping it and pulling straight back while twisting.
Destroying an LCD Monitor: Step-by-Step Guide
You may want to see also

Unscrew the bonnet
To unscrew the bonnet, start by gripping it with your hand and twisting it in a counter-clockwise direction. Keep twisting until the bonnet is completely removed. If you are dealing with an older valve, you may need to use channel locks to remove the bonnet. Be cautious not to apply excessive force when using the wrench, as this could deform the bonnet.
If you are having trouble removing the bonnet, try using tongue and groove pliers. These can be useful if the bonnet is stuck or particularly tight. Again, be careful not to use too much force, as this could damage the bonnet.
It is important to make sure that you have completed the previous steps before attempting to unscrew the bonnet. Ensure that you have turned off the water and drained the system, and that you have removed the trim from the valve. This will make it easier to access the bonnet and avoid any potential damage to the surrounding components.
By following these steps, you should be able to successfully unscrew the bonnet and continue with the process of removing the cartridge from your Delta Monitor. Remember to work carefully and patiently, especially if you are new to plumbing repairs.
Monitor Your Roommate's Internet Usage: A Step-by-Step Guide
You may want to see also
Frequently asked questions
To ensure the shower valve is a Delta Monitor, look on the trim plate. There should be the word "Delta" on the bottom and "Monitor" on the top.
You will need Allen wrenches, tongue and groove pliers, needle-nose pliers, and faucet grease.
First, turn off the water supply to your house and drain the system. Then, remove the trim from the valve by locating and loosening the set screw on the handle. Next, remove the chrome collar by pulling straight back while twisting. Now, unscrew the bonnet by gripping it with your hand and twisting in a counter-clockwise direction. Finally, remove the old cartridge by gripping it and pulling straight back while applying steady pressure and wiggling it up and down.


