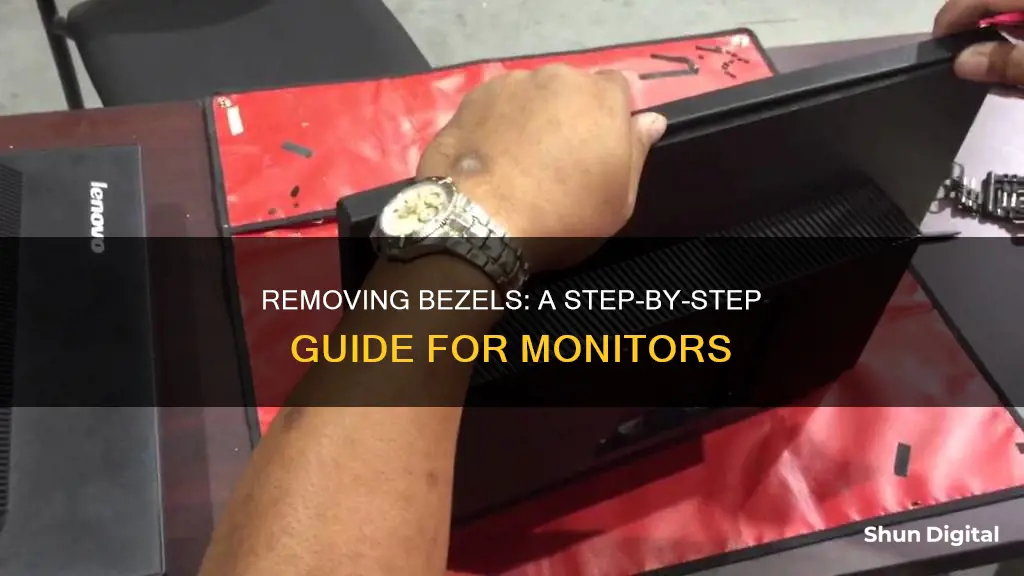
Removing the bezel from your monitor can be a challenging task, but it is possible. The process may vary depending on the monitor model and your specific use case. Some people remove bezels to create a seamless dual-monitor display, enhance their gaming experience, or build a smart mirror. Before attempting to remove the bezel, it is recommended to refer to specific instructions for your monitor model or seek guidance from online forums and communities. The process may involve prying open the casing with a thin, hard tool and unscrewing parts. It is important to be cautious and patient during this process to avoid damaging the monitor or its internal components.
| Characteristics | Values |
|---|---|
| Tools required | Screwdriver, thin and hard tool such as a paint scraper |
| Steps | Remove part of the casing with a screwdriver, pry the casing open with a thin tool, separate the front and back casings, remove the stand, unscrew any screws on the back, cover the metal border with black plastic tape |
| Challenges | Risk of damaging the casing, difficulty prying the casing open, risk of damaging the connectors when removing the back casing |
What You'll Learn

Tools to remove monitor bezel
The tools you will need to remove a monitor bezel will depend on the type of bezel and your level of expertise. Here are some common tools and methods to achieve a bezel-free monitor setup:
- ASUS ROG Bezel-Free Kit: This kit is designed for gamers with multiple-monitor setups who want to create the appearance of one seamless, extra-large wraparound monitor. It uses optical micro-structures to refract light, bending it inward to hide the bezels. The kit includes four clips, two lenses, and an angle measurement tool for easy setup. It is compatible with flat monitors under 27 inches with a frameless or slim-bezel design.
- DIY Solutions: If you're handy and want to save some money, there are DIY methods to remove monitor bezels. One approach is to use polarization filters, which are layers of specifically designed sheets of polymer that bend light in a certain direction, creating the illusion of a bezel-free display. You can source these filters from old LCD monitors or TVs, or purchase them from recycling centres or online marketplaces. With access to a 3D printer, you can create custom brackets and mounts to hold the filters in place.
- Alternative Commercial Options: There are alternative bezel-free kits available on sites like Etsy and Frex. These kits may offer similar functionality to the ASUS kit but at a lower price point. However, be sure to research their compatibility with your specific monitor setup.
- Adhesives: If you're looking for a more permanent solution, you can use adhesives like epoxy or metal epoxy (JB Weld) to attach the bezel to the monitor casing. This method may be more suitable if you have experience with adhesives and are confident in your ability to apply them correctly.
Monitoring Hydro Usage: Smart Metering and Water Efficiency
You may want to see also

Removing the monitor's front casing
Tools Required:
- A screwdriver to remove any screws holding the casing together.
- A thin and hard tool, such as a paint scraper, to pry the casing open. Alternatively, you can use any object that fits into the gap between the monitor's casing.
Steps to Remove the Front Casing:
- Removing the Stand (Optional): While you can start by detaching the stand, keeping it attached may provide better access to the monitor's edges and make the process easier.
- Prying the Casing Open: Insert your thin, hard tool into the gap between the front and back casings. If your tool is thicker than the gap, use a screwdriver to help pry the edges apart. Start at one corner and twist your tool to separate the two parts. Expect some resistance, and be careful not to apply excessive force, as you may damage the casing.
- Breaking the Plastic Tabs: You will likely hear a snap as the first set of plastic tabs holding the casing together break. Once the initial tabs are broken, it will become easier to separate the rest. Work your tool down the gap, gradually pulling the casing apart as you go.
- Using Your Hands: Once you have separated a good length of the casing, you can also use your hands to pull the casing apart while continuing to pry with your tool.
- Releasing the Final Corner: As you work your way around the monitor, you will eventually reach the last corner. At this point, the entire front bezel should pop off. Be cautious of any buttons or LEDs built into the front bezel to avoid accidental damage.
By following these steps, you will successfully remove the monitor's front casing, allowing you to access the internal components and make any desired modifications.
Are Your Cell Messages Being Monitored? Here's How to Tell
You may want to see also

Removing the monitor's back casing
Step 1: Remove the Front Casing
Before starting, make sure you have the necessary tools, including a screwdriver and a thin, hard tool like a paint scraper. You can keep the monitor stand attached for better access to the edges. Use your tool to pry open the gap between the front and back casings. Start at one corner and twist the tool to separate the two parts. The first corner will likely be the most challenging, and you may damage the casing in the process. As you move along the edges, you'll hear snaps as the plastic tabs holding the casing together break. Gradually pull the casing apart, and by the last corner, the entire front bezel should come off. Be cautious around any buttons or LEDs built into the bezel.
Step 2: Unscrew the Back Casing
With the front bezel removed, you can now detach the monitor stand and start working on the back casing. Begin by pushing the corner of the monitor away from the back casing. The difficulty of this step will depend on your monitor model. Use your scraper tool to push the tabs away from the monitor, moving along the edge of the casing. Be gentle and avoid applying pressure to the surface of the monitor. Work your way around the corners, and once you have two corners removed, you'll have better access to the internals.
Step 3: Expose the Button Connections
At this stage, you should be able to see the connections between the buttons and the monitor. Assess the length of the connecting wires. If they are long enough, you can proceed to remove the back casing without worrying about damaging the button board. However, if the wires are short, work slowly and cautiously to avoid sudden movements that might damage the connectors.
Step 4: Detach the Back Casing and Button Board
Once the back casing is removed, you'll have full access to the button board and LEDs. Carefully unscrew the board to detach it from the monitor. Don't worry about the plastic buttons, as you can control the monitor directly by pushing on the control board.
Step 5: Prepare for Smart Mirror Installation
At this point, your monitor is ready for installation in a smart mirror setup. You may want to cover the light-colored metal border around your monitor with black plastic tape to prevent it from being visible through the mirror. Vinyl tape is an excellent option as it is thin and flexible, allowing it to conform to the grooves of the border. Start by taping the control board to the back of the monitor to keep it secure. Then, flip the monitor over and apply the tape along the edge, making sure to cover any sign of the metal border. Aim for a slight overhang so you can wrap the tape around the bezel.
Now your monitor is fully debezeled and ready for installation in your smart mirror project!
Finding Horror Monitors in Woodpuppets: A Guide
You may want to see also

Preparing your monitor for your smart mirror
The process of removing the bezel from your monitor can be frustrating, but it is necessary to bring the monitor as close as possible to the mirror's surface. Removing the bezel will also remove the bulky outer casing, resulting in a slimmer mirror.
Every monitor is different, but the following steps should help you prepare your monitor for your smart mirror.
Tools required:
- Screwdriver
- Thin, hard tool such as a paint scraper
Removing the front casing:
- You can start by removing the stand, but it may be easier to keep it attached for better access to the monitor's edges.
- Use your tool to pry open the gap between the front and back casing. Start at one corner and try to twist the tool to separate the two parts.
- The first corner will be the hardest, and you may damage the casing while prying it apart.
- Work your way down the side of the gap, gradually pulling the casing apart.
- Once you have separated a good length of the casing, you can also use your hands to pull it apart.
- Be careful of any buttons or LEDs built into the front bezel.
Removing the back casing:
- After removing the front casing, you can now remove the monitor stand and unscrew any screws on the back.
- Take note of the button locations and start working on the opposite side to avoid damaging the connectors.
- Push the corner of the monitor away from the back casing. This may be easy or difficult depending on your monitor model.
- Use your tool to push along the edge of the back casing to release the tabs. Be careful not to apply pressure to the surface of the monitor.
- Once you have two corners removed, pull the casing back to access the buttons and their connecting wires.
- If the connecting wires are short, work slowly to avoid damaging the button board.
- After removing the back casing, unscrew the board for the buttons and LEDs.
Finishing touches:
- The hard part is over, but your monitor may now have a light-coloured metal border that will be visible behind your smart mirror.
- Use black plastic tape, preferably vinyl tape, to cover the border. This will make it invisible once installed.
- Tape the control board to the back of the monitor to keep it secure.
- Flip the monitor over and apply tape to cover the metal border, ensuring a little overhang to wrap around the bezel.
Now your monitor is ready to be installed in your smart mirror!
Asus ROG Monitors: Glossy Screens, Worth the Hype?
You may want to see also

Tips for removing the bezel without breaking it
Removing the bezel from your monitor can be a delicate process, and it's easy to accidentally damage your monitor during the process. Here are some tips to help you remove the bezel from your monitor without breaking it:
- Before you begin, make sure you have the right tools for the job. Some people recommend using a suction cup clamp tool, guitar picks, and a metal spudger. You can also use a flathead screwdriver, but be extremely careful not to let the metal touch the glass, as this will cause it to crack.
- Work slowly and carefully. Be aware of where the latches are so you can disconnect them without applying too much pressure and risking damage to the screen.
- If you're having trouble getting the bezel off, try using your fingernail to gently pry it up at the corner. Just be careful not to scratch the screen.
- If you're using a plastic tool, try coming in from the outside of the monitor instead of from over the top. This can help prevent breakage.
- For added security, use a suction cup to keep the glass from sinking back down as you work.
- If you're removing the bezel from an iPod Touch, make sure to take out the battery first.
- If the VESA mounts are part of the casing, you may need to get creative with your solution. Some people have suggested using binder clips to hold everything together.
Identifying Dead Pixels on Your Monitor: A Quick Guide
You may want to see also
Frequently asked questions
Removing the bezel from your monitor can be a challenging task. You will need a screwdriver to remove part of the casing and a thin, hard tool to pry the casing open. A paint scraper usually works well, but anything that fits between the monitor's casing will work. Start by removing the stand, then squeeze your tool into the gap between the front casing and the back casing. Twist your tool to push the two parts away from each other. You will likely damage the casing as you try to pry them apart. Work your tool down the side of the gap and gradually pull the casing apart.
Once the front casing has been removed, you can remove the monitor stand and unscrew any screws on the back. Take note of where the buttons are on your monitor and start working on the opposite side to avoid damaging the connectors. Push the corner of the monitor away from the back casing. Be careful not to apply pressure to the surface of the monitor.
Work slowly to avoid the casing popping off and damaging the button board.
Yes, there are bezel-free kits available that use optical micro-structures to refract light, bending it inward to hide the bezels. These kits are designed for gamers with multiple-monitor setups to create the appearance of one extra-large wraparound monitor.


