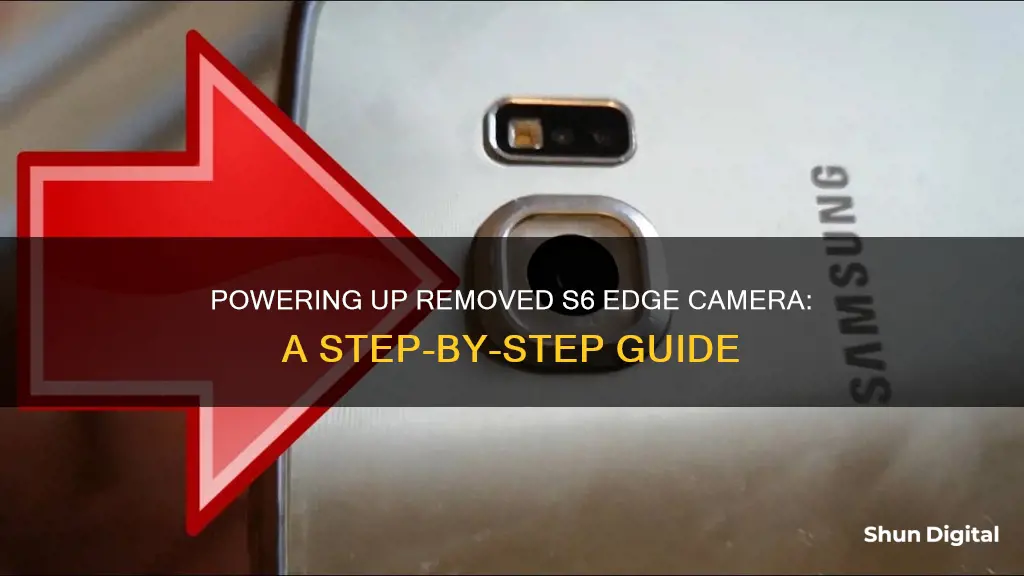
If you're looking to power up your removed camera from your Samsung Galaxy S6 Edge, you'll first need to replace it. This involves removing the rear glass, which will destroy the adhesive holding it in place. To do this, heat up the rear panel to loosen the adhesive, then use a suction cup to lift the glass and insert an opening pick to slice through the adhesive. Repeat this process for all four sides of the phone. Once the rear glass is removed, you can then lift the midframe assembly and disconnect the camera from the motherboard. To reassemble, follow these instructions in reverse and refer to a rear glass adhesive replacement guide.
What You'll Learn

Removing the rear glass
Before you begin, note that removing the rear glass will destroy the adhesive holding it in place. You will need to follow a reinstallation guide to put the rear glass back on.
You will need:
- A heat pad set to 80°C, or an iOpener
- A metal spudger
- Guitar picks, or playing cards
- Tweezers
- Isopropyl alcohol
- Lint-free cloth
- Replacement adhesive
Heating the adhesive:
- If using a heat pad, place the device backside down for 5-10 minutes.
- If using an iOpener, place it in the centre of the microwave and heat for 30 seconds. Depending on the wattage of your microwave, you may need to adjust the heating time. The iOpener should be hot, but not too hot to touch.
- If you don't have a microwave, you can heat the iOpener in a pot of boiling water for 2-3 minutes.
Separating the glass:
- Insert a metal spudger into the bottom of the device, between the back glass and the body.
- Replace the spudger with a guitar pick, using it as a wedge.
- Keep adding guitar picks around the edge of the glass until you have separated the entire perimeter.
- Carefully remove the rear glass.
Removing adhesive:
- Use tweezers to peel away any remaining adhesive from the chassis.
- Clean the adhesion areas with isopropyl alcohol (at least 90%) and a lint-free cloth. Swipe in one direction only.
You can now access the internal components of your device.
Carmel Mountain: A Cameraman's Perspective
You may want to see also

Heating the iOpener
The iOpener is a tool used to heat up the rear panel of your Samsung Galaxy S6 Edge to loosen the adhesive around the edge of the glass. This will allow you to remove the rear glass and access the internal components of your phone. Here's a detailed guide on how to heat the iOpener:
Microwave Method:
- Clean your microwave: Before proceeding, ensure that you clean your microwave, especially the bottom, to prevent any dirt or residue from sticking to the iOpener.
- Place the iOpener in the microwave: Position the iOpener in the center of the microwave plate, ensuring that it can spin freely if you have a carousel microwave.
- Heat the iOpener: Heat the iOpener in the microwave for thirty seconds. The time may vary depending on the wattage of your microwave. The goal is to heat it until it's barely too hot to touch.
- Reheat as needed: Throughout the repair procedure, you will need to reheat the iOpener as it cools down. Place it back in the microwave for additional thirty-second intervals.
- Avoid overheating: Be cautious not to overheat the iOpener. Do not heat it above 100˚C (212˚F). If it appears swollen or bursts, do not touch it, and dispose of it properly.
- Handle with care: When removing the iOpener from the microwave, hold it by one of the two flat ends to avoid the hot center. Use oven mitts if necessary to protect your hands.
Boiling Water Method (if no microwave is available):
- Boil water: Fill a pot or pan with enough water to completely submerge the iOpener. Heat the water until it reaches a boiling point.
- Submerge the iOpener: Turn off the heat and carefully place the iOpener into the boiling water. Ensure that it is fully submerged.
- Soak for 2-3 minutes: Allow the iOpener to soak in the hot water for 2-3 minutes.
- Remove and dry: Using tongs, carefully remove the heated iOpener from the water. Thoroughly dry it with a towel, holding it only by the end tabs.
- Reheating: If you need to reheat the iOpener, simply repeat the process by boiling more water and soaking the iOpener for 2-3 minutes.
Once your iOpener is heated and ready, you can proceed to use it to loosen the adhesive on the rear panel of your Samsung Galaxy S6 Edge. Remember to exercise caution when handling hot items and always follow the safety instructions provided by the manufacturer.
Lane Watch Camera: When Did Honda Introduce This Feature?
You may want to see also

Removing the rear housing
To remove the rear housing of your Samsung Galaxy S6 Edge, you will need a hairdryer, a poker card, a case opening tool, a suction cup tool, and a Phillips screwdriver. You will also need to remove the back cover and the SIM card tray.
Firstly, heat up the back cover to soften the adhesive around it. Then, insert a poker card into the edge to remove the adhesive and widen the gap. Run the poker card and case opening tool around the edges to separate the back cover.
Next, undo the 13 screws in the rear housing. Then, separate the rear housing from the LCD assembly with the help of a suction cup tool and a case opening tool. Remove the three case button flex ribbon cables, and peel off the wireless charging coil.
Finally, pry up the screen flex connector, battery flex connector, ear speaker flex connector, and proximity sensor flex connector. Turn the motherboard upside down to release the connector behind.
Disabling Camera Access on VeryFitPro: A Step-by-Step Guide
You may want to see also

Disconnecting the battery
Prepare Your Workstation:
Before starting, ensure you have discharged your battery below 25%. Lithium-ion batteries can be dangerous if accidentally punctured, so it is important to take this precaution. If your battery is swollen, do not proceed with heating methods. Instead, use a dropper or syringe to inject isopropyl alcohol around the edges of the back cover to weaken the adhesive. Always wear eye protection and exercise caution when dealing with a swollen battery.
Remove the Rear Glass:
The first step is to remove the rear glass panel. Place an iOpener or use a hair dryer, heat gun, or hot plate to heat the rear panel and loosen the adhesive. Apply a suction cup near the bottom edge of the glass and lift to create a small gap. Insert an opening pick into this gap and slide it along the bottom edge to slice through the adhesive. Repeat this process for the remaining three sides of the phone, leaving an opening pick under each edge to prevent the adhesive from resealing. Finally, remove the rear glass.
Remove the Midframe Assembly:
Remove the thirteen 3.3mm or 3.5mm Phillips #00 screws securing the midframe to the phone. Ensure you have ejected the SIM card tray before proceeding. Firmly grasp the edge of the midframe assembly and lift it up while pushing down on the battery to separate it from the phone. Be careful not to snag the midframe on the audio jack or charging port. If needed, reheat and apply an iOpener to the edges of the display to soften the adhesive.
Disconnect the Battery:
Now, you are ready to disconnect the battery. Using the flat end of a spudger, pry up and disconnect the battery connector from its socket on the motherboard. Be gentle and careful during this step to avoid damaging any components.
Once the battery is disconnected, you can proceed with other repairs or replacements, such as a camera module replacement. Remember to work in a well-ventilated area and wear protective gear when handling electronic components.
Troubleshooting D-Link Camera Visibility Issues
You may want to see also

Releasing the motherboard
To release the motherboard, you must first remove the rear glass of the Samsung Galaxy S6 Edge. Removing the rear glass will destroy the adhesive holding it in place, so you will need to follow a guide to reinstall it.
Insert a paper clip or SIM eject tool into the hole in the SIM card slot on the power button side of the phone. Press to eject the SIM card tray, being careful not to press too hard, and remove the tray from the phone.
Next, heat an iOpener in the microwave for thirty seconds. Place it in the centre of the microwave, ensuring that the plate spins freely. If your iOpener gets stuck, it may overheat and burn. Depending on the wattage of your microwave, you may need to adjust the heating time. The iOpener is ready when it is barely too hot to touch. Handle the iOpener with care as it will be very hot.
Lay the heated iOpener over the rear panel for about two minutes to loosen the adhesive around the edge of the glass. You may need to reheat and reapply the iOpener several times to get the phone warm enough. Shift the iOpener to heat the remaining section of the panel for another two minutes.
As an alternative to using a microwave, you can heat the iOpener in boiling water. Fill a pot or pan with enough water to fully submerge the iOpener. Heat the water to a boil, then turn off the heat. Place the iOpener into the hot water for 2-3 minutes, ensuring it is fully submerged. Use tongs to extract the heated iOpener from the water, then dry it thoroughly with a towel.
Once the rear glass is hot to the touch, apply a suction cup near the bottom edge of the glass. Lift on the suction cup to create a small gap underneath, then insert an opening pick into the gap. You can add a few drops of isopropyl alcohol into the gap to help weaken the adhesive. Slide the pick along the bottom edge of the phone to slice through the adhesive securing the rear glass.
Repeat the heating and cutting procedure for the remaining three sides of the phone. Leave an opening pick under each edge to prevent the adhesive from resealing. Use an opening pick to slice through any remaining adhesive, then remove the rear glass.
Now, remove the thirteen 3.3 mm Phillips #00 screws from the midframe. Take out the SIM card tray and lift the charging pad for wireless charging, which is lightly glued to the midframe. To remove the midframe, push down on the battery and the rest of the smartphone while pushing up the frame with your other hand. If the frame doesn't move, carefully insert a pick between the display and the frame, and press it upward.
Use the flat end of a spudger to disconnect the battery ribbon cable from the motherboard. Disconnect the home button ribbon cable, then use the pointed end of the spudger to disconnect the two antenna interconnect cables. Disconnect the display ribbon cable and the earpiece ribbon cable from the motherboard.
The motherboard is an ESD-sensitive component, so handle it with care. Grip the motherboard on both edges toward the top of the device and lift it up and away from the display, taking care not to put too much stress on the daughterboard ribbon cable. Disconnect the daughterboard ribbon cable from the underside of the motherboard.
See-Through Trailers: Chevy's Truck Camera System Explained
You may want to see also
Frequently asked questions
To power up a removed camera from an S6 Edge, you will need to reconnect it to the motherboard. First, pry up the connectors on the motherboard to release the camera. Then, use the flat end of a spudger to reconnect the camera connector to its socket on the motherboard.
To remove the rear glass from your S6 Edge, you will need to loosen the adhesive holding it in place. You can do this by heating the rear panel with an iOpener or a hair dryer. Once the adhesive is loosened, use a suction cup to lift the rear glass, and insert an opening pick to slice through the remaining adhesive.
To disconnect the battery from your S6 Edge, first power off the device and remove the SIM card tray. Then, undo the screws in the rear housing and pry up the screen flex connector, battery flex connector, ear speaker flex connector, and proximity sensor flex connector. Finally, gently pry up the edges of the battery to remove it from the adhesive underneath.


