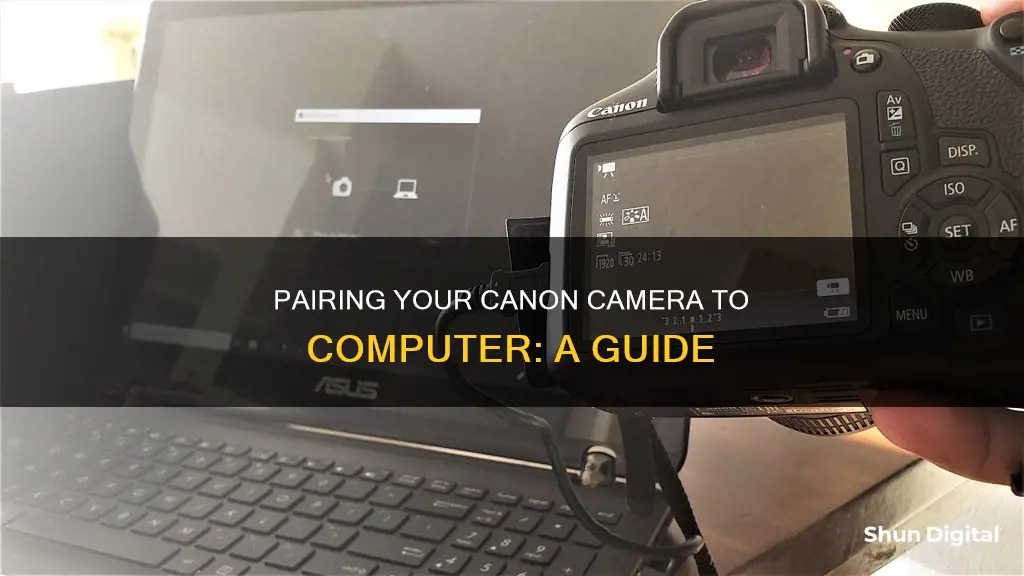
Canon's EOS Utility software allows users to transfer images from their EOS camera to their computer. This can be done via Wi-Fi or by using a USB cable. EOS Utility is included in the initial software setup for your EOS camera. This software can be used to import images from the camera, control the camera, and perform other operations.
| Characteristics | Values |
|---|---|
| Connection Type | Wi-Fi, USB Cable, Wireless File Transmitter |
| Camera Models | EOS R50, EOS R7, EOS R10, EOS REBEL T6S, EOS 760D, EOS RP |
| Software | EOS Utility, Digital Photo Professional, ImageBrowser EX |
| Operating Systems | macOS, Windows, Linux |
What You'll Learn

Connecting a Canon EOS camera to a computer via Wi-Fi
To connect your Canon EOS camera to your computer via Wi-Fi, you will need to install the latest version of EOS Utility on your computer. This will allow you to import images from your camera, control your camera, and perform other operations.
Preparing the Camera
- Ensure your camera is turned on.
- Press the button to select the relevant tab.
- Turn the dial to select 'Wi-Fi settings' and press the button.
- Turn the dial to select 'Wi-Fi' and press the button.
- Turn the dial to select 'Enable' and press the button.
- Press the button.
- Turn the dial to select 'Wi-Fi/Bluetooth connection' and press the button.
Connecting the Camera and the Computer
- Turn the dial to select 'Remote control (EOS Utility)' and press the button.
- Turn the dial to select 'Add a device to connect to' and press the button.
- Check the SSID (network name) and password. If you set the password to 'None', you will not be required to enter a password.
- On your computer's network setting screen, select the SSID. Enter the password if required.
- Turn the dial to select 'OK' and press the button.
- A message will be displayed with the last six digits of the MAC address of the camera to be connected.
- Start EOS Utility.
- In EOS Utility, click 'Pairing over Wi-Fi/LAN'. If a firewall-related message is displayed, select 'Yes'.
- Select the camera you wish to connect to, then click 'Connect'.
- Turn the dial to select 'OK' and press the button.
Your camera is now connected to your computer via Wi-Fi.
Transferring Images to Your Computer
Once the connection is established, you can use EOS Utility to transfer images from your camera to your computer. Here are the general steps:
- In the main window of EOS Utility, click 'Download Images to Computer'.
- Choose to 'Start automatic download' or 'Select and download' images.
- If you selected 'Select and download', choose the images you want to download and click 'Download'.
- Specify the save destination folder if needed.
- The images will be downloaded to your computer.
- Once the download is complete, click 'Quit' and close EOS Utility.
Playing 264 Surveillance Footage: A Step-by-Step Guide
You may want to see also

Using EOS Utility to transfer images from camera to computer
EOS Utility is a software that allows you to transfer images from your EOS camera to your computer. It is included in the initial software setup for your EOS camera and is compatible with a range of operating systems, including Windows and macOS. Using EOS Utility, you can transfer all images at once or select individual images to transfer. The transferred images are saved in the "Pictures" folder on your computer, and you can change the destination folder in the preferences.
Preparing the Camera:
- Ensure your camera is turned on.
- Display the menu screen by pressing the appropriate button.
- Navigate to the correct tab by pressing the necessary buttons or turning the dial.
- Go to "Wireless communication settings" or a similar option.
- Select "Wi-Fi settings" and then "Wi-Fi," followed by "Enable."
- Return to the previous menu and select "Nickname."
- If needed, change the nickname and press the appropriate button to confirm.
- Navigate to the option for registering a device for connection and press the necessary button.
- Note the SSID (network name) and password displayed.
Connecting the Camera to the Computer:
- On your computer's network setting screen, select the SSID from the previous step.
- Enter the password when prompted.
- On your camera, you may need to confirm the pairing by selecting "OK."
- Start the EOS Utility software on your computer. The steps to do this vary depending on your Windows or macOS version.
- In EOS Utility, click on "Pairing over Wi-Fi/LAN."
- If a firewall-related message appears, select "Yes."
- Choose the camera you want to connect to from the list and click "Connect." Identify the correct camera using the MAC address displayed on the camera's LCD monitor if multiple cameras are listed.
- On your camera, confirm the connection by selecting "OK."
Transferring Images:
- Once the connection is established and the EOS Utility main window appears, click on "Download Images to Computer."
- Choose between starting the automatic download or selecting specific images to download.
- If you select the automatic download, the process will begin immediately.
- If you choose to select specific images, a viewer window will appear, displaying the images on your memory card.
- Check the boxes of the images you want to transfer or use the appropriate buttons/keys to select multiple consecutive images.
- Click the necessary buttons to confirm your selection and start the transfer.
- The images will be downloaded to your computer and saved in the specified folder.
- Once the transfer is complete, you can close the EOS Utility software.
Please note that certain camera functions may be unavailable during the Wi-Fi connection with EOS Utility, and there may be limitations with remote shooting and image display. Additionally, movie files will take longer to transfer due to their larger file size.
Low Power Mode: Impact on Camera Quality
You may want to see also

How to prepare your camera for pairing with a computer
To prepare your camera for pairing with a computer, you will need to ensure the following:
Step 1: Prepare Necessary Items
- Check your computer's environment: Ensure your computer supports a connection to your camera via Wi-Fi.
- Install EOS Utility on your computer: This is essential software that allows your computer to communicate with your camera.
- Connect to a base station: If you are using a wireless router, ensure it is connected to your computer and acting as an access point.
Step 2: Configure Basic Camera Settings
- Power on your camera: Turn on your camera by setting the power switch to the "ON" position.
- Display the menu screen: Press the "MENU" button.
- Select "Wireless Communication Settings": Use the navigation buttons to locate and select this option.
- Enable Wi-Fi: Navigate to and select "Wi-Fi/NFC" or "Wi-Fi Function," then choose "Enable."
- Set Auto Power Off: If desired, set Auto Power Off to "Disable" to prevent the wireless LAN function from turning off when the camera powers off.
- Register a Nickname (optional): If your camera is connected to another device wirelessly, a nickname will be displayed on that device. You can set or change this nickname in the camera's settings.
- Display the "Wi-Fi Function" screen: This concludes the basic camera settings.
Step 3: Connect the Camera and Computer
- Select "Remote Control (EOS Utility)": This option may be located under a separate tab in your camera's settings.
- Initiate the connection process: Depending on your access point, you may use WPS (Wi-Fi Protected Setup) for a simplified connection or manually connect by searching for available networks.
- Select the desired connection method: If your access point supports WPS, you can use either PBC (push-button connection) mode or PIN (PIN code connection) mode. If your access point does not support WPS, you can manually detect and connect to the network.
- Follow the on-screen instructions: The specific steps will vary depending on your chosen connection method. You may need to press the WPS button on your access point, enter a PIN code, or manually select the desired network.
- Establish the connection: Once the connection is established, your camera and computer will be paired successfully.
By following these steps, you can effectively prepare your camera for pairing with a computer using the EOS Utility software.
Exploring Las Vegas: The City Under Constant Surveillance
You may want to see also

Connecting a Canon EOS camera to a computer via USB
Connecting your Canon EOS camera to a computer via USB is a straightforward process. Here's a step-by-step guide to help you through the process:
Step 1: Check Compatibility
Before you begin, ensure your computer has a Type-C USB terminal. The Canon EOS camera comes with an IFC-100U interface cable, which has Type-C terminals on both ends. If your computer doesn't have a compatible terminal, you may need to purchase an adapter.
Step 2: Prepare the Camera
- Confirm that your camera is turned off and not connected to the computer.
- Set the camera's power switch to the "ON" position.
- Access the camera's menu by pressing the "MENU" button.
- Locate and select the "Auto power off" settings. You may find this under a "Power saving" tab.
- Adjust the "Auto power off" setting to "Disable". This prevents the camera from turning off during the transfer process. Refer to your camera's instruction manual for detailed steps specific to your model if needed.
Step 3: Connect the Cable
- Open the terminal cover on your camera.
- Attach the cable protector to the interface terminal area of the camera. The cable protector helps prevent accidental disconnection and terminal damage.
- Feed the USB cable through the cable protector clamp.
- Secure the clamp in the designated location.
- Connect one end of the USB cable to the digital terminal of your camera.
Step 4: Connect to the Computer
- Plug the other end of the USB cable into your computer's USB port. The location of the USB port may vary depending on your computer model.
- Turn on your camera.
- On your computer, select "EOS Utility" from the programs. If EOS Utility doesn't open automatically, you may need to manually open it by going to the Start menu or dock and locating the EOS Utility application.
Step 5: Transfer Images
Once the connection is established and EOS Utility is open, you can begin transferring images from your camera to your computer. You can choose to transfer all images at once or select individual images.
Remember to refer to your camera's instruction manual for detailed information specific to your Canon EOS model, as there may be slight variations in the steps outlined above.
Materials Used to Make Camera Bags
You may want to see also

Using EOS Utility to remotely control your camera
EOS Utility is an application that allows you to perform a range of functions with your camera, such as downloading images, controlling your camera remotely, and registering your name in the metadata attached to images. It is included in the initial software setup for your EOS camera.
To use EOS Utility to remotely control your camera, you can connect your camera to your computer using a USB cable, Wi-Fi, or a separate Wireless File Transmitter (excluding the EOS M).
- Ensure that you have the latest version of the EOS Utility software installed on your computer.
- On your camera, select the option to connect to EOS Utility and choose to add a new device. Check the SSID (network name) and password.
- On your computer's network settings, select the same SSID and enter the password.
- Follow the on-screen instructions on your camera to establish a Wi-Fi connection.
- Once connected, open EOS Utility on your computer and click "Pairing over Wi-Fi/LAN." If a firewall message appears, select "Yes."
- Select the camera you wish to connect to from the list and click "Connect."
- Your camera is now connected to your computer via Wi-Fi, and you can operate it using EOS Utility.
Alternatively, if you are connecting via USB, follow these steps:
- Connect your camera to your computer using a USB cable.
- Turn on your camera.
- Open EOS Utility and select "Remote Shooting."
- In the capture window, set up your shooting preferences.
- Set up the Live View function by clicking on the "Live View/Movie func. set."
- Click the "Live View shoot" or "Remote Live View display" button to view the image on your computer.
- Adjust your focus using the "Remote Live View window."
- Press the shutter button to capture the image. The image will be saved directly on your computer, and you can review it using Digital Photo Professional.
With EOS Utility, you can easily transfer images, control your camera remotely, and adjust settings, all from the convenience of your computer.
Can Computer Monitors Spy on You?
You may want to see also


