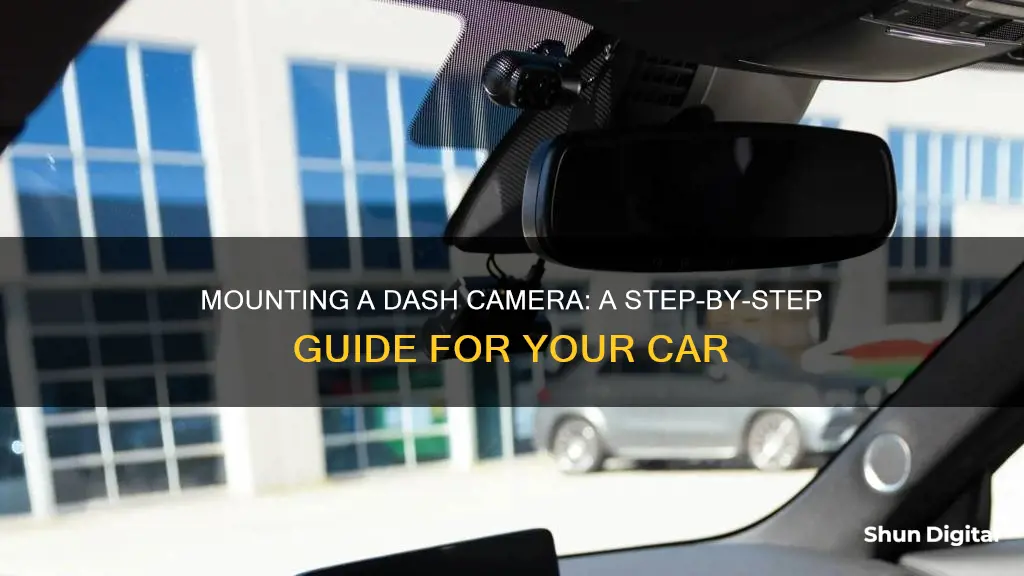
Dashcams are incredibly useful devices that can be easily set up in almost any vehicle. The ideal position for most forward-facing dashcams is mounted to the windshield, just behind the rearview mirror. However, some states have laws prohibiting this, so it is important to check local laws before installing a dashcam. There are two main options for mounting a dashcam: suction cup mounts and adhesive mounts. Suction cup mounts, such as those offered by Rexing and Z-EDGE, are very forgiving and allow for easy adjustments, while adhesive mounts, like those included with the 360 Smart Network camera, offer more permanence but can be tricky to adjust. In addition to these options, there are also various DIY solutions for mounting a camera to a car dash, such as using a sponge, a rug pad, and some weights.
| Characteristics | Values |
|---|---|
| Camera Mount Type | Suction Cup, Adhesive, Magnetic, Dashboard Base Plate, Headrest, Sponge, GoPro |
| Camera Angle | Forward-facing, Interior, Rear-facing |
| Camera Position | Behind rearview mirror, in front of driver, centre of vehicle, on dashboard, on air vent |
| Power Source | Battery, Auxiliary Power Outlet, USB, Hardwired |
What You'll Learn
![]()
Suction cup mounts
To ensure the best performance of your suction cup mount, it is important to take some precautionary measures. Firstly, clean the surface of your windshield to ensure maximum holding strength. Remove any grease or stains before attaching the suction cup. This is crucial for a secure attachment and will minimise the risk of the mount falling off.
Additionally, consider the placement of your dashcam. It is recommended to position it near the rearview mirror to avoid blocking the driver's field of vision. You can also tilt the lens slightly upwards to get a better angle, balancing the exposure and clarity of the footage.
If you live in a hot and humid area, you may need to take extra steps to prevent the suction cup from losing its grip. One solution is to reattach the mount regularly, such as every couple of weeks. Alternatively, you can try using a different type of mount that is more suitable for your climate.
There are a variety of suction cup mounts available on Amazon that are compatible with different dashcam models. These mounts often come with multiple joints to suit various car dash cameras, camcorders, and DVRs. When choosing a suction cup mount, consider the diameter of the cup to ensure it fits your dashboard or windshield.
Undoing Steps in Camera Raw: A Simple Guide
You may want to see also
![]()
Adhesive mounts
Before applying an adhesive mount, it is important to clean the surface of your windshield. Use a window cleaner to thoroughly clean the area where you will be placing the mount, and ensure that the area is completely dry before proceeding. It is also recommended to keep the area at room temperature, avoiding extreme cold or direct sunlight, to ensure the adhesive bonds properly.
Once the surface is prepared, you can apply the adhesive mount to the desired location. Press firmly and hold for about 10 seconds to secure the adhesive against the glass. This will help create a strong bond and ensure that your dashcam stays securely in place, even when driving on bumpy roads.
When positioning your dashcam, it is recommended to place it in or near the center of the front windshield. This will provide an optimal field of view, capturing footage of the road ahead and both sides of the vehicle. Try to position the dashcam near the rearview mirror to avoid obstructing the driver's field of vision and minimize distractions. Tilting the lens slightly upwards can also provide a better angle, capturing more of the road and important details such as road signs and license plates.
With proper installation and positioning, adhesive mounts provide a secure and discreet way to mount your dashcam, ensuring you capture clear and stable footage of your drive.
Understanding Camera Raw and Its Link to Lightroom
You may want to see also
![]()
Dashboard mounts
When choosing a dashboard mount, you may want to consider a clip-on mount or a rearview mirror stem mount. The former is a good option for those who want a more permanent setup, while the latter is ideal for those who want to be able to adjust their camera angle without having to worry about residue.
If you opt for a clip-on mount, you will need to use an adhesive to secure your dashcam to the dashboard. Before applying the adhesive, be sure to clean the surface of your dashboard with a window cleaner and allow it to dry completely. Once the adhesive is in place, simply press and hold your dashcam against it for about 10 seconds to ensure a strong bond.
For rearview mirror stem mounts, you will need to ensure that your dashcam is properly aligned with the mirror stem. This type of mount is also adjustable, so you can tilt the lens slightly upwards to get the best angle.
When installing your dashcam on the dashboard, it is important to avoid obstructing your line of sight while driving. Place the dashcam in the center of the dashboard, next to the rearview mirror, to keep it at eye level and avoid any interference from windshield glare. Additionally, make sure that there are no obstacles like sunshades or dots blocking the camera's view.
Game Camera Battery Life: How Long Do They Last?
You may want to see also
![]()
License plate mounts
If you're looking to mount a camera on your car's dashboard, one creative way to do it is by using a license plate mount. This method offers a dramatic outside shot and is fairly easy to set up. Here's a step-by-step guide on how to mount a camera on your car's dash using a license plate mount:
Step 1: Gather Materials
For this setup, you will need angled steel and an L-bracket. You can purchase these materials from any hardware store. Additionally, ensure that your license plate has two screw holes with a distance of 13mm between them, as this is the standard spacing for most reversing cameras.
Step 2: Prepare the License Plate Mount
The license plate mount setup is straightforward. First, attach the L-bracket to the license plate using the provided screws. The L-bracket will serve as the base for mounting your camera. Ensure that the L-bracket is securely attached to the license plate before proceeding.
Step 3: Mount Your Camera
Now, you can mount your camera onto the L-bracket. Adjust the camera angle as needed to capture the desired field of view. If your camera has adjustable tilt, make sure to set it according to your preferences. Additionally, consider the camera's height and ensure it doesn't obstruct your view or interfere with any car functions, like the tailgate.
Step 4: Connect the Camera
Once the camera is securely mounted, connect the camera's wiring harness to the front of the vehicle. This harness should terminate with an RCA connection, allowing you to plug it directly into the HD DVR rearview mirror monitor. This will enable you to view the camera feed and use the mirror as a regular rearview mirror as well.
Step 5: Test and Adjust
After completing the installation, test the camera to ensure it's functioning properly. Check the camera's field of view and make any necessary adjustments to the tilt or positioning. Additionally, if your camera has parking guidelines, you can choose to turn them on or off, depending on your preference.
By following these steps, you can effectively mount a camera on your car's dash using a license plate mount. This method provides a unique perspective for capturing footage and is a cost-effective solution compared to other mounting options. Remember to test the setup thoroughly and adjust as needed to ensure optimal performance and safety.
Focusing a Polaroid 600: Tips for Sharp Instant Photos
You may want to see also
![]()
Magnetic mounts
The Garmin Low-Profile Magnetic Mount is a highly-rated option that includes a mount, magnetic disk, and adhesive material. It is designed to minimise blockage of your line of sight while keeping your camera securely in place. This mount is compatible with several Garmin dash cam models, including the Dash Cam Mini, Mini 2, and Speak Plus Dashcam.
Another option is the Magnetic Dash Camera Adapter with a 20mm Ball Mount by Bulletpoint Mounting Solutions. This mount features a powerful magnet, alignment teeth, and strong adhesive for a secure hold. It is designed to attach to a mounting arm and is compatible with dash cameras and other small devices with a flat mounting surface.
If you're looking for a simple and inexpensive solution, you can also create your own magnetic mount. One example is a DIY GoPro mount that can be attached to the hood of your car. This option may be ideal if you're looking for a more flexible or temporary setup.
Alone: Keeping Cameras Charged for Long-Term Survival
You may want to see also
Frequently asked questions
The ideal position for a forward-facing dashcam is on the windshield, just behind the rearview mirror. This position provides a good view of the road and is less likely to obstruct the driver's view.
There are two main types of mounts for dashcams: suction cup mounts and adhesive mounts. Suction cup mounts are easier to adjust, while adhesive mounts are more permanent but may struggle in extreme temperatures.
Dashcams can be powered in several ways, including through an auxiliary power outlet, USB, or by hardwiring it directly into the fuse box. Keep in mind that you'll need to route or hide any wires.
Yes, laws regarding dashcam placement vary by state or region. Some states prohibit mounting cameras on the windshield, while others only require that the camera does not obstruct the driver's view. Be sure to review the laws in your area before installing a dashcam.