Adobe Camera Raw is a non-destructive photo editing software, meaning that it does not apply any edits to the original file but stores them as a list of instructions in a separate file. This means that you can always revert to the original image. To undo changes in Adobe Camera Raw, simply move the slider back to its default position. You can also use the Undo command by pressing Command + Z on Mac or Control + Z on Windows. If you want to undo multiple steps, you can use the Multiple Undo command by pressing Command + Option + Z on Mac or Control + Alt + Z on Windows.
| Characteristics | Values |
|---|---|
| Undo a single step | CMD Z |
| Undo multiple steps | CMD + Z (Mac) / Control + Z (Win) |
| Redo a single step | Shift + CMD Z |
| Redo multiple steps | Shift + Control + Z (Win) / Shift + CMD Z (Mac) |
| Reset all sliders in a panel | Option + Click Reset (Panel Name) (Mac) / Alt + Click Reset (Panel Name) (Win) |
| Reset all slider adjustments made to an image | Click the More icon and choose between Reset to Open and Reset to Default |
| Reset the crop and manual perspective adjustments | Option + Click (Mac) / Alt + Click (Win) |
What You'll Learn
- Use the 'Undo' command: Control + Z (Win) / Command + Z (Mac)
- Use the 'Redo' command: Shift + Control + Z (Win) / Shift + Command + Z (Mac)
- Reset sliders in a panel: Hold Option (Mac) / Alt (Win) and click Reset
- Reset all slider adjustments: Click the three dots and choose Reset to Open or Reset to Default
- Reset all changes: Revert to the last saved version
![]()
Use the 'Undo' command: Control + Z (Win) / Command + Z (Mac)
To undo steps in Camera Raw, you can use the Undo command: Control + Z (Win) / Command + Z (Mac). This command will undo the last change made to your image in Camera Raw. If you need to undo multiple steps, you can continue using this command, and it will undo your changes one by one in reverse order.
The Undo command is a quick and easy way to correct mistakes or experiment with different edits in Camera Raw. It is a non-destructive editing tool, meaning it does not apply any changes directly to the original file. Instead, it stores your edits as a list of instructions in a separate file, allowing you to adjust and fine-tune your image without permanently altering the original.
In addition to the Undo command, there are also Redo commands to redo changes: Control + Shift + Z (Win) / Command + Shift + Z (Mac). These Redo commands can be used to reapply changes that were previously undone.
Using these simple keyboard shortcuts, you can easily navigate through your editing history, making adjustments and corrections as needed without fear of permanently altering your original image.
Monthly Fees for Cellular Cameras: What's the Deal?
You may want to see also
![]()
Use the 'Redo' command: Shift + Control + Z (Win) / Shift + Command + Z (Mac)
To redo an action in Camera Raw, use the Redo command: Shift + Control + Z (Win) / Shift + Command + Z (Mac). This keyboard shortcut is a standard feature on most modern software applications and operating systems, providing a quick and convenient way to reverse previous undo actions.
On Windows, pressing Ctrl + Z performs an undo action, and adding the Shift key to this combination activates the redo function. Similarly, on Mac systems, the Command + Z shortcut is typically used for undo, and including the Shift key in this sequence triggers the redo command.
While the Redo command is a widely adopted standard, some software applications may use alternative keyboard shortcuts or lack support for it altogether. In such cases, you may need to explore other options to enable the desired functionality. For instance, you could consider using third-party tools like AutoHotKey, which allow you to customise keyboard shortcuts by creating scripts that remap key combinations.
By utilising tools like AutoHotKey or similar solutions, you can tailor your computer's behaviour to match your preferred workflow, ensuring that you can efficiently redo actions in various software applications, including Camera Raw.
Polaroid Land Camera: Battery Power for Instant Photos
You may want to see also
![]()
Reset sliders in a panel: Hold Option (Mac) / Alt (Win) and click Reset
Resetting sliders in a panel is a straightforward process in Lightroom. First, hold down the Option key if you're on a Mac or the Alt key if you're on a Windows computer. With the key held down, click the "Reset" command, and that's it! This action will return all the sliders below it to their default settings. This shortcut is handy when you need to reset multiple sliders simultaneously, saving you time and effort.
This method works in all the right-hand panels of the Develop module except for the Tone Curve panel. So, whether you're working with the Basic Panel, Detail Panel, or any other panel in Lightroom, you can conveniently reset the sliders by holding the Option/Alt key and clicking "Reset."
Additionally, it's worth noting that the Alt/Option key has various other functions in Lightroom. For example, it can be used to reveal the "Set Default" button in the Develop module, allowing you to set default settings for images captured with a specific camera. It also has applications in the Tone Curve panel, where holding it down while making adjustments slows the mouse drag speed, enabling you to make finer changes.
Charging GH5 Batteries: In-Camera Method
You may want to see also
![]()
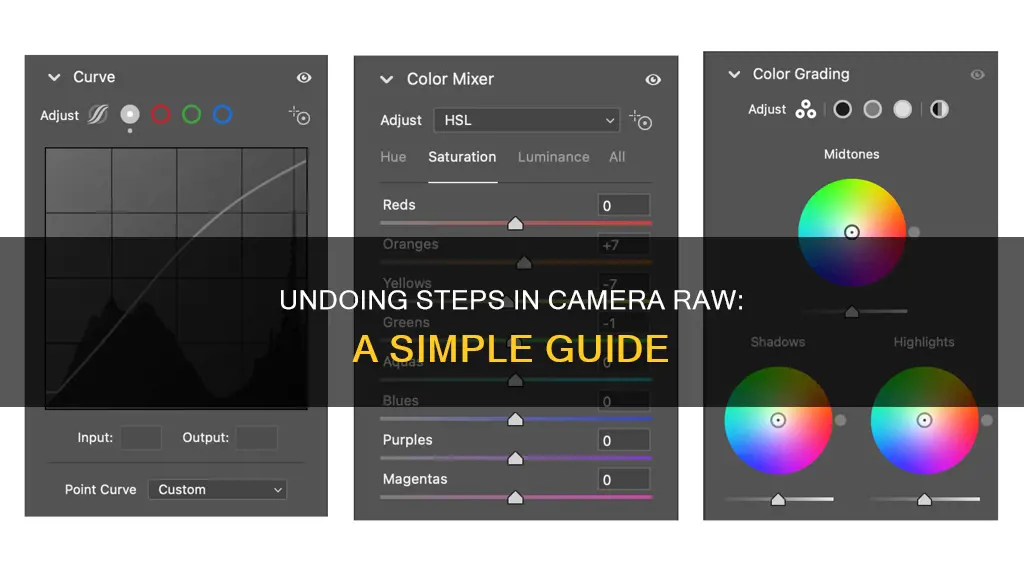
Reset all slider adjustments: Click the three dots and choose Reset to Open or Reset to Default
Resetting all slider adjustments in Camera Raw is a straightforward process. Simply click on the three dots, also known as the “More” button, located on the toolbar at the top-right corner of the Camera Raw interface. From the options that appear, select "Reset to Open" or "Reset to Default".
The "Reset to Open" option will reset all adjustments to their values when the image was first opened in Camera Raw. On the other hand, the "Reset to Default" option will reset all adjustments to their default values, reverting the image to its original state before any modifications were made.
It is important to note that if you are reopening a raw capture that was previously modified in Camera Raw, the standard "Reset" button will not work as intended. This is because the "Reset" button resets adjustments to their values when the image was last opened, not to the Camera Raw defaults. In such cases, using the "Reset to Default" option from the three dots menu is the best way to reset all slider adjustments to their original settings.
XA20 Camera Battery Life: How Long Does It Last?
You may want to see also
![]()
Reset all changes: Revert to the last saved version
Resetting all changes and reverting to the last saved version in Camera Raw is a straightforward process. Here's a detailed guide:
- Identify the Right-Hand Panels: Camera Raw has several right-hand panels, including Basic, Curve, Detail, Optics, and more. These panels contain various editing tools and adjustments that can be applied to your image. To reset all changes, you'll need to access the options within these panels.
- Access the Panel Menu: On each of the right-hand panels, there is a small pop-up menu or icon located at the top right corner of the panel. Click on this menu to access additional options.
- Select "Camera Raw Defaults": By choosing "Camera Raw Defaults" from the panel menu, you will reset all the adjustments made to that particular panel and revert the settings to their original defaults. This action will undo any changes you've made within that specific panel.
- Repeat for All Panels: To reset all changes in Camera Raw, you will need to select "Camera Raw Defaults" for each of the panels individually. This ensures that all adjustments across the different panels are reverted to their default settings.
- Alternative Method – Reset All Sliders: If you have made adjustments using sliders within the panels, there is another way to reset them all at once. Hold the "Option" key on Mac or the "Alt" key on Windows and click the "Reset" button at the bottom of the panel. This will reset all sliders within that particular panel to their default positions. Repeat this step for each panel to reset all slider adjustments.
- Clear Crop and Other Tools: If you have applied tools such as cropping, straightening, or spot removal, you can clear these adjustments as well. For example, to clear a crop, select the "Crop Tool" and then right-click on the image and choose "Clear Crop." This will remove the crop from your image. Repeat similar steps for other tools to clear their adjustments.
- Cancel Changes: If you have made changes but haven't saved or applied them yet, you can simply cancel out of Camera Raw without saving. This will discard all the adjustments made during that editing session.
- Delete XMP Files: Camera Raw stores adjustments in XMP sidecar files. If you want to completely remove all changes made to a RAW file, you can locate and delete the associated XMP files. This will remove any adjustments applied to the RAW file, but be sure to do this before opening the file in Camera Raw again.
By following these steps, you can effectively reset all changes and revert to the last saved version of your image in Camera Raw. Remember that these methods will undo all adjustments made within Camera Raw, so be sure to save your work if you want to keep any specific edits.
Charging the Eyoyo Underwater Camera: A Step-by-Step Guide
You may want to see also
Frequently asked questions
You can undo multiple steps in your Photoshop document using Control + Z (Win) / Command + Z (Mac).
Choose Edit > Redo or use the keyboard shortcut Shift + Control + Z (Win) / Shift + Command + Z (Mac).
Choose File > Revert.
Use the History Brush tool to paint with the selected state or snapshot on the History panel.
Click the More icon (the three dots) and choose between Reset to Open and Reset to Default.