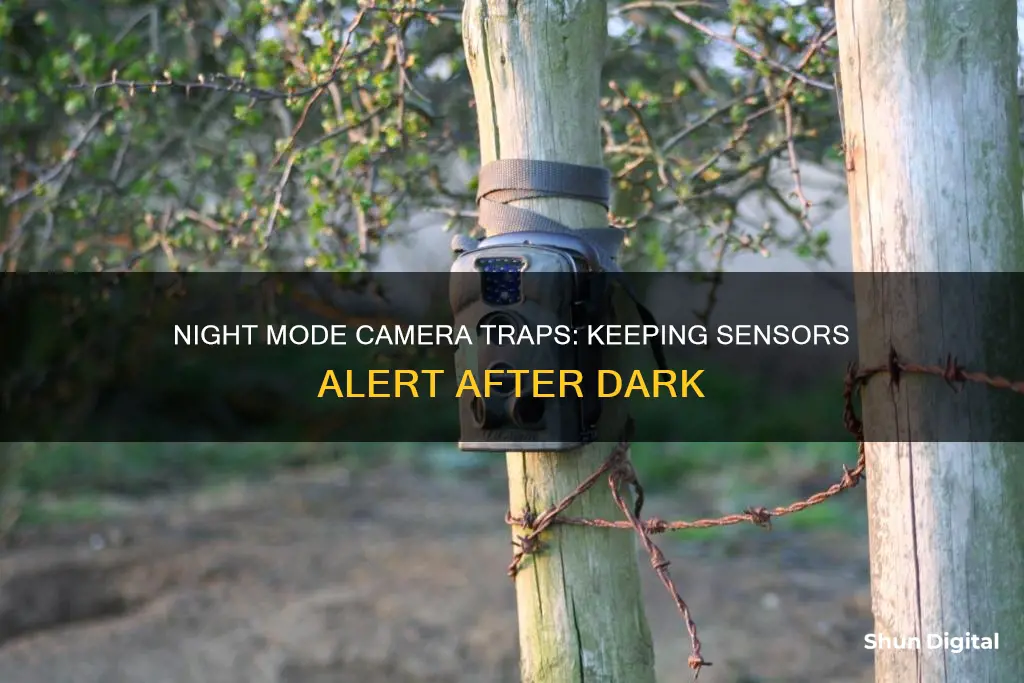
Camera traps are devices used to photograph wildlife autonomously and are a great way to capture up-close photos of animals. They are equipped with motion sensors that trigger the camera when an animal walks in front of it. While camera traps are a great way to photograph wildlife, they can be tricky to set up. One of the challenges is ensuring that the camera trap works effectively at night. Here are some tips to keep your camera trap in night mode:
- Use a camera trap with night vision or thermal imaging capabilities. These features will enable the camera to capture high-quality images even in low-light or no-light conditions.
- Set up your camera trap in an area with minimal waving vegetation to avoid constant triggering.
- Use artificial lighting, such as flash or infrared triggers, to illuminate the scene and ensure well-exposed photos.
- Adjust camera settings such as shutter speed, aperture, and ISO to optimise night-time photography.
- Consider using a DSLR camera with a wide-angle lens to improve image quality and protect the lens from water droplets.
- Protect your camera trap from the elements using waterproof casings or housing.
- Ensure your camera trap is well-built and sealed to prevent damage from weather, humidity, and animals.
| Characteristics | Values |
|---|---|
| Lighting | Natural light or artificial light (flash) |
| Camera Placement | Along the edges of flower beds, on a tree, washing line pole or wooden stake, 1-2 metres away from the subject |
| Camera Angle | Aimed at a clear area, free of waving vegetation |
| Camera Settings | Manual exposure mode, shutter speed: 1/200s, aperture: f/8 or f/11, ISO: auto, single shot mode, manual focus |
| Flash Output | Set manually to correctly expose the scene at night |
| Interval Between Triggers | 4 seconds |
| Memory Card | 8GB or above |
| Power Source | Powerful batteries or standard batteries |
| Weatherproofing | Weather-proof duct tape, waterproof casings, Peli 1300 case |
| Sensor Type | PIR (passive infrared) or AIR (active infrared) |
| Sensor Placement | Away from the camera, pointing across the scene |
| Wired or Wireless | Wireless systems are less fiddly and more expensive, wired systems are cheaper and have longer battery life |
| Battery Type | AA, AAA, D-cell, or rechargeable |
| Extras | RainX, silicone bag, Camtraptions PIR v3 sensor |
What You'll Learn
- Use a passive infrared (PIR) sensor to detect motion in front of the camera
- Set up the camera trap in an area with high wildlife activity, such as near sources of water and food or animal trails
- Use a wide-angle lens to get close-up photos and capture the animal's environment
- Seal the camera trap with weather-proof duct tape to keep out moisture and wildlife
- Set the camera to manual exposure mode with a fast shutter speed and a high aperture to ensure well-exposed photos at night

Use a passive infrared (PIR) sensor to detect motion in front of the camera
A passive infrared (PIR) sensor is an electronic sensor that measures infrared (IR) light radiating from objects in its field of view. PIR sensors are most often used in motion detectors, such as burglar alarms and automatic lighting systems. They are also commonly used in camera traps to detect animals and trigger the camera to capture an image or start recording.
PIR sensors work by detecting changes in the amount of infrared radiation impinging upon them. When an object, such as an animal, passes in front of the sensor, the temperature at that point in the sensor's field of view will rise, causing a change in the incoming infrared radiation. This change is converted into a change in output voltage, which triggers the detection.
PIR sensors have two main components: the Fresnel lens and the pyroelectric sensor. The Fresnel lens focuses incoming electromagnetic radiation onto the pyroelectric sensor, which then triggers the camera. The Fresnel lens is typically made of plastic and has multiple facets moulded into it to focus the infrared energy onto the sensor.
When using a PIR sensor for a camera trap, it is important to consider the placement of the sensor to minimise false triggers. The sensor should be mounted on a sturdy pole or tree with a clear line of sight and ideally sheltered from direct sunlight. It is also recommended to use a tube or some other type of "blinder" to narrow the field of view and ensure that only movement directly in front of the sensor triggers the camera.
PIR sensors are a reliable and simple way to detect motion in front of a camera trap, making them a popular choice for photographers looking to capture images of wildlife or other elusive subjects. With their low power consumption and easy setup, PIR sensors can be left unattended for long periods, increasing the chances of capturing that perfect shot.
Outdoor Camera Options: Battery-Powered Security Solutions
You may want to see also

Set up the camera trap in an area with high wildlife activity, such as near sources of water and food or animal trails
Setting up your camera trap in an area with high wildlife activity is crucial for capturing those candid wildlife moments. Here are some detailed tips to help you set up your camera trap effectively:
Firstly, look for areas near sources of water and food. Animals are naturally drawn to these locations, making them ideal spots to capture a range of species. For example, setting up your camera near a watering hole or a river can increase your chances of spotting various creatures that come to drink or bathe. Similarly, positioning your trap near a feeding station or a patch of lush vegetation can attract herbivores and other animals seeking a meal.
Another strategy is to identify animal trails and migration routes. These paths are often well-worn and can be found between feeding and watering areas or connecting different habitats. Setting up your camera trap along these routes increases the likelihood of capturing animals in their natural habitat as they move from one place to another. Look for signs such as footprints, droppings, or disturbed vegetation to help you identify these trails.
When placing your camera trap, consider the height and angle. For smaller creatures like hedgehogs, place the camera close to the ground and point it towards a feeding station or water bowl. This will ensure you capture their activities without missing any details. For larger animals, you may need to adjust the height accordingly to ensure the sensor detects their movement effectively.
Clear a space in front of the camera to ensure nothing obstructs the view. Avoid areas with waving vegetation, as this can constantly trigger the camera, filling up your storage space with unnecessary footage. Aim the camera at a clear area along the edges of vegetation or open spaces near the sources of water or food.
If you're setting up multiple camera traps, consider placing them in a network to maximise your chances of capturing wildlife activity. This way, you can capture different angles or cover a larger area. Just ensure that the cameras are placed at optimal positions and heights, depending on the species you're targeting.
By following these tips and choosing locations with high wildlife activity, you'll be able to capture incredible footage and gain valuable insights into the behaviour and habits of various species.
Charging Cameras on 'Alone': Powering the Ultimate Survival Show
You may want to see also

Use a wide-angle lens to get close-up photos and capture the animal's environment
Using a wide-angle lens is a great way to get close-up photos of animals and capture their environment. This technique can add a unique perspective to your wildlife photography and create interesting contrasts to typical wildlife shots. Here are some tips to help you get the most out of using a wide-angle lens for camera trapping at night:
- Choose the Right Lens: Select a wide-angle lens that suits your camera and the type of animal you want to photograph. For larger animals, a lens around 12-16mm will work well, while for smaller creatures like lizards or frogs, you may need to get as close as 5 cm. Consider lenses like the Laowa 15mm/ 4 Macro 1:1, Sigma 15mm/ 2.8 Fisheye, or Tokina 10-17 mm F/ 3.5-4.5 AT-X.
- Get Close to the Animal: With a wide-angle lens, you need to be very close to the animal. For larger animals, position yourself about 20-30 cm from the front of the lens, and for small insects, you may need to be almost touching them.
- Focus Manually: Set your camera to manual focus mode and estimate where the animal will be detected by your sensor. Adjust the focus ring accordingly to ensure proper focus.
- Use a Remote Release System: Since animals may be startled by a camera pointed directly at them, consider using a wireless remote release system. This allows you to trigger the shutter from a distance, reducing the chances of scaring the animal away.
- Set Up a Feeding Station: To attract animals and get them used to the camera, set up a feeding station with healthy and approved foods. This will encourage them to approach the camera and increase your chances of capturing close-up shots.
- Use Aperture Priority Mode: Set your camera to aperture priority mode, allowing you to manually select the aperture while the camera determines the shutter speed. Choose a small f-stop number to let in more light and force the camera to select a fast shutter speed, freezing the motion of moving animals.
- Choose the Right Aperture: Opt for an aperture setting like f/8 or f/11 to give you plenty of depth of field and ensure your images are well-exposed.
- Consider Lighting and Flash: At night, your camera will automatically select a higher ISO, and you can use low-powered flashes to illuminate the scene. During the day, the camera will choose a lower ISO, and the flashes will provide fill-light.
- Check and Adjust Settings: Regularly check your camera trap to ensure it is functioning correctly and adjust settings as needed. Review the images and videos captured to determine if any changes are required.
Updating Your Camera Raw D500: A Step-by-Step Guide
You may want to see also

Seal the camera trap with weather-proof duct tape to keep out moisture and wildlife
Sealing your camera trap with weather-proof duct tape is an essential step in ensuring your equipment remains in good working order. Not only does duct tape act as a protective barrier, keeping out moisture and wildlife, but it also helps to camouflage your camera, ensuring that it blends seamlessly into the natural environment.
When selecting a duct tape for your camera trap, opt for a weather-resistant variety that can withstand extreme conditions. Look for tapes designed for outdoor use, as these will be more durable and have a stronger adhesive. For example, the Gorilla All Weather Outdoor Waterproof Duct Tape is a highly-rated option that can withstand hot and cold temperatures and resist drying, cracking, and peeling caused by weather conditions.
Before applying the duct tape, ensure that the camera trap's surface is clean and dry. This will maximize the tape's adhesion and ensure its longevity. Take care to seal any holes or crevices that could allow ants or other small creatures to enter and damage the internal wires and connections.
When applying the duct tape, use smooth, continuous strips, ensuring that there are no gaps or overlaps that could allow moisture to penetrate. Pay particular attention to the areas around connectors, cables, and other elements, as these are often vulnerable to moisture ingress. Make sure that the tape is not under unnecessary tension, as this could cause it to peel or become detached over time.
By properly sealing your camera trap with weather-proof duct tape, you can be confident that your equipment will remain protected from the elements and unwanted wildlife intruders. This will ensure that your camera trap continues to function effectively, capturing valuable images and videos of wildlife without any disturbances.
VTech Kidizoom Camera: What's in the Box?
You may want to see also

Set the camera to manual exposure mode with a fast shutter speed and a high aperture to ensure well-exposed photos at night
Setting up a camera trap can be a tricky process, but it's a great way to capture wildlife in your surroundings. To ensure well-exposed photos at night, you must set your camera to manual exposure mode, adjust the shutter speed and aperture, and consider other factors like ISO and flash output.
Manual exposure mode gives you full control over your camera settings, allowing you to adjust the shutter speed, aperture, and ISO independently. This mode is ideal when you want complete control over your camera's exposure settings and are working in consistent lighting conditions.
First, let's talk about shutter speed. The shutter speed refers to how long the shutter stays open, allowing light to hit the camera sensor. A faster shutter speed means a shorter exposure time, and it freezes motion, resulting in sharper images. For camera traps, a shutter speed of 1/200s is a good starting point. It's fast enough to capture motion without causing issues with flash synchronisation.
Next, we'll discuss aperture. The aperture is the opening in the lens that controls the amount of light entering the camera. It is measured in f-stops, with lower f-stop values corresponding to larger apertures. For camera traps, an aperture of f/8 or f/11 is recommended as it provides a good depth of field, ensuring that objects at different distances are in focus.
When setting up your camera trap, it's crucial to consider the trade-offs between shutter speed and aperture. Increasing the shutter speed will result in a darker image, so you may need to compensate by increasing the aperture (decreasing the f-stop value) to let in more light. Conversely, if you want a shallower depth of field, you can decrease the aperture and increase the shutter speed.
Additionally, ISO plays a vital role in determining image exposure. ISO controls the camera's sensitivity to light, with higher ISO values resulting in brighter images. However, higher ISO speeds also introduce more noise or grain into your images, so it's generally recommended to keep the ISO as low as possible while still achieving the desired exposure.
Finally, don't forget to set the flash output manually. Trial and error will help you find the right setting to ensure your scene is correctly exposed at night.
By following these guidelines and making adjustments based on your specific camera and environment, you'll be able to capture well-exposed photos with your camera trap at night.
Olympus Camera Battery: How Long Does It Last?
You may want to see also
Frequently asked questions
Camera traps are triggered by motion sensors, which start the shooting process when an object enters the device's field of view. The basic components of a camera trap are the flash, the camera, and the motion sensor. The flash lights up the subject when triggered at night, and the camera captures the image when motion is detected.
Set your camera to manual exposure mode. Set the shutter to 1/200s, the aperture to f/8 or f/11, and the ISO to auto. Use single-shot mode to avoid strobe-flashing nocturnal creatures. Set the flash output manually and use the trial and error approach to ensure the scene is correctly exposed at night.
Almost any DSLR can be used for camera trapping. Avoid mirrorless cameras as they tend to have poorer battery life. A second-hand Canon 5D Mark II with a battery grip can be left in the field for a month or more without running out of battery. A cheaper option is an old Canon 70D or Nikon equivalent.
A wide-angle lens is ideal for camera trapping as it allows you to get close to the subject and capture amazing, photojournalistic-style photos. A 24mm Canon 2.8 lens is a good option as it is relatively sharp and small, preventing water droplets from getting on the lens.


