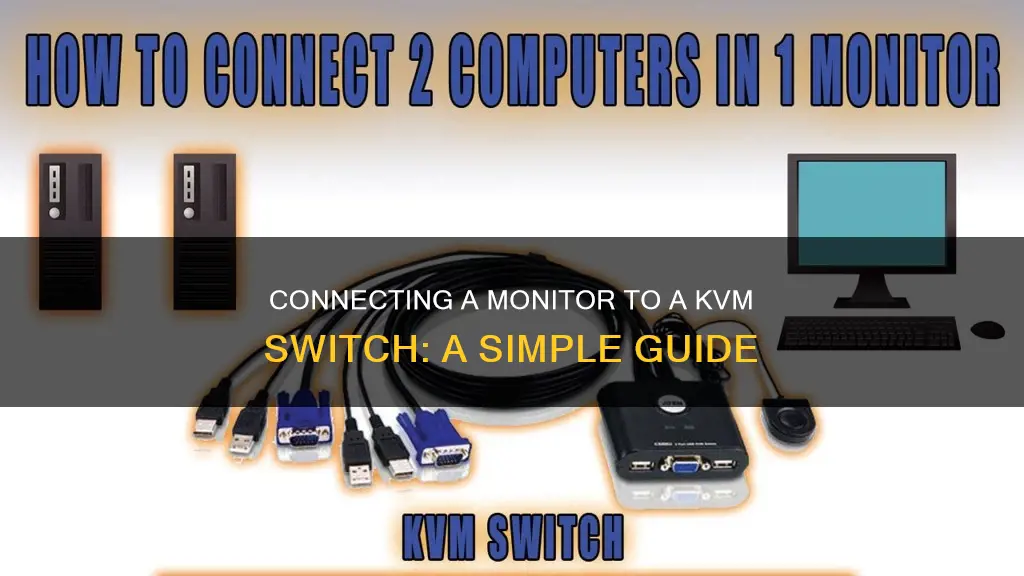
A KVM (Keyboard, Video, Mouse) switch is a device that allows users to control multiple computers with just one set of peripherals. This means that you can use one monitor, keyboard, and mouse for several computers, switching between them without having to unplug and plug in cables. This is especially useful for those working from home who may have a home computer and a work laptop, or for IT programmers, graphic designers, and gamers who need to streamline their workflow and enhance productivity.
| Characteristics | Values |
|---|---|
| Purpose | Control multiple computers with one set of peripherals |
| Devices | Keyboard, video, mouse, monitor |
| Connection | HDMI, DisplayPort, USB-A, USB-B, USB-C, VGA, DVI, Thunderbolt |
| Benefits | Space-saving, cost-efficient, convenient, efficient |
| Setup | Choose the right KVM switch, prepare cables and adapters, connect devices, power on, test |
What You'll Learn

Choosing the right KVM switch
- Number of computers and users: Determine how many computers you want to connect to the KVM switch. Also, consider the number of users who will need access to these computers simultaneously. Some KVM switches support a few computers, while others can handle dozens or even thousands of servers.
- Monitor configuration: Decide whether you need a single or multi-monitor setup. Some KVM switches support single, dual, or even triple-monitor configurations. If you require more monitors, look for KVM switches that can be cascaded or consider KVM-Over-IP solutions for an unlimited number of monitors.
- Video type and resolution: Check the video connector types your setup requires (VGA, DVI, HDMI, DisplayPort, etc.). Ensure the KVM switch is compatible with your monitor's native inputs to avoid the need for adapters. Also, consider the resolution and refresh rate your monitor supports, and choose a KVM switch that can handle those specifications.
- Peripheral support: Determine what additional peripherals (keyboard, mouse, printer, webcam, speakers, etc.) you want to connect to the KVM switch. Ensure the KVM switch has enough USB ports to accommodate all your peripheral devices. Some KVM switches also offer extra features like USB peripheral device hubs, allowing you to connect devices like flash drives and graphics tablets.
- Distance requirements: Consider the distance between the users and the computers. If you need to place the computers and users far apart, look for KVM switches that support longer connection distances, such as CatX (Cat5/6/7) KVM switches or KVM-over-IP solutions.
- Security and authentication: If you are handling sensitive information or working in a government or military environment, ensure you choose a KVM switch that meets the necessary security standards, such as NIAP-certified Secure KVM Switches.
- Special features: Depending on your specific needs, you may want to look for KVM switches with additional features. For example, some KVM switches offer remote power management functionality, support for serial devices, or audio support.
- Compatibility: Ensure the KVM switch is compatible with your computer's ports and operating system. Check that the KVM switch supports the types of cables (HDMI, VGA, DisplayPort, USB-A, USB-C, etc.) used by your computers and peripherals.
By carefully considering these factors, you can choose the right KVM switch that meets your specific requirements and ensures a smooth setup process.
Cloning Monitors: Performance Impact and Optimization Strategies
You may want to see also

Preparing the cables, adapters, and hubs
Before you start setting up your KVM switch, it's important to ensure you have the right cables, adapters, and hubs ready. The specific requirements will depend on the type of KVM switch you've chosen and the devices you want to connect. Here's a detailed guide to help you prepare:
Firstly, confirm the ports available on your laptop, desktop, and monitors. Common ports include HDMI, DisplayPort (DP), USB-A, and USB-C. Check that the KVM switch ports are compatible with your devices. If you find any incompatibilities, you may need to purchase adapters or a docking station to make them work together.
For example, if you have a laptop with a USB-C connector, you may need an adapter to convert the signal to HDMI if your KVM switch only has HDMI ports. Similarly, if your KVM switch doesn't come with HDMI cables, you may need to purchase high-quality cables that meet your setup's standards, especially if you're using HDMI 2.0 devices. Using an HDMI 1.4 cable with HDMI 2.0 devices will result in lower image quality.
Additionally, if you're connecting a desktop computer, ensure your graphics card has enough output ports. You may need to connect multiple HDMI or DisplayPort cables from your graphics card to the KVM switch.
Once you have all the necessary cables, adapters, and hubs, you can start connecting your devices to the KVM switch.
Adjusting Screen Display: Restoring Font Size on Your Monitor
You may want to see also

Connecting to computing devices
For example, if you have a Type-C laptop running Windows OS, connect the laptop to the Input port marked 'A' of the KVM with a USB-C cable to enable MST mode. Alternatively, connect two USB-C cables to the inputs 'A' and 'B' or only the input ports marked 'B' to disable MST mode. If you are using a MacBook, connect your laptop to the Input 'A' and 'B' ports of the KVM with two USB-C cables.
If you are using a desktop PC, connect it with a DisplayPort cable and an HDMI cable. If your PC has a graphics card with multiple output ports, use two HDMI ports on the graphics card, connecting each to the KVM with an HDMI cable.
For a work laptop with only a single HDMI output port and a USB-C connector, you will need to buy an adapter to convert the laptop's USB-C to HDMI. Then, connect the adapter to the KVM using an HDMI cable.
Once you have connected all your computing devices to the KVM switch, you can move on to the next step of connecting your USB peripherals.
LCD Monitors at Madison Square Garden: A Technical Upgrade
You may want to see also

Connecting to USB peripherals
Step 1: Choose the Right KVM Switch
Before connecting your USB peripherals, it's important to select a KVM switch that suits your specific needs. Consider the number of computers you want to connect, the distance between them, and the type of peripherals you'll be using. Additionally, ensure that the KVM switch is compatible with your computer's ports and operating system. Some KVM switches offer extra features like additional USB ports, so you can connect devices like webcams or external microphones.
Step 2: Gather Necessary Equipment
Once you've chosen the right KVM switch, gather all the required cables, adapters, and hubs. Ensure that you have the appropriate cables to connect your computing devices, monitors, and USB peripherals to the KVM switch. If you encounter connector type incompatibilities, you may need to purchase adapters or a docking station. Additionally, some KVM switches may not come with certain cables, such as HDMI cables, so you'll need to acquire those separately.
Step 3: Connect USB Peripherals
When connecting your USB peripherals, follow these guidelines:
- Keyboard and Mouse: Connect your keyboard to the USB 1.1 port or the designated port for keyboard connections. If you're using a high-power USB device, such as a 4K webcam, connect it to a USB 3.0 port if available. Using a USB port with a higher voltage can also be beneficial.
- Other USB Devices: If you have additional USB peripherals like printers, external storage devices, or headsets, connect them to the available USB ports on the KVM switch. Ensure you reserve enough ports for your keyboard and mouse.
- Power Management: Some USB peripherals, especially those with higher power requirements, may need to be connected directly to a power source rather than drawing power through the KVM switch.
Step 4: Test the Setup
After connecting your USB peripherals, it's important to test the setup to ensure everything is functioning correctly. Power on the KVM switch and connected devices, then use the KVM switch to switch between computers. Verify that your keyboard, mouse, and other USB peripherals are responding as expected on each computer.
By following these steps, you'll be able to successfully connect your USB peripherals to the KVM switch, allowing seamless control of multiple computers with a single set of peripherals.
Blind Spot Monitors: DIY Installation and Setup Guide
You may want to see also

Powering up the KVM switch
Once you've chosen the right KVM switch for your needs and prepared the necessary cables, adapters, and hubs, it's time to power up the KVM switch.
First, connect the power cable to the KVM switch. Make sure that the power adapter matches your power outlet and that the voltage aligns with local electrical standards. Then, plug the adapter into the power outlet and connect it to the KVM switch's power port. Check that all connections are secure and correct.
When you power on the KVM switch, observe the indicator lights or displays. These will show the power status and operational state of the device. Some models may also include self-check programs or boot sequences to ensure that all connected devices are correctly recognised and configured.
After powering up, you can start using the KVM switch to manage multiple computers with just one set of peripherals.
Choosing the Right Desktop Monitor: Understanding Size and Dimensions
You may want to see also
Frequently asked questions
First, choose the right KVM switch for your needs, ensuring it is compatible with your computer's ports and operating system. Next, prepare the necessary cables, adapters, and hubs. Then, connect your computing devices, monitors, and peripherals to the KVM switch. Finally, power up the KVM switch and test it to make sure everything is working correctly.
KVM stands for Keyboard, Video, and Mouse. A KVM switch is a hardware device that lets users control multiple computers with one or more sets of peripherals, keyboards, monitors, and mice. This technology offers different methods of connecting to computers and reduces the need for multiple keyboards and mice on a desk.
KVM switches bring several advantages, including space-saving, cost efficiency, convenience, and efficiency. They reduce the need for additional peripherals, streamline workflows, and boost productivity by allowing seamless transitions between tasks on different devices.


