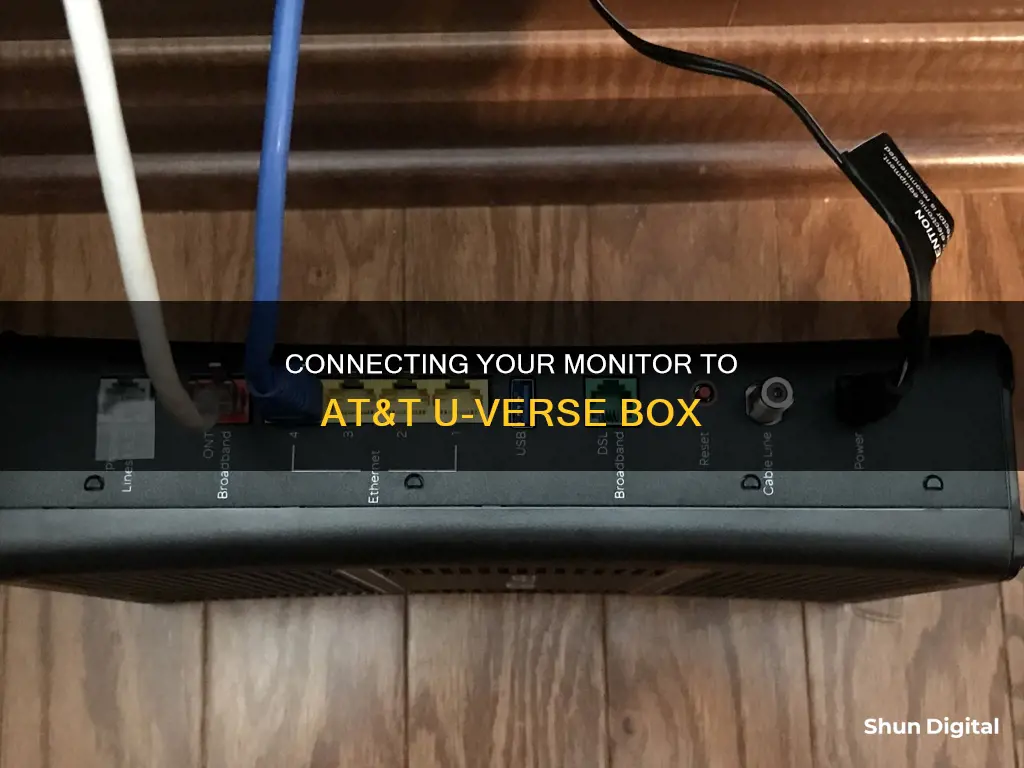
AT&T U-verse is a fiber optic phone, internet, and cable TV service. The process of setting up your monitor with an AT&T U-verse box depends on the type of service you want to connect. You will also need to schedule an appointment with an AT&T technician to install the necessary cable wiring. The AT&T U-verse box can be connected to your monitor using an HDMI cable, a coaxial cable, or a wireless connection.
How to hook up a monitor to an AT&T U-verse box
| Characteristics | Values |
|---|---|
| Cable type | HDMI, coaxial, component, DVI, or AV |
| Cable connection | Connect the cable to the 'TO TV' port on the U-verse box and the corresponding port on the monitor |
| Power | Plug the U-verse box into a power outlet |
| TV settings | Change the TV channel to 3 or change the input to the correct port type |
| U-verse box setup | Press 'OK' on the U-verse box, then press 'AT&T' followed by 'OK' |
| Resolution | Set the TV screen resolution to 1080i or 720p |
What You'll Learn

Connecting with an HDMI cable
Connecting your monitor to your AT&T U-verse box using an HDMI cable is a straightforward process. Here is a detailed guide to help you through the steps:
Firstly, ensure you have the right cable. HDMI (High-Definition Multimedia Interface) is the preferred choice for most new high-definition (HD) audio/visual devices, as it provides excellent audio and video performance. It also supports High-bandwidth Digital Content Protection (HDCP), which prevents the illegal duplication of copyrighted material.
Once you have your HDMI cable, follow these steps:
- Connect one end of the HDMI cable to the HDMI port on the back of your AT&T U-verse box. The port should be labelled. Do not disconnect any Network or TO WALL cables during this process.
- Plug the other end of the HDMI cable into the HDMI port on your monitor or TV. Again, this port should be located on the back of your display device.
- Power on your AT&T U-verse box by plugging it into a wall outlet.
- Using your TV or monitor's remote control, select the correct input. This could be labelled as INPUT, TV/Video, or SOURCE, depending on your device. Refer to your display device's manual if you're unsure.
- Your display should now show the AT&T U-verse screen. Press OK to Watch TV.
- Finally, use your AT&T U-verse remote control to press AT&T followed by OK.
And that's it! You should now be successfully connected. If you have any issues, try a different HDMI cable or input, as these can sometimes be problematic. Additionally, ensure your TV's screen resolution is set to either 1080i or 720p for the best HD experience.
Monitoring Java Heap Size: A Comprehensive Guide
You may want to see also

Using a coaxial cable
To hook up a monitor to an AT&T U-verse box using a coaxial cable, you will need to follow a few simple steps. Firstly, you should examine the connection ports available on your monitor. If your monitor has an HDMI port, you can connect it to the U-verse box using an HDMI cable for the highest quality video and audio connection. However, if your monitor does not have an HDMI port, you can use a coaxial cable.
To connect using a coaxial cable, start by locating the "TO TV" connection on the back of the AT&T U-verse box. Connect one end of the coaxial cable to the "TO TV" connection. Then, connect the other end of the coaxial cable to the "VIDEO IN" or "Antenna In" port on the back of your monitor. Ensure that you do not disconnect any Network or "TO WALL" cables during this process.
Once the coaxial cable is connected, plug the U-verse box into a power source, such as a wall outlet. Then, using your monitor's remote control, change the channel to Ch. 3. Your monitor should now display the AT&T U-verse screen. Press "OK" to start watching TV. Finally, use the U-verse remote control to select "AT&T" and then press "OK" again.
It is important to note that while coaxial cables are convenient, they do not provide an HD picture. If you are looking for the highest quality video and audio connection, it is recommended to use an HDMI cable instead.
HP Monitor Options: Sizes and Features Explored
You may want to see also

Setting up a wireless receiver
To set up a wireless receiver for your AT&T U-verse box, you will need to connect your Wireless Access Point (WAP) device to your Wi-Fi gateway, connect your wireless receiver to your TV, and then pair your WAP and wireless receiver.
Firstly, connect your WAP to your Wi-Fi gateway using the yellow Ethernet cable. Plug the other end of the Ethernet cable into an open Ethernet port on your Wi-Fi gateway. Move the WAP as far away as possible from the Wi-Fi gateway. Plug the WAP's power cord into a working electrical outlet.
Next, connect your wireless receiver to your TV. You can use an HDMI cable, a coaxial cable, or component cables. On the back of the AT&T U-verse receiver, look for the connection type that matches your chosen cable. Plug the other end of the cable into the corresponding port on your TV.
Now, using your TV remote control, select the connection type you used. For example, if you used an HDMI cable, select HDMI on your TV. Consult your TV user manual if you need help locating the Input/Source screen.
Finally, pair your wireless receiver with your WAP. Plug the two-part power cord into the wireless receiver and then into an electrical outlet. The receiver will power on automatically. Wait about a minute, and you will receive additional instructions to complete your setup. Press the WPS button on your WAP, and then press OK on your wireless receiver within two minutes. Confirm that at least three green LED bars are lit on the wireless receiver. When you see a green LED lit on the front of the receiver, you have paired successfully. It may take a few minutes for live TV to appear.
Asus Monitor: Website Ordering Worth It?
You may want to see also

Connecting with component output
If you're connecting your AT&T U-verse box to a monitor, you have a few options for cables, including HDMI, coaxial, and component output. Here's a step-by-step guide for connecting with component output:
First, locate the “TO TV” connection on the back of your AT&T U-verse box. You'll be connecting your component cables here. The component output cables are typically colour-coded: Pr (red), Pb (blue), Y (green), and an audio connection (either left/right audio or optical audio). Make sure you have the correct cables ready.
Next, connect the component cables from the "TO TV" output on the U-verse box to the matching component inputs on the back of your monitor. The colours of the connections should match: red to red, blue to blue, and green to green. If your audio connection is left/right audio, connect the red and white connectors to the corresponding coloured inputs on your monitor. If you're using an optical audio connection, this will be a single cable.
Once the component cables are connected, power on your AT&T U-verse box and your monitor. Using the remote control for your monitor (not the U-verse remote), change the input to match the port you used for the component connection. For example, if you connected to the "Component 1" port, change your monitor's input to "Component 1." Refer to your monitor's manual if you need help changing the input.
Now, you should see the AT&T U-verse screen on your monitor. Press “OK” on your monitor's remote control to start watching TV. Finally, use the U-verse remote control to press “AT&T” followed by “OK."
Note that when using component output, ensure your U-verse box's resolution is not set to 1080i or 720p, as this will disable the component output.
Understanding Monitor LCDs: What You Need to Know
You may want to see also

Using an HDMI-to-DVI adapter
If your TV has a DVI port but not an HDMI port, you can use an HDMI-to-DVI adapter to connect it to the HDMI port on the AT&T U-verse set-top box (STB). However, since DVI only transmits video, you will also need to connect the audio ports using RCA cables.
Adapters and adapter cables are readily available and allow you to connect many types of mismatched devices. You can find them at Amazon or other retailers. Simply search for the names of the input and output ports you need to connect, followed by the word "adapter cable".
Before you begin setting up your AT&T U-verse service, you must schedule an appointment with an AT&T technician to come to your home to install the necessary cable wiring. Once the wiring is in place, you can proceed to connect your devices.
- Purchase an HDMI-to-DVI adapter cable.
- Use the adapter cable to connect the DVI port on your TV to the HDMI port on the STB.
- Connect the audio ports on the TV and STB using RCA cables, as DVI does not transmit audio.
- Plug the power cable of the STB into the "Power" jack on the back of the STB, and then connect the other end to an electrical outlet.
- Turn on your TV and STB.
- Set your TV to channel 3.
- Use the TV remote's "Input" button to set the video input to the correct option (e.g., if you used an HDMI connection, select the HDMI input option on your TV's input menu).
- Follow the on-screen prompts to complete the setup, such as pressing "OK to Watch TV" and selecting "AT&T" followed by "OK" on your U-verse TV remote.
Bigger Monitors, Better Aim? Sensitivity and Screen Size Explored
You may want to see also
Frequently asked questions
You can hook up a monitor to an AT&T U-verse box using an HDMI cable. First, connect the HDMI cable to the HDMI connection on the back of the AT&T U-verse receiver. Then, plug the receiver into a power source. Finally, use your TV remote to change the input to the corresponding setting.
If your monitor doesn't have an HDMI port, you can use a coaxial cable. Connect the coaxial cable to the 'TO TV' connection on the back of the AT&T U-verse receiver and the 'VIDEO IN' port on your monitor.
If your monitor doesn't have an HDMI or coaxial port, you can use AV cables. Connect the red, white, and yellow AV cables to the corresponding red, white, and yellow AV jacks on both the AT&T U-verse receiver and your monitor.
If you don't have the necessary cables, you may need to purchase them from an electronics store or online. You can also try contacting AT&T customer support to see if they can provide the required cables.


