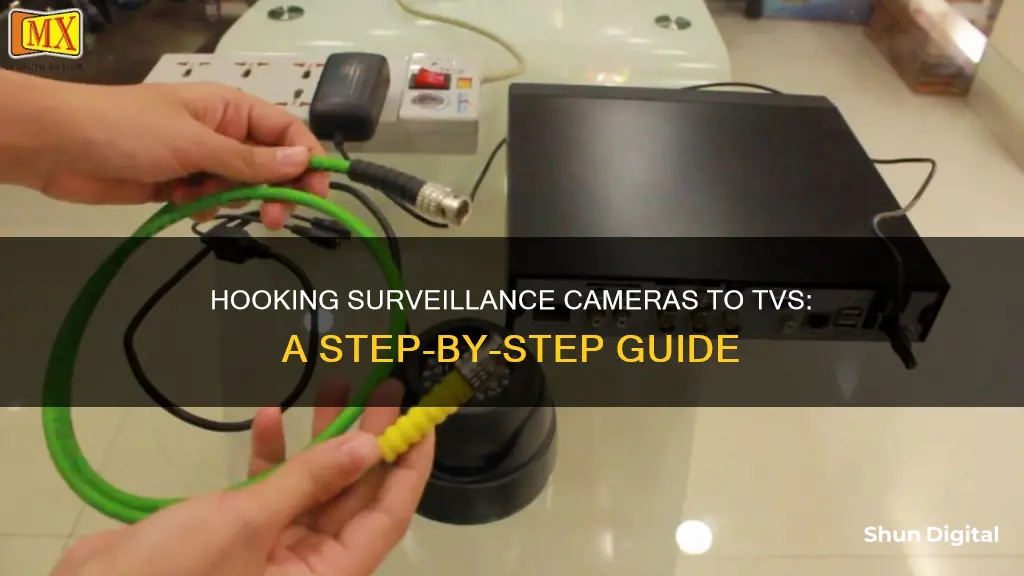
There are several ways to connect a surveillance camera to a TV, depending on the type of camera and the TV model. The most common types of security cameras include CCTV cameras, HD-over-Coax security cameras, IP security cameras, and wireless cameras. Before connecting your camera to your TV, ensure that your TV is compatible with the camera. Check if your TV has the required input, such as HDMI, AV, or BNC, and confirm if it can display the camera's video quality.
For CCTV cameras, you can use a coaxial or RCA cable to connect to your TV. If you have an HD-over-Coax security camera, you may need to use specialized BNC connectors. IP security cameras typically connect to the internet via Ethernet cables, while wireless cameras use Wi-Fi or Bluetooth to stream footage to your TV through a mobile app or computer software.
To connect your camera to your TV without a DVR, simply use an HDMI cable to connect the camera to the TV, and switch the TV's input to HDMI. Alternatively, if your TV has an Ethernet port, you can connect your camera directly using an Ethernet cable or an Ethernet-to-HDMI adapter.
| Characteristics | Values |
|---|---|
| Camera Type | CCTV, HD-over-Coax, IP, Wireless |
| TV Input Type | HDMI, AV, BNC, Ethernet |
| Connection Method | DVR, NVR, Wireless, Direct Cable |
| Cable Type | Coaxial, BNC, RCA, HDMI, VGA, Ethernet |
| Power Source | DC Power Adapter, Power Jack Plug Adapter |
What You'll Learn

Connect a CCTV camera to a TV using a coaxial or RCA cable
To connect a CCTV camera to a TV, you will need a coaxial or RCA cable. The process is extremely simple and requires only a few components and steps. Here is a detailed guide on how to do it:
Step 1: Determine the Type of CCTV Camera and TV Inputs
First, you need to identify the type of CCTV camera you have. Traditional analog cameras with CVBS (Composite Video Baseband Signal) technology are compatible with regular TVs. High-resolution analog cameras with HD-TVI, HD-CVI, and AHD technology will not work with a regular TV and require additional devices.
Next, check the connections on both the CCTV camera and the TV. Look at the back of the camera to determine if it has ports for coaxial or RCA cables. The TV should have both RCA and coaxial inputs, but it will at least have one of them.
Step 2: Measure the Distance and Purchase the Correct Cable
Measure the distance between the CCTV camera and the TV to determine the length of the cable you need to purchase. Ensure you buy a cable that is long enough to cover this distance. Both RCA and coaxial cables are readily available at most electronics stores.
Step 3: Connect the Cable to the CCTV Camera
Connect the cable to the back of the CCTV camera. If you are using an RCA cable, simply plug it into the corresponding coloured ports on the camera. For a coaxial cable, you will need to screw it into the back of the camera.
Step 4: Connect the Cable to the TV
Run the cable from the CCTV camera to the TV, and connect it to the TV's input ports. As with the camera, RCA cables will simply plug in, while coaxial cables will need to be screwed in.
Step 5: Turn on the TV and Select the Correct Input
Turn on the TV and select the audio and video (AV) input. You may need to tune the TV to a different video input or channel to receive the CCTV camera's signal, depending on the make and model of your TV. The image from the CCTV camera should now appear on the screen.
Important Considerations:
- When purchasing a CCTV camera, look for specifications like 480, 540, 600, or 700 TV lines, as these indicate compatibility with regular TVs.
- Be careful when handling the power supply and connections. Always ensure the correct polarity to avoid damaging your equipment.
- If you are using a Siamese coaxial cable, you can power the camera from the TV location as well.
Amcrest Camera Troubleshooting: Night Mode Strobing Issues
You may want to see also

Use an HDMI cable to connect a security camera to a TV
Connecting an HD security camera to a TV using an HDMI cable is a straightforward process, but there are some important considerations to keep in mind. Firstly, HD security cameras, such as HD-CVI, HD-TVI, or AHD cameras, use BNC video connectors and coax cables to transmit video. As a result, you cannot directly connect the video output of these cameras to the HDMI input of a TV. However, by using an HDMI video converter, you can easily transform the HD security camera's video signal into an HDMI signal that your TV can recognise.
To set up this connection, you will need to connect the video output of your HD security camera to the HDMI converter. This is typically done using an RG59 coax cable. Ensure that your camera's video standard is compatible with the converter; most HD-TVI, AHD, and HDCVI cameras can be converted to HDMI using readily available converters. Once your camera is connected to the converter, use a standard HDMI cable to connect the HDMI output of the converter to the HDMI input of your TV.
If you wish to record video footage in addition to displaying the live feed on your TV, you may be able to use the same converter. Many HDMI converters feature a video loop output in addition to the HDMI output, allowing you to connect to a DVR while maintaining the live feed to your TV. Simply use an RG59 jumper cable to connect the BNC video output of the converter to your DVR.
It is important to note that not all security cameras use the same video standards. Before setting up your connection, ensure that your camera's video standard (AHD, HD-TVI, HDCVI, or HD-SDI) is compatible with your chosen HDMI converter. Additionally, always refer to your camera's user manual for specific instructions and requirements.
Charging BP-511A Camera Batteries: Picking the Right Charger
You may want to see also

Connect a security camera to a TV with an Ethernet cable
Connecting a security camera to a TV can be done in several ways, depending on the type of camera and TV you have. Here is a detailed guide on how to connect a security camera to a TV using an Ethernet cable:
Step 1: Check Compatibility
Before attempting to connect your security camera to your TV, it is essential to ensure that your devices are compatible. Check that your TV has an Ethernet port and confirm the type of security camera you are using.
Step 2: Connect the Security Camera to an NVR
To begin the setup process, you will need to connect your wireless security camera to a router using an Ethernet cable. This step is necessary because security cameras require an internet connection to function. Once you have established a stable internet connection for your camera, you can proceed to the next step.
Step 3: Connect the NVR to the TV
After successfully connecting your security camera to the router, the next step is to establish a connection between the NVR (Network Video Recorder) and your TV. Utilize an HDMI cable for this step, connecting the HDMI output from the NVR to the HDMI input on your TV.
Step 4: Supply Power to the NVR
To ensure that your setup functions properly, you need to provide power to the NVR (Network Video Recorder). Accomplish this by plugging the power adapter of the NVR into a power source. Once powered, your security camera and NVR should be ready to record and display footage.
Alternative Method: Using a NetCam Viewer Monitor
If you prefer an alternative method, you can opt to use a NetCam viewer monitor, which is a portable option that can display footage from up to 9 cameras simultaneously. This method still utilizes an Ethernet cable to connect IP cameras to the device and an HDMI cable to connect to your TV. One notable advantage of the NetCam viewer is its support for over 600 brands of cameras.
Dragon Camera Tickets: Are You Obliged to Pay Fines?
You may want to see also

Use a mobile app to connect a security camera to a TV wirelessly
If you own a wireless security camera with its own mobile application, you can use the app to stream the camera's video feed onto your television with a Wi-Fi connection. Here's how to do it:
Step 1: Download and launch the security camera app on your phone.
Open your mobile app store and search for the brand of your security camera. Download the corresponding app and launch it on your phone.
Step 2: Connect your security camera to Wi-Fi.
Ensure that your security camera is connected to the same Wi-Fi network as your TV. This will allow them to communicate with each other.
Step 3: Use an app like Google Home to stream the video from your phone to your TV.
There are several apps available that can assist with streaming video from your phone to your TV. Google Home is one popular option, but you can also explore alternatives like Chromecast or Apple TV, depending on your device compatibility.
Step 4: Stream the video feed from your phone to your TV.
With the app launched and your devices connected, you can now use the app to stream the security camera's video feed directly to your television. This provides a convenient way to monitor your security camera footage on a larger screen.
It's important to note that not all security cameras have wireless capabilities or dedicated mobile apps. Before attempting these steps, ensure that your security camera is indeed wireless and offers a mobile app for streaming. Additionally, always refer to your camera's user manual for specific instructions related to your particular model.
Monthly Fees for Cellular Cameras: What's the Deal?
You may want to see also

Connect a security camera to a smart TV using a dedicated app
There are several ways to connect a security camera to a smart TV using a dedicated app. Here is a step-by-step guide:
Amazon Alexa
If you have an Alexa-compatible TV, such as a FireStick or Fire TV Cube, follow these steps:
- Open the Alexa app on your mobile device and ensure you are signed in with the same account that your TV is registered to.
- Select "More" in the bottom-right corner, then choose "Skills & Games."
- Search for and enable the relevant skill for your security camera.
- Sign in to your security camera app account.
- Follow the prompts until you reach the "Discover Devices" screen, then select the camera you want to view on your TV.
- Press the voice button on your Fire TV remote and say, "Open [camera brand] camera." Your live feed should now be displayed on the TV.
Google Chromecast
If you have a Nest or Arlo camera, you can connect it to your smart TV via Chromecast or Google TV:
- Open the Google Home app on your mobile device.
- Tap "Devices," "Add," and then "New Device."
- Select the home you want to add the camera to and tap "Next."
- Wait for the app to find your camera.
- Tap your camera model and scan the QR code.
- Turn on your Chromecast or Google TV.
- Hold the Assistant button on the remote and say, "Show me my [camera brand] camera."
Apple HomeKit
If you have an Apple HomeKit-compatible camera and Apple TV, follow these steps:
- Press the "+" icon in the Home app and follow the on-screen instructions to connect your camera.
- Press and hold the TV button on your Apple TV remote to open the Control Center.
- Select the HomeKit icon, and your camera footage should appear on the TV.
Samsung SmartThings
If you have a Samsung smart TV, you can use the SmartThings app to connect a compatible camera:
- Open the SmartThings app on your mobile device.
- Tap the "+" icon in the top-left corner to open the menu, then select "Add Device."
- Scroll to the "By Brand" tab and select your camera's brand.
- Tap "Add" to link your camera account.
- Follow the on-screen instructions and authorize the connection.
- Open the SmartThings app on your TV and select the camera you want to view.
Drive Mode Button: Understanding Camera's Power Feature
You may want to see also
Frequently asked questions
Connecting a security camera to a TV allows you to access real-time video feeds, enhancing your security by providing a larger screen for monitoring areas of concern.
You will need a coaxial cable (RG59), a power jack plug adapter, and the correct type of CCTV camera.
First, install your CCTV camera. Then, connect the CCTV cable to the camera, ensuring proper connection and polarity. Next, use the P4 connector to power the camera, and connect the power supply to the camera. After that, connect the camera to the TV using a BNC to RCA adapter. Finally, turn on the TV and select the audio and video (AV) input.
Ensure that your security camera and TV have HDMI ports. Then, connect them using HDMI cables and turn on your TV, switching to HDMI input.
You can use a dedicated mobile app of your security camera service to transmit your video footage wirelessly. Alternatively, if you own a smart TV, you can download and use an app directly on the TV itself to view the live camera feed.


