Focusing a camera on stars at night can be challenging. Autofocus rarely works in low-light conditions, and even manual focus can be tricky. Here are some tips to help you focus your camera on the stars:
- Set your camera to manual focus mode.
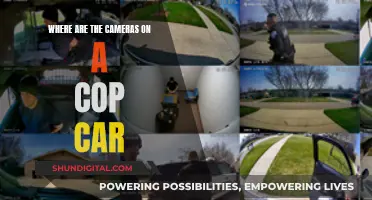
- Find a bright star or planet, such as Sirius, Vega, Deneb, Altair, or Arcturus, and centre it in your frame.
- Use the live view mode on your camera to see what your sensor sees.
- Zoom in on the star and manually adjust the focus until it appears as a small, sharp point of light.
- Take test shots and review them at full magnification to ensure the stars are in focus.
- Use a tripod to keep your camera steady and prevent blur.
- Check your focus regularly throughout the night, as changes in temperature can affect it.
- Consider using a Bahtinov mask, a focusing mask that helps achieve perfect focus by creating a star diffraction pattern.
| Characteristics | Values |
|---|---|
| Camera mode | Manual or Bulb |
| Aperture | F/4 or below |
| White balance | Daylight or Auto |
| Exposure | 30-seconds or Bulb |
| ISO | 1600 or above |
| Camera lens mode | Manual focus |
| Camera lens | Set to the lowest possible number |
| Live view | Enabled |
| Focus ring | Turn until the star is as small as possible |
| Tape | Use to secure the focus ring |
What You'll Learn
![]()
Use manual focus mode
When shooting astrophotography, it's best to switch your camera or lens to manual focus mode as the stars are too dim and small for autofocus to work reliably. Here are the steps to achieve perfect focus:
Step 1: Check Your Settings
First, ensure your camera settings are correct to make the focusing process easier. The mode doesn't matter as you'll only be focusing, but it's good to switch to Manual or Bulb mode if you plan on taking images afterward. Set your aperture as low as possible (e.g., f/2.8) to allow more light to reach the sensor, and consider increasing the ISO to 800 or 1600 to enhance light capture.
Step 2: Set Lens to Manual Focus
Before going outside, make sure your lens is set to Manual Focus mode. Autofocus will not work effectively for this type of photography.
Step 3: Locate a Bright Star and Frame It in Live View
Once it's dark, look for one of the brightest stars (e.g., Vega in summer, Rigel in winter) or a bright planet. Turn on Live View on your camera and aim it at the chosen celestial body. If you can't spot it on your screen, adjust the focus ring on your lens until you find it.
Step 4: Enhance and Zoom
Center the chosen star or planet in your frame and activate the maximum digital zoom (usually x10) while keeping the object in view. This step will allow you to see the object more clearly and help you achieve a precise focus.
Step 5: Focus Using the Focus Ring
Turn the focus ring on your lens until the star or planet becomes a small, sharp pinpoint of light. You may need to turn the ring all the way to one side and then back slightly to find the perfect focus. Once you achieve this, do not touch the lens for the rest of the night to maintain focus.
Bonus Tip: Lock Down Your Focus
If you plan on using this lens solely for astrophotography, consider taping the focus ring to the lens body with gaffer tape after achieving focus. This way, you won't need to refocus each time you shoot.
Montebello Camera Tickets: Do You Have to Pay?
You may want to see also
![]()
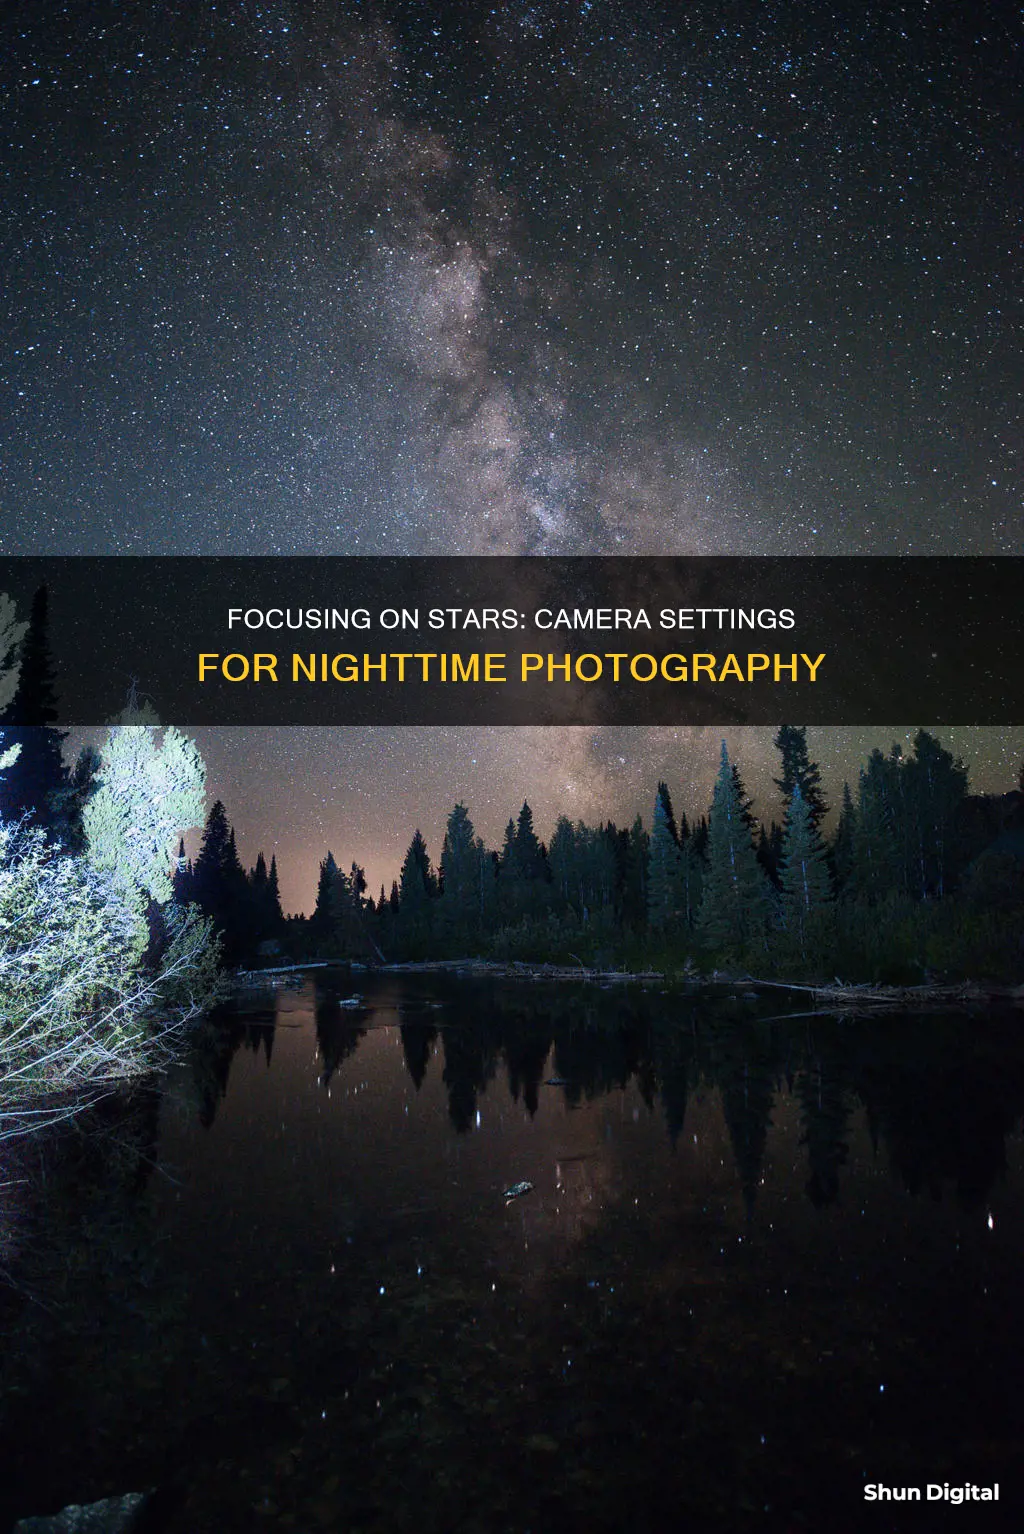
Set the lens to the infinity mark
Setting the lens to the infinity mark is a good starting point for focusing on the stars. However, it is important to note that lens markings are rarely perfectly accurate, so further adjustments will likely be needed to achieve true infinity focus. This can be done by using the Live View mode on your camera and zooming in on a bright star, slowly adjusting the focus ring until the star appears as a small, sharp pinpoint of light.
If your lens does not have an infinity mark, you can still achieve infinity focus by manually focusing on a distant object during the day and marking that spot on the lens. Alternatively, you can use a tool such as a Bahtinov mask or a Hartman mask to help you achieve precise infinity focus. These masks create a diffraction pattern around a bright star, allowing you to make fine adjustments to your focus until the pattern is centred or symmetrical, indicating that your lens is focused on infinity.
It is worth noting that changes in temperature can affect your focus, so it is important to periodically check and adjust your focus throughout your night of shooting. Additionally, some lenses may not have a true infinity focus, so it is always best to use your eyesight and manual focus to achieve the sharpest results.
The Evolution of Fujifilm Cameras: A Manufacturing Journey
You may want to see also
![]()
Enable Live View
Live View is a video image that is output from the sensor to the LCD display on the back of the camera in real time. It is very difficult to precisely focus a star field through a DSLR viewfinder by eye alone, so Live View can be a great help in focusing an astrophoto.
Step 1: Use Manual Exposure and Manual Focus
Set your camera to Manual exposure and the Bulb setting for long exposures. Use ISO 1600. The brightness of the image for focusing is related to the camera settings. Higher ISOs and longer shutter speeds produce the brightest star images. Set your lens to manual focus.
Step 2: Find a Bright Star or Planet
Use a bright star or planet to focus on. If there isn't a bright star in the field you want to shoot, first move the scope to a bright star, focus, and then move back to your desired field.
Step 3: Set Aperture
If you are using an f/2.8 or slower camera lens, use your fastest aperture. For example, with an 18mm to 55mm f/3.5 to f/5.6 zoom lens, set the lens to f/3.5 for focusing if you want to shoot at 18mm. If you are using a telescope, your focal ratio will be fixed.
Step 4: Get Close to Focus Before Using Live View
Set the camera to manual focus and put the focus ring to the infinity mark. If your lens doesn't have a focus scale, eyeball it through the viewfinder and get as close to focus as you can. Adjust the diopter on the camera first. You do this in the daytime by taking the lens off the camera and focusing the diopter on the focus squares on the ground glass.
Step 5: Center the Star
Put the star as close to the center of the field as you can. This will help when you zoom in later to focus.
Step 6: Turn on Live View
Turn on Live View on your camera. If you start out close to focus, you should be able to see a bright star at 1x. Then zoom in to 10x to critically focus. If the star is not exactly in the center of the field, you can move the zoom box around with the controls on the back of the camera to center it.
Step 7: Dial Down the Exposure
Once you are close to focus, dial the exposure way down. This will allow you to better see the "seeing". The star will wobble around and scintillate more when it is slightly out of focus. It will be sharpest when it is exactly at focus.
Step 8: Focus the Star
Focus by going back and forth through the point of best focus several times so that you know what the point of best focus looks like. There may be some play or wobble in the lens, so get used to it. Lock the focus down without moving the focus. This can be done with a piece of masking tape.
Step 9: Take a Test Exposure
Once you have focused, take a test exposure and examine the image. Zoom in to a 100% enlargement and check that the stars are in focus and that you haven't accidentally moved the focus ring on the camera lens.
Reducing Noise in Underexposed Camera Raw Files
You may want to see also
![]()
Preset the exposure
Presetting the exposure is a crucial step in capturing the perfect image of the night sky. Here are some detailed instructions to guide you through this process:
Camera Settings
Firstly, ensure your camera has the capability to shoot in "Manual" or "Bulb" mode. This manual mode is essential as it allows you to independently adjust the shutter speed, ISO, and aperture to achieve the perfect exposure.
Shutter Speed
The shutter speed setting will depend on the lighting conditions and the desired effect. For capturing the faint light from distant stars, set your shutter speed to around 25 seconds. Going beyond 30 seconds may result in blurred stars due to the Earth's rotation. If you want to capture star trails, you can opt for longer shutter speeds, but be mindful that this will also depend on your lens and camera type.
Aperture
For night sky photography, it is recommended to use the widest aperture your lens allows. Most photographers use an aperture setting of f/2.8 or wider. This allows more light to reach the camera sensor, which is crucial for low-light conditions.
ISO
The ISO setting will depend on the amount of light pollution in your surroundings. If you are in a very low-light area, such as a rural location away from city lights, set your ISO between 1600 and 3200, or higher if necessary. For areas with more light pollution, such as a city, keep your ISO around 800 to reduce noise in the image.
Additional Tips
- Use a sturdy tripod to minimise camera shake during the long exposure.
- Consider using a remote shutter release or the timer function to further reduce camera shake.
- Turn off autofocus and manually focus on infinity to ensure all the stars are in focus.
- Play around with the settings and take test shots to find the perfect combination for your specific camera and conditions.
- Use photo editing software to make fine adjustments to exposure, colour, and contrast after capturing the images.
Remember, there are no "best settings" for night sky photography, but by following these guidelines and experimenting with your equipment, you'll be well on your way to capturing breathtaking images of the cosmos.
Ohio Speedsters: Evading the Ticket Camera
You may want to see also
![]()
Use a flashlight
Focusing on the stars at night can be challenging. One way to do it is by using a flashlight. Here's a step-by-step guide on how to use a flashlight to focus your camera on the stars:
Get a Bright Flashlight:
Get a bright flashlight. A pocket-sized flashlight can provide enough light. Avoid using your phone as a light source, as it won't be bright enough.
Find an Object in the Distance:
Look for an object in the distance, such as a tree or any other object that is far away. Ideally, you want to focus on something that is effectively at infinity. The required distance depends on your aperture and focal length, but generally, with a wide-angle lens, an object about 25 feet (7.5 meters) away should be suitable.
Shine the Flashlight on the Object:
Shine the bright flashlight on the object you have chosen. If you are with a friend, they can hold the light or even shine the light on their hand or face while standing at a distance.
Focus Your Camera:
Compose your shot and focus your camera on the illuminated object. You may need to zoom in and use manual focus to get the sharpest result. Ensure that both the object and the stars are in focus. Adjust your camera settings accordingly.
Test and Adjust:
Take a test shot to check if the stars are in focus. You may need to adjust your focus slightly forward or backward to get the sharpest result. Take multiple test shots if needed until you achieve the desired focus.
Refine Your Composition:
Once you have achieved focus, you can adjust your composition as needed. Remember to keep the focus ring secured or locked to avoid accidentally changing the focus.
Using a flashlight to focus on the stars is a creative solution when there is no moon or distant lights available. With some experimentation and patience, you can capture stunning images of the night sky. Remember to carry a flashlight with you on your nighttime photography adventures!
Updating Camera Raw in Lightroom: Offline Method
You may want to see also
Frequently asked questions
First, set your camera to manual focus mode as autofocus is unreliable in low light conditions. Then, locate the brightest star or planet in the sky and centre it in your frame. Next, zoom in on the star as much as possible and adjust the focus manually until the star is a small, sharp pinpoint of light.
Set your camera to manual mode. Use a high ISO (1600 or above) and a wide aperture (f/4 or below) to let as much light reach the camera sensor as possible. Set the shutter speed to a long exposure (30 seconds or more) but be mindful that this may cause star trailing.
You can use either a camera lens or a telescope to photograph the stars. A sturdy tripod is also essential to prevent camera shake and achieve a sharp image.