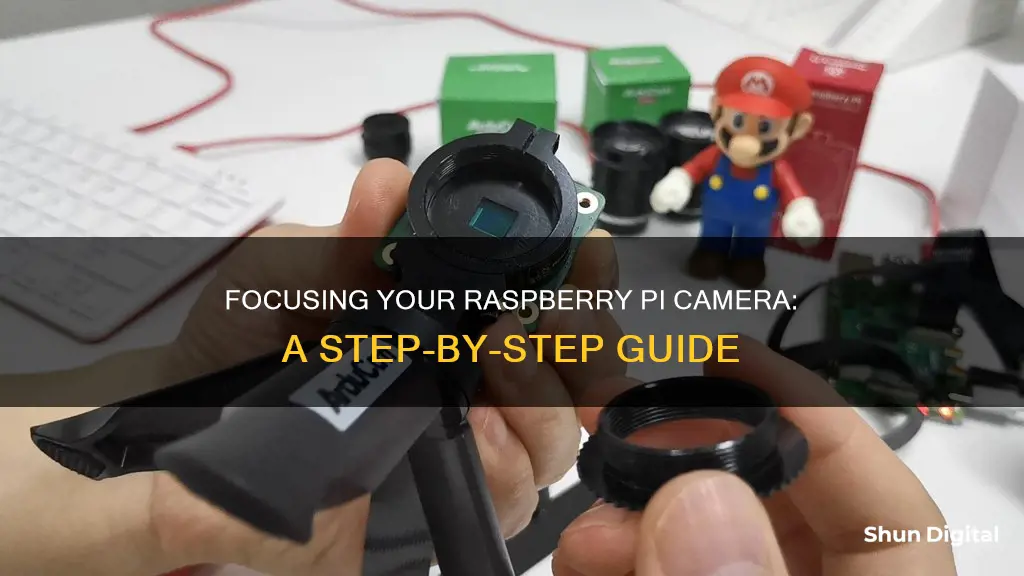
The Raspberry Pi camera is a versatile tool with a range of applications, from time-lapse photography to security and monitoring. While the original Raspberry Pi Camera model was set to infinity focus, allowing for crisp and sharp images of distant subjects, the Raspberry Pi Camera v2 was designed with a shorter focus distance, resulting in blurry or hazy images for distant subjects. This issue can be addressed by manually adjusting the lens with tools like jeweler's pliers or a lens adjustment tool. Additionally, third-party solutions, such as the Arducam Motorized Focus Pi Camera, offer autofocus capabilities for the Raspberry Pi Camera, enhancing its functionality and ease of use.
| Characteristics | Values |
|---|---|
| Camera Model | V1.3, V2, V2.1, V3, HQ |
| Focus Type | Infinity focus, short-distance focus |
| Focus Control | Manual, autofocus |
| Focus Tools | Jeweler's pliers, mini needle-nose pliers, lens adjustment tool, credit card, drill, file, fingers, 3D-printed wrench |
| Camera Module | Arducam Motorized Focus Pi Camera |
| Camera Sensor | CMOS, OV5647 |
| Camera Resolution | 1080p, 2592x1944 |
| Camera Angle of View | 60.6 degrees, 54 x 44 degrees |
| Camera Dimensions | 32mm x 32mm, 25mm x 24mm |

Infinity focus
The original Raspberry Pi Camera model v1.3 came set to infinity focus straight out of the box. This meant that when used for something like a landscape timelapse or for security and monitoring purposes (where the Pi is at least 5 meters away from the subjects it's recording), everything would look crisp and sharp.
For many fixed-focus cameras and lower-end camera sensors, it makes sense to set them to infinity focus. Closer objects are still recognizable, but slightly blurry. Most of these cameras don't need to focus on a person a meter away for a portrait, and they're also rarely used for FaceTime-like video chat.
The Raspberry Pi Foundation decided to set v2.1 and greater cameras back to infinity focus. However, resellers like Amazon are still shipping from their stock of v2 cameras with the focus set at a short distance.
If you have a v2 camera, there is a way to adjust the focus to infinity. You can use a pair of jeweler's pliers or mini needle-nose pliers to directly manipulate the lens focus. Grasp the front element of the lens and rotate; if the lens is difficult to rotate (due to a slight amount of glue locking it in place from the factory), you may need to use another pair of tweezers/pliers to carefully hold the base of the camera module, then give a little back-and-forth twist until the lens starts rotating.
To adjust the focus, pinch the indentations with the pliers (gently), then give a small amount of torque (just enough to break the thin glue that sets the factory focus). Turn back and forth in small increments while taking pictures to confirm the correct focus.
You can also purchase a lens adjustment tool for this purpose. Adafruit sells a specialty tool for $0.95 that can be used to adjust the focus of your Raspberry Pi camera.
Charging Your GE Camera: A Quick Guide
You may want to see also

Using pliers
To adjust the focus, you will need a pair of jeweller's pliers or needle-nose pliers. You will also need to be careful as this process may void your warranty.
Firstly, you need to break the thin layer of glue that sets the factory focus. You can do this by holding the base of the camera module with one pair of pliers and using another pair to gently twist the lens back and forth. You can also use tweezers to hold the base.
Once the glue has been broken, you can then use the pliers to gently pinch the indentations on the lens and twist it to adjust the focus. You should do this in small increments, testing the focus with pictures as you go. Turn the lens back and forth, taking pictures to confirm the correct focus. Be careful not to over-rotate the lens as it may become disengaged and challenging to reposition.
You can also use a credit card, a drill, and a file in place of pliers if you don't have any available. You would need to drill a hole in the credit card, and then file away slots to line up with the indentations on the top of the camera lens.
Point-and-Click Camera Batteries: Are They Lithium-Based?
You may want to see also

Autofocus prerequisites
An autofocus (AF) optical system uses a sensor, a control system, and a motor to focus on a manually or automatically selected point or area. The three prerequisites for autofocus are: a sensor, a focus motor, and a control system.
The sensor is used to detect the scene and focus the camera. The focus motor is what moves the lens, and the control system is how the lens is moved. When focusing manually, your hands act as the focus motor, and your brain acts as the control system.
The official Raspberry Pi camera modules do not support autofocus. The V1.3 module's lens is glued and fixed, while the V2 and HQ modules require manual adjustment. Only the Camera Module 3 series has autofocus capabilities.
To enable autofocus on the Raspberry Pi camera, you need to add a focus motor and a control system. This can be achieved by building a Compact Camera Module (CCM) with a focus motor inside or by designing a special lens assembly with a focus motor mounted above the image sensor.
The Raspberry Pi should also be able to control the focus motor through the MIPI CSI camera ribbon cable. This can be achieved by enabling the I2C bus, specifically the I2C for the VideoCore processor, and adding a line to the /boot/config.txt file.
Once the prerequisites are met, you can enable the autofocus feature by automating the focusing process with a program. This can be done using a simple Python program that allows you to use the keyboard keys to move the focus motor.
To enable autofocus, you can use computer vision libraries like OpenCV to detect the image's contrast and adjust the motor until the maximal contrast is achieved.
Camera Tickets: Admissible Court Evidence?
You may want to see also

Manual focus
You can adjust the focus by pinching the indentations on the lens with a pair of jeweller's pliers or mini needle-nose pliers and gently turning back and forth in small increments while taking pictures to confirm the correct focus. You can also use a credit card, a drill, and a file to adjust the focus if you don't have pliers. Drill a hole in the credit card that's about 5/16" (8mm), then file away slots in the hole to line up with the indentations on the top of the camera lens.
The 8MP V2 cameras include a lens adjustment tool, and you can use this to refocus the camera module. However, if you do this manually, you will need to keep readjusting when you want to focus on objects that are closer or further away.
Motorola's 360 Moto Mod Camera: How Many Megapixels?
You may want to see also

Motorized focus
The autofocus system consists of three main prerequisites: a sensor, a focus motor, and a control system. The sensor detects the scene, the focus motor adjusts the lens position, and the control system directs the movement of the lens. Together, these components enable the camera to automatically focus on the desired subject.
Arducam, a leading provider of camera solutions for Raspberry Pi, has developed autofocus modules for the Raspberry Pi camera. Their autofocus system is powered by OpenCV, an open-source computer vision library. This system uses contrast detection to determine the optimal focus. By analyzing the intensity difference between adjacent pixels, the camera can adjust the lens position until the maximal contrast is achieved, resulting in a clear and sharp image.
The Arducam autofocus modules are available for both the 5MP OV5647 and 8MP IMX219 camera sensors used in the Raspberry Pi. These modules offer a motorized focus lens that can be controlled remotely via software. This remote control capability is especially useful when the camera is placed in hard-to-reach locations or when multiple objects at different distances need to be captured clearly in the same frame.
In addition to the autofocus feature, Arducam also provides precise manual focus control. Users can utilize the UP and DOWN arrow keys on their keyboard to fine-tune the focus, allowing for pixel-accurate adjustments. This manual control is ideal for applications such as machine vision and object recognition, where precise focus is crucial.
The Arducam autofocus solution is compatible with various operating systems, including Raspbian, MotionEye, Kali, and Ubuntu. It also includes an acrylic camera case and a flexible ribbon cable for easy integration with the Raspberry Pi Model A and B series.
With Arducam's autofocus modules, users can enjoy the convenience of automated focus, sharper images, and the flexibility to capture objects at various distances, all while maintaining the native compatibility of the Raspberry Pi camera.
Understanding Drive Mode in Action Cameras
You may want to see also


