There are several ways to transfer movies from a computer to an iPad. One way is to use a Lightning or USB-C connector to connect the iPad to the computer and import the desired movies to the Photos app on the iPad. Another way is to use iTunes to sync movies from a computer to an iPad. A third way is to use a video downloader tool to download movies directly to the iPad.
| Characteristics | Values |
|---|---|
| Required hardware | iPad, computer, USB cable, camera adapter or card reader |
| Required software | iTunes, Photos app |
| File types | MP4, MOV, M4V, WMV, RM, MKV, AVI, FLV |
| Process | 1. Connect iPad to computer with USB cable. 2. Open Photos app on iPad. 3. Tap Import. 4. Select photos and videos to import. 5. Choose import destination. 6. Tap Import All or Import Selected. 7. Keep or delete imported files on camera. 8. Disconnect camera adapter or card reader. |
What You'll Learn
![]()
Connect your iPad to your computer
There are several ways to connect your iPad to your computer, and the method you choose will depend on your specific needs and setup. Here is a detailed guide to help you through the process:
Using AirPlay and the Reflector App:
This method involves using AirPlay and a screen mirroring app called Reflector to share your iPad screen with your computer.
Step 1: Download the Reflector App
Start by downloading and installing the Reflector app on your computer. It is available for both Windows and macOS.
Step 2: Enable AirPlay
Open the Control Centre on your iPad by swiping down from the top right corner. Turn on the AirPlay button.
Step 3: Connect to the Same WiFi Network
Ensure that your iPad and computer are connected to the same WiFi network.
Step 4: Enable Screen Mirroring
Open the Control Centre on your iPad again and enable 'Screen Mirroring'.
Step 5: Select Your Device
On your iPad, you will see a list of receiver monitors. Choose your computer or monitor, and your iPad screen will be shared.
Using iTunes:
You can also connect your iPad to your PC using the iTunes app.
Step 1: Install iTunes
Download and install the iTunes app on your computer, ensuring that you have the latest version.
Step 2: Connect Your iPad
Connect your iPad to the iTunes app. You will see an iPad-shaped icon appear in the upper left corner. Follow any initial setup instructions if this is your first connection.
Step 3: Click on the iPad Icon
Click on the iPad icon, and you will see an 'Options' selection on the page that appears.
Step 4: Enable Sync with this iPad Over WiFi
Scroll down the options and enable the 'Sync with this iPad Over WiFi Box' option. This ensures that your iPad and computer sync together on the same WiFi network.
Step 5: Click 'Apply' and 'Done':
Click the 'Apply' button, and then the 'Done' button. Now, whenever your iPad and computer are on the same WiFi network, you will be able to connect through iTunes.
Using Bluetooth:
This method uses Bluetooth to connect your iPad to your Windows computer.
Step 1: Open the Windows Start Menu
Click the Windows 'Start' button and find the 'Control Panel' in the menu.
Step 2: Select 'Hardware & Sound Selection':
From the Control Panel, enter 'Hardware & Sound Selection' and click on the 'Add A Device' option.
Step 3: Enable Bluetooth on Your iPad
On your iPad, go to 'Settings' and turn on Bluetooth.
Step 4: Select Your iPad on Your Computer
Go back to your computer, and in the 'Add device' section, you should now see an 'iPad' option. Double-click on it, and your computer will attempt to connect to your iPad.
Step 5: Match the Codes
A code will appear on both your iPad and computer. Match the codes and select 'Yes' on the computer.
Step 6: Pair the Devices
Click 'Next' on your computer and 'Pair' on your iPad to complete the connection.
Using an Adapter:
You can also connect your iPad to your computer monitor using an adapter and a video cable.
For this method, you will need to purchase an adapter, such as the Apple Lightning to Digital AV Adapter, and a video cable or HDMI cable.
Connect the Lighting plug end of the adapter to your iPad's Lighting port, and then connect the video cable or HDMI cable to the other end of the adapter.
This setup will allow you to connect your iPad to your computer monitor or TV, and you can switch your display input to mirror your iPad screen.
Remember that you have multiple options for connecting your iPad to your computer, and you can choose the one that best suits your needs and device setup.
Surveillance Cameras in Bathrooms: What's the Legal Status?
You may want to see also
![]()
Open the Photos app on your iPad
To open the Photos app on your iPad, first, locate the app on your iPad. The Photos app icon is a multicolored flower made up of pink, green, blue, and yellow.
Once you've found the Photos app, open it by tapping on the icon. When the app opens, you'll see a sidebar on the left side of the screen. This sidebar allows you to navigate through your photos and includes options such as "Library," "For You," "People," "Places," "Albums," and more.
The "Library" section is where you can browse your photos and videos organized by days, months, years, or view all your photos together. "For You" is a personalized feed that includes your memories, shared photos, and featured photos. The "People" section lets you browse photos by the people and pets recognized by the Photos app. The "Places" section organizes your photos by the locations where they were taken.
Additionally, the Photos app also includes "Utilities and Media Types," which contains automatically created albums to organize your photos by categories such as "Videos" and "Live Photos." You can also create your own albums by tapping the "+" icon and naming the new album.
Understanding Camera Raw's Haze Removal Tool
You may want to see also
![]()
Select the videos you want to import
To select the videos you want to import from your computer to your iPad, you can use iTunes, the Photos app, or a third-party app.
If you're using iTunes, follow these steps:
- Open iTunes on your computer and connect your iPad using a USB cable.
- Look for the iPad icon to appear, then click on it.
- Click on "Films" in the bottom menu on the left.
- Open File Explorer and navigate to the folder where your video is located.
- Click and drag the video onto the blank pane in iTunes.
- If the video is compatible, it will be transferred to your iPad. If not, you'll see an error message.
- To convert an incompatible video, click the "<" symbol to go to your iTunes library.
- Click "File", then "Add File to Library".
- Browse and select the video file, then click "Open".
- The video will be added to iTunes. Use the drop-down menu to choose "Films" or "Movies".
- Click on "Home Videos" and select the video you just added.
- Click "File" and then "Convert", then choose "Create iPad or Apple TV version".
- The converted video will appear in your "Home Videos" list.
- Drag and drop the converted video from the list onto your iPad in iTunes.
Alternatively, you can use the Photos app to import videos to your iPad:
- Connect your iPad to your computer with a USB cable.
- Open the Photos app on your computer.
- Unlock your iPad if prompted and trust the computer if asked.
- The Photos app will show an Import screen with all the photos and videos on your iPad.
- Choose where you want to import your videos by selecting an existing album or creating a new one.
- Select the videos you want to import and click "Import Selected" or "Import All New Photos".
- Wait for the process to finish, then disconnect your iPad.
If you prefer not to use iTunes or the Photos app, there are third-party apps available that can help you transfer videos to your iPad. One popular option is WALTR 2, which offers a simple drag-and-drop interface and converts files into a playable format if needed. Other options include PlayerXtreme Media Player, VLC Player, and GoodReader.
Salvaging Your Camera After a Battery Leak
You may want to see also
![]()
Choose your import destination
When you import photos and videos from your iPad to your computer, you can choose where you want to import your media files. Here are the steps to choose your import destination:
Importing to a Mac
- Connect your iPad to your Mac: Use a USB cable to connect your iPad to your Mac.
- Open the Photos app on your Mac: If the Import screen doesn't appear automatically, click your device's name in the Photos sidebar.
- Unlock your iPad: If prompted, unlock your iPad using your passcode. If you see a prompt asking you to "Trust This Computer," tap "Trust" to continue.
- Choose your import destination: Next to "Import to," you have several options:
- Import into an existing album: Click the Album pop-up menu and choose the album you want.
- Import into a new album: Click the Album pop-up menu, choose "New Album," enter an album name, and click "OK."
- Import into the Photos library without specifying an album: Click the Album pop-up menu and choose "None."
- Select the photos and videos you want to import: You can choose to import all new photos or select specific items.
- Keep or delete imported items on your iPad: After importing, you can choose to keep or delete the photos and videos on your iPad.
Importing to a Windows PC
- Connect your iPad to your PC: Use a USB cable to connect your iPad to your Windows PC.
- Install and open the Apple Devices app: Download and install the Apple Devices app from the Microsoft Store.
- Unlock your iPad: If prompted, unlock your iPad using your passcode.
- Trust the connection: If you see a prompt on your iPad asking you to "Trust This Computer," tap "Trust" or "Allow" to continue.
- Follow Microsoft's instructions: Visit the Microsoft website to learn how to import photos and videos to the Microsoft Photos app on your Windows PC.
Using iCloud Photos
Alternatively, you can use iCloud Photos to access your photos and videos on all your Apple devices, including your iPad and computer, without needing to import them manually. Here's how to set it up:
- Ensure you have enough iCloud storage: iCloud Photos will store your original, full-resolution photos and videos, so make sure you have enough iCloud storage space before turning on iCloud Photos.
- Turn on iCloud Photos on your devices: On each device, go to "Settings" > [your name] > "iCloud", and make sure you're signed in with the same Apple ID. Then, turn on "iCloud Photos."
- Access your photos and videos: Once iCloud Photos is set up, you can access your media on all your devices. Any changes or edits you make will be automatically updated across all devices.
Fighting a NY Speeding Ticket: What You Need to Know
You may want to see also
![]()
Keep or delete the videos on the iPad
There are several ways to transfer videos from your computer to your iPad. Here are some of the most common methods:
Using iTunes
- ITunes Syncing: Connect your iPad to your computer with a USB cable and wait for iTunes to launch automatically. Unlock your iPad and, if required, enter your iPad password to trust the computer. Click the device icon, then choose "Movies" or "TV Shows" from the "Settings" menu. Click the checkbox next to "Sync Movies" or "Sync TV Shows", select the videos you want to transfer, and click "Apply".
- ITunes File Sharing: Connect your iPad to your computer and run iTunes. Unlock your device and, if necessary, enter your passcode to trust the computer. Select the device icon and choose "File Sharing". Choose the app you want to transfer videos to (e.g. iMovie), then either drag and drop the video files into the window on the right or click "Add File". The files will then be copied to your device automatically.
Using iCloud
- Ensure your videos are no longer than 5 minutes in length and are 720p resolution or lower.
- On your iPad, go to "Settings" > [your name] > "iCloud" > "Photos" and enable "iCloud Photos".
- Upload the video files to iCloud. If you have iCloud for Windows, go to iCloud settings and enable "iCloud Photo Library" and "Upload new photos and videos from my PC", then copy the videos to the folder under the latter option. If you don't have iCloud for Windows, go to iCloud.com, sign in with your Apple ID, click "Photos", and upload the video files by clicking the upload icon.
- Once the syncing process is complete, open the Photos app on your iOS device to check the videos.
Using Google Drive
- Go to drive.google.com and sign in with your Google account.
- Click the "New" button and choose "File upload" or "Folder upload".
- Find and select the files or folders you'd like to transfer, then click "Upload".
- Download and install Google Drive for iOS on your iPad from the App Store.
- Sign in with your Google account and access the uploaded files. Download them to your device if necessary.
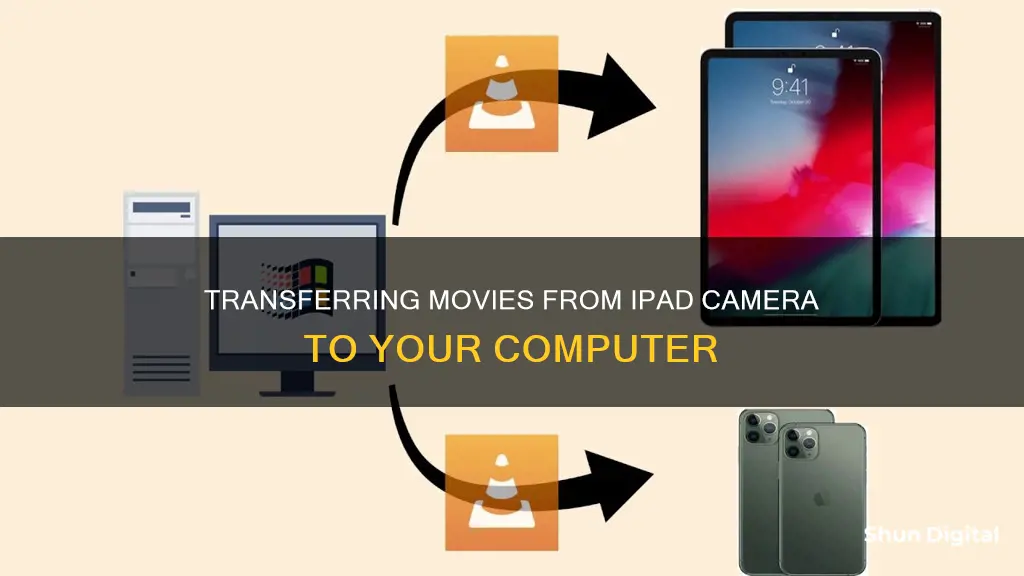
Using the VLC Player
- Download and install the VLC app on your iPad.
- Open the VLC app and click the icon in the top left corner.
- Enable "Sharing via WiFi" and make a note of the IP address.
- On your computer, open a browser and enter the IP address.
- Either drag and drop the video files into the browser or click the plus icon to add them. The videos will then be transferred to your iPad wirelessly and automatically.
- The transferred videos will be saved in the VLC app by default. If you want to transfer them to your iPad camera roll, select the video files, click the share icon, and choose "Save [number] Videos" to export them to the Photos app.
Using EaseUS MobiMover
- Connect your iPad to your computer and start EaseUS MobiMover. Unlock your iOS device and click "Trust" when prompted.
- Go to "PC to Phone" > "Select Files".
- Select the videos you want to transfer and click "Open".
- Click "Transfer" to begin transferring the videos to your iPad.
Once you've transferred videos to your iPad, you may eventually want to delete some to free up storage space. Here are some ways to do that:
Deleting Videos from the iPad Directly
- For movies you bought or synced from your computer: Open the Videos app, find the video you want to remove, and swipe to the left, then tap "Delete".
- For iPads running iOS 8: Go to "Settings" > "General" > "Usage" > "Manage Storage" > "Videos". Find the video/movie you want to delete, swipe it to the left, and tap the red "Delete" button.
- For iPads running iOS 9 and higher: Go to "Settings" > "General" > "Storage & iCloud Storage" > "Manage Storage" under "Storage" > "Videos". Select the video you want to remove, swipe it to the left, and tap the red "Delete" button.
- For recorded videos: Open the "Photos" app on your iPad, touch the "Albums" icon at the bottom of the screen, select the "Videos" option, tap the "Select" button at the top-right of the screen, choose the recorded video you want to delete, and tap the trashcan icon. Touch the "Delete Video" button to remove the video.
Deleting Videos from the iPad in the Settings App
- Launch the Settings app on your iOS device.
- Tap "iPhone/iPad Storage".
- Under "Recommendations", tap "Review Downloaded Videos".
- To delete a video, swipe leftwards across it in the list, then tap the "Delete" button. To delete multiple videos, tap "Edit" in the top-right corner of the screen, tap the red minus buttons next to the videos you want to remove, then tap "Done".
Is My Computer Camera Spying On Me?
You may want to see also
Frequently asked questions
First, connect your iPad to your computer and launch iTunes. Then, trust the computer on your iPad and enter your iPad password if prompted. Click the "Device" button, choose "Movies", check the "Sync Movies" option, and select the items you want to transfer. Finally, click "Apply" to start syncing.
Yes, you can use third-party apps such as VLC Media Player or WALTR 2 to wirelessly transfer videos between your iPad and computer. Simply download and install the app on your iPad, enable "Sharing via WiFi", and use the provided IP address to access the videos on your computer.
Common formats such as MP4, MOV, and M4V are supported by the iPad. If your video is in an unsupported format, you can use software to convert it before transferring.
You can use the Photos app on your iPad to import photos and videos. Connect your iPad to your computer, open the Photos app, and tap "Import". Select the photos and videos you want to import, choose your import destination, and tap "Import" again.
Yes, you can import photos and videos directly from a digital camera to your iPad using the Photos app. Connect your camera to your iPad using a camera adapter or card reader, turn on your camera, and ensure it is in transfer mode. Then, open the Photos app, tap "Import", and select the items you want to import.